Metrici POS Payment Terminal
User Manual for End Users and System Administrators

Drag to rotate • Scroll to zoom • Right-click to move
Table of Contents
- Introduction
- First Boot & Network
- Admin Menu
- User Flow (Payment Process)
- Web Application Integration
- Troubleshooting
1. Introduction
The Metrici Payment Terminal is a self-service hardware device designed for parking payment. It is installed at parking exits or pay stations, allowing drivers to pay their parking fee without human assistance.
The terminal features a touchscreen interface where drivers can select their language, enter their vehicle's license plate number or a received code, view the calculated parking fee (based on time spent inside), and complete payment using a built-in POS card reader.
The device communicates with the Metrici Web Application in real time. When a driver enters their plate number, the terminal queries the Metrici server for the parking duration and amount due. After successful payment, the server is notified and the vehicle is cleared for exit.
Key features:
- Self-service payment — drivers pay independently via touchscreen
- Multi-language support — 15 languages available for the user interface
- POS card reader — built-in card payment terminal for contactless and chip payments
- Invoice generation — drivers can request an invoice with their details (phone, email, CIF/VAT ID)
- PoE powered — single Ethernet cable for both power and network connectivity
- Real-time integration — communicates with Metrici Web Application for pricing, billing, and access control
- On-screen keyboard — full alphanumeric keyboard for plate and invoice data entry
- Ethernet connectivity — connects via Ethernet (RJ45, Cat6A compatible)
Technical Data
| Specification | Details |
|---|---|
| Description | Self-service parking payment terminal with touchscreen and POS |
| Display | Touchscreen with on-screen keyboard |
| Payment | Built-in POS card reader (contactless) |
| Connectivity | 1 Ethernet port (RJ45, Cat6A compatible) |
| Power | PoE+ (IEEE 802.3at) via Ethernet cable — no separate power adapter needed |
| Languages | English, Romanian, Bulgarian, Hungarian, Polish, Serbian, Ukrainian, Turkish, Croatian, French, Italian, Spanish, Portuguese, German, Dutch |
| Software Compatibility | Metrici Web Application with Parking Module license |
| Interface | Touchscreen for end users, admin configuration panel for installers |
2. First Boot & Network Configuration
The Metrici Payment Terminal is powered via PoE+ (Power over Ethernet Plus). Connect a single Ethernet cable from a PoE+ switch or PoE+ injector to the device's Ethernet port. This cable provides both network connectivity and electrical power — no separate power adapter is needed.
After powering on, the terminal will display the language selection screen. Before configuring the payment flow, you must first access the admin menu to set up the network and application settings.
3. Admin Menu
To access the admin menu, tap the bottom center of the screen 8 times. After tapping 8 times, a login page will open — see Fig.3 Admin Login.
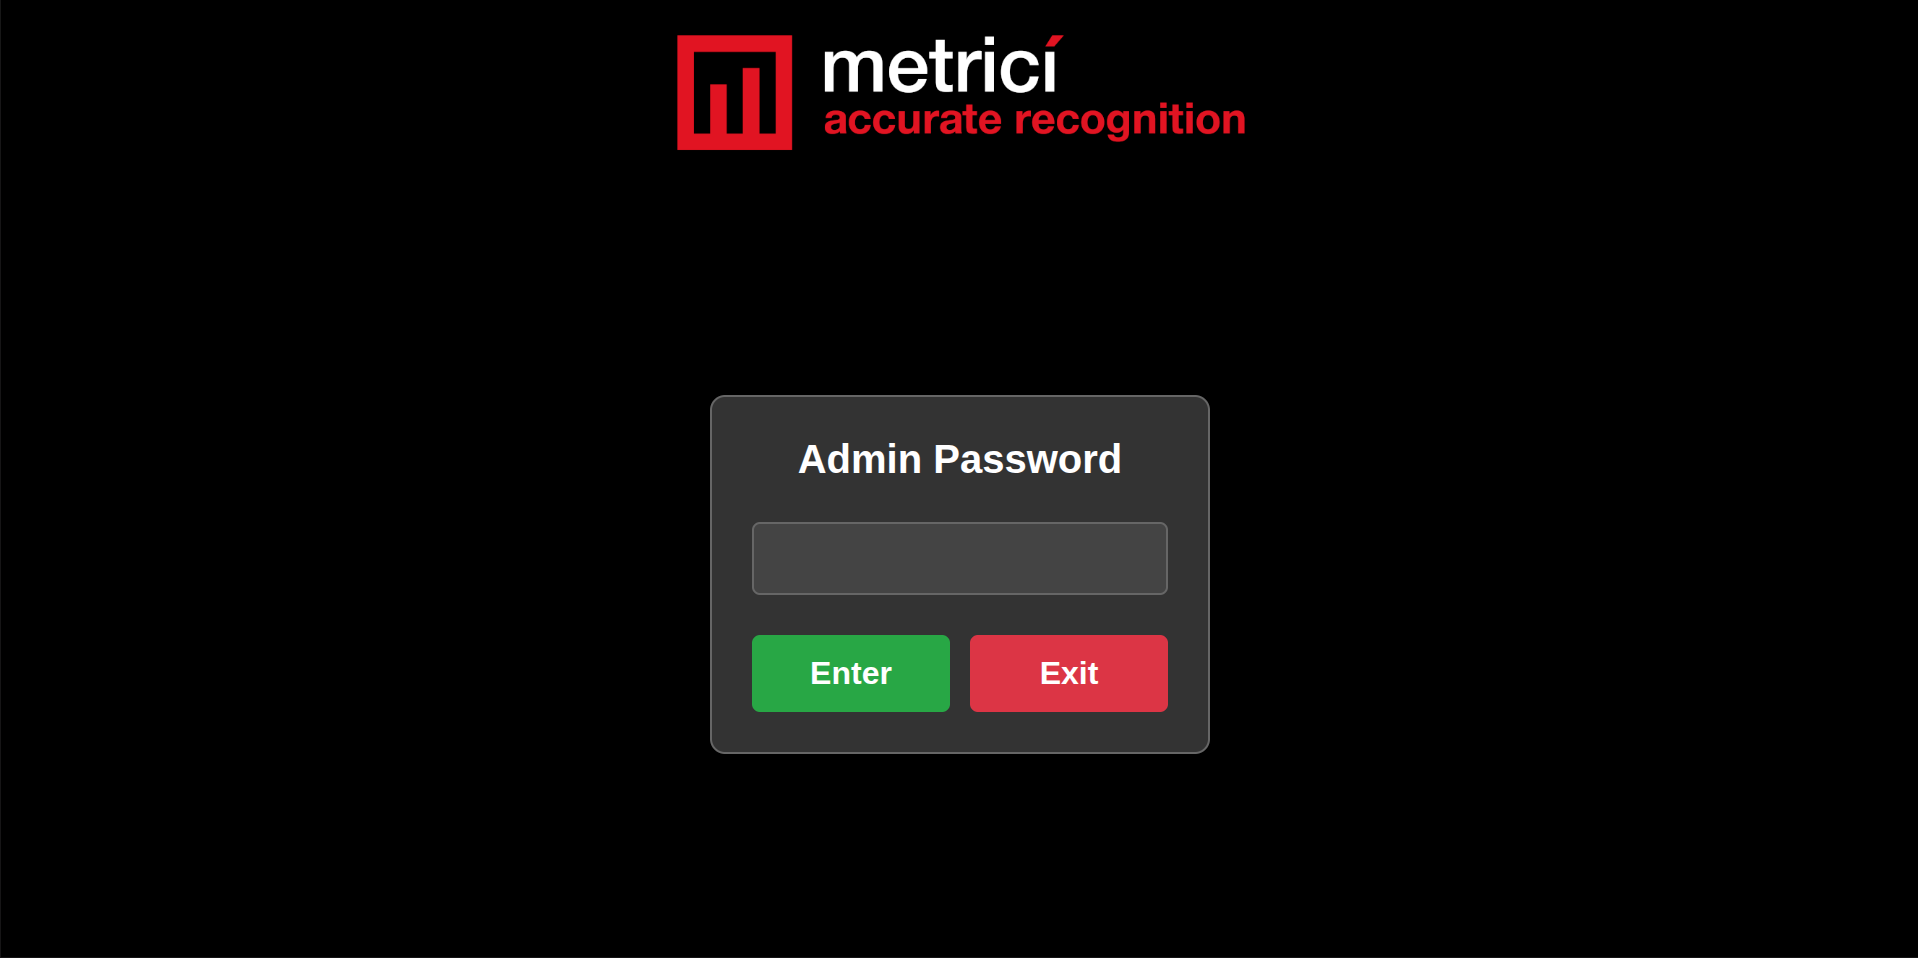
The default password is metriciadmin. Enter the password and press Enter to access the configuration panel. Press Exit to return to the user interface.
The configuration panel has three tabs: Admin Settings, Application Settings, and Network Settings. After making any changes, click the green Save button to apply. Click the red Exit button to return to the user interface.
3.1 Admin Settings
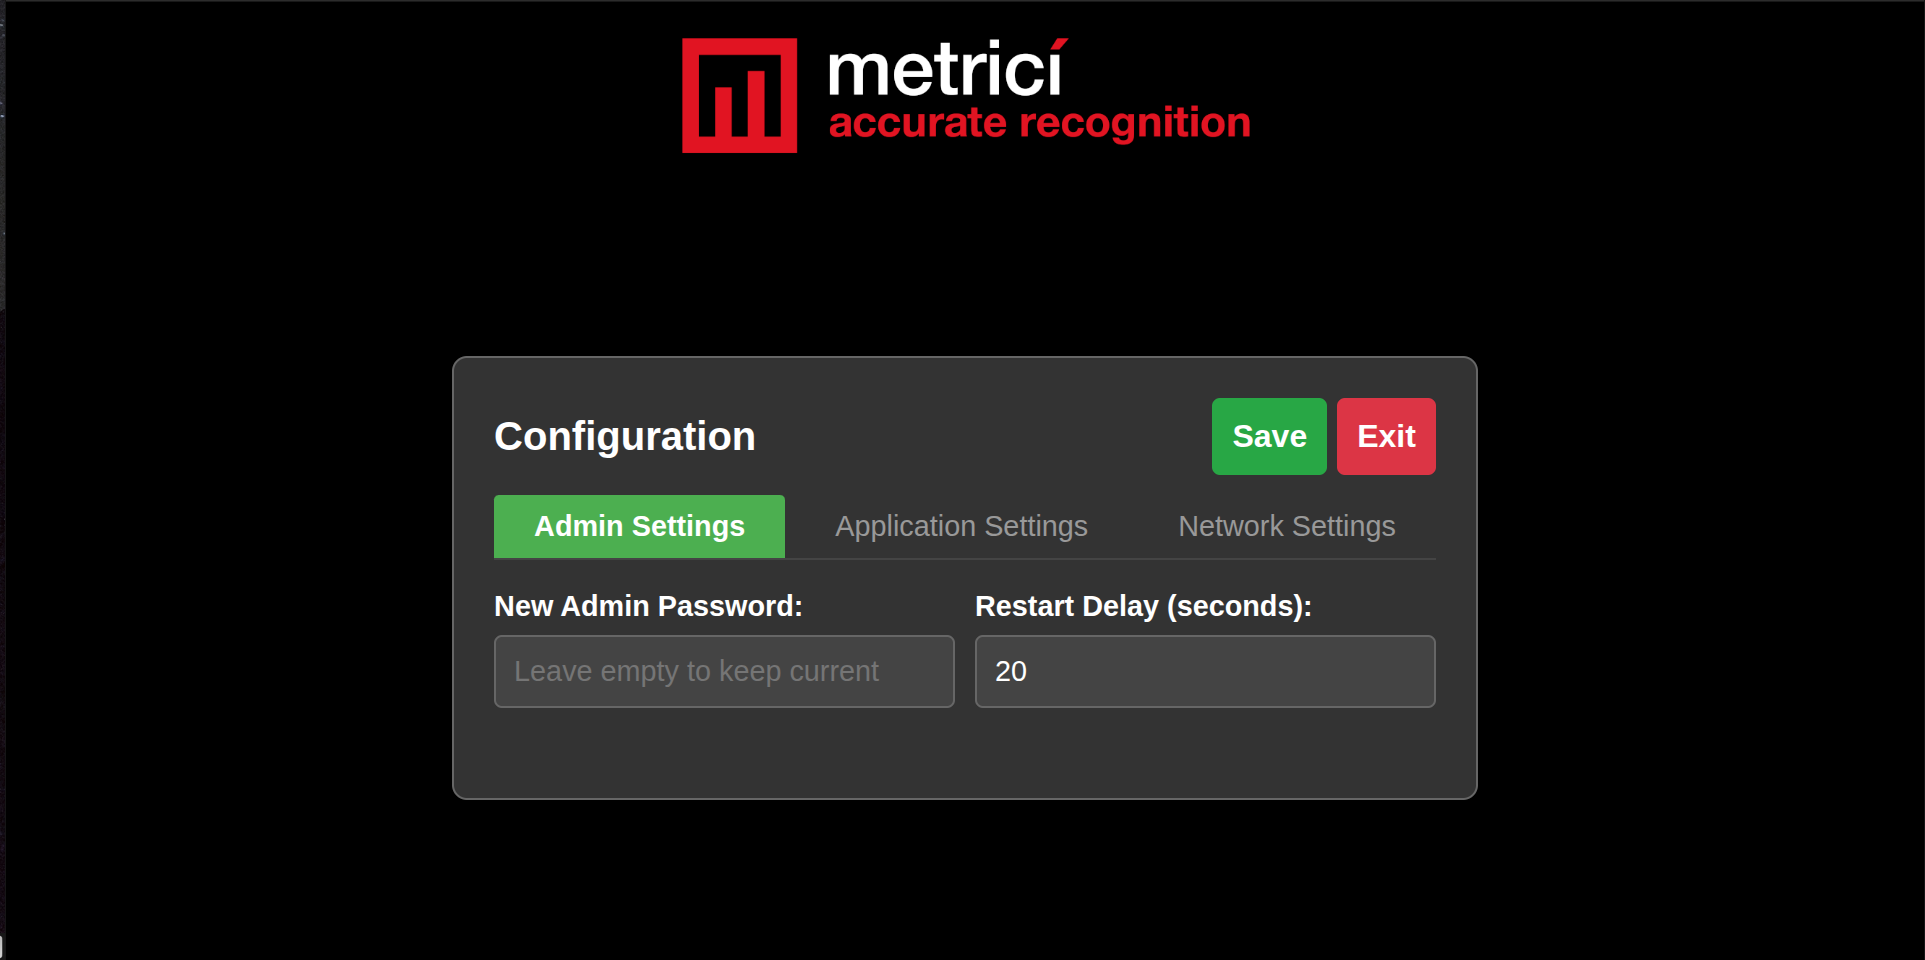
The Admin Settings tab allows you to change the admin password and configure the restart delay — see Fig.5 Admin Settings.
| Field | Description |
|---|---|
| New Admin Password | Enter a new password to replace the current one. Leave empty to keep the existing password. |
| Restart Delay (seconds) | The number of seconds the terminal waits before restarting after a configuration change or timeout. Default is 20 seconds. |
3.2 Application Settings
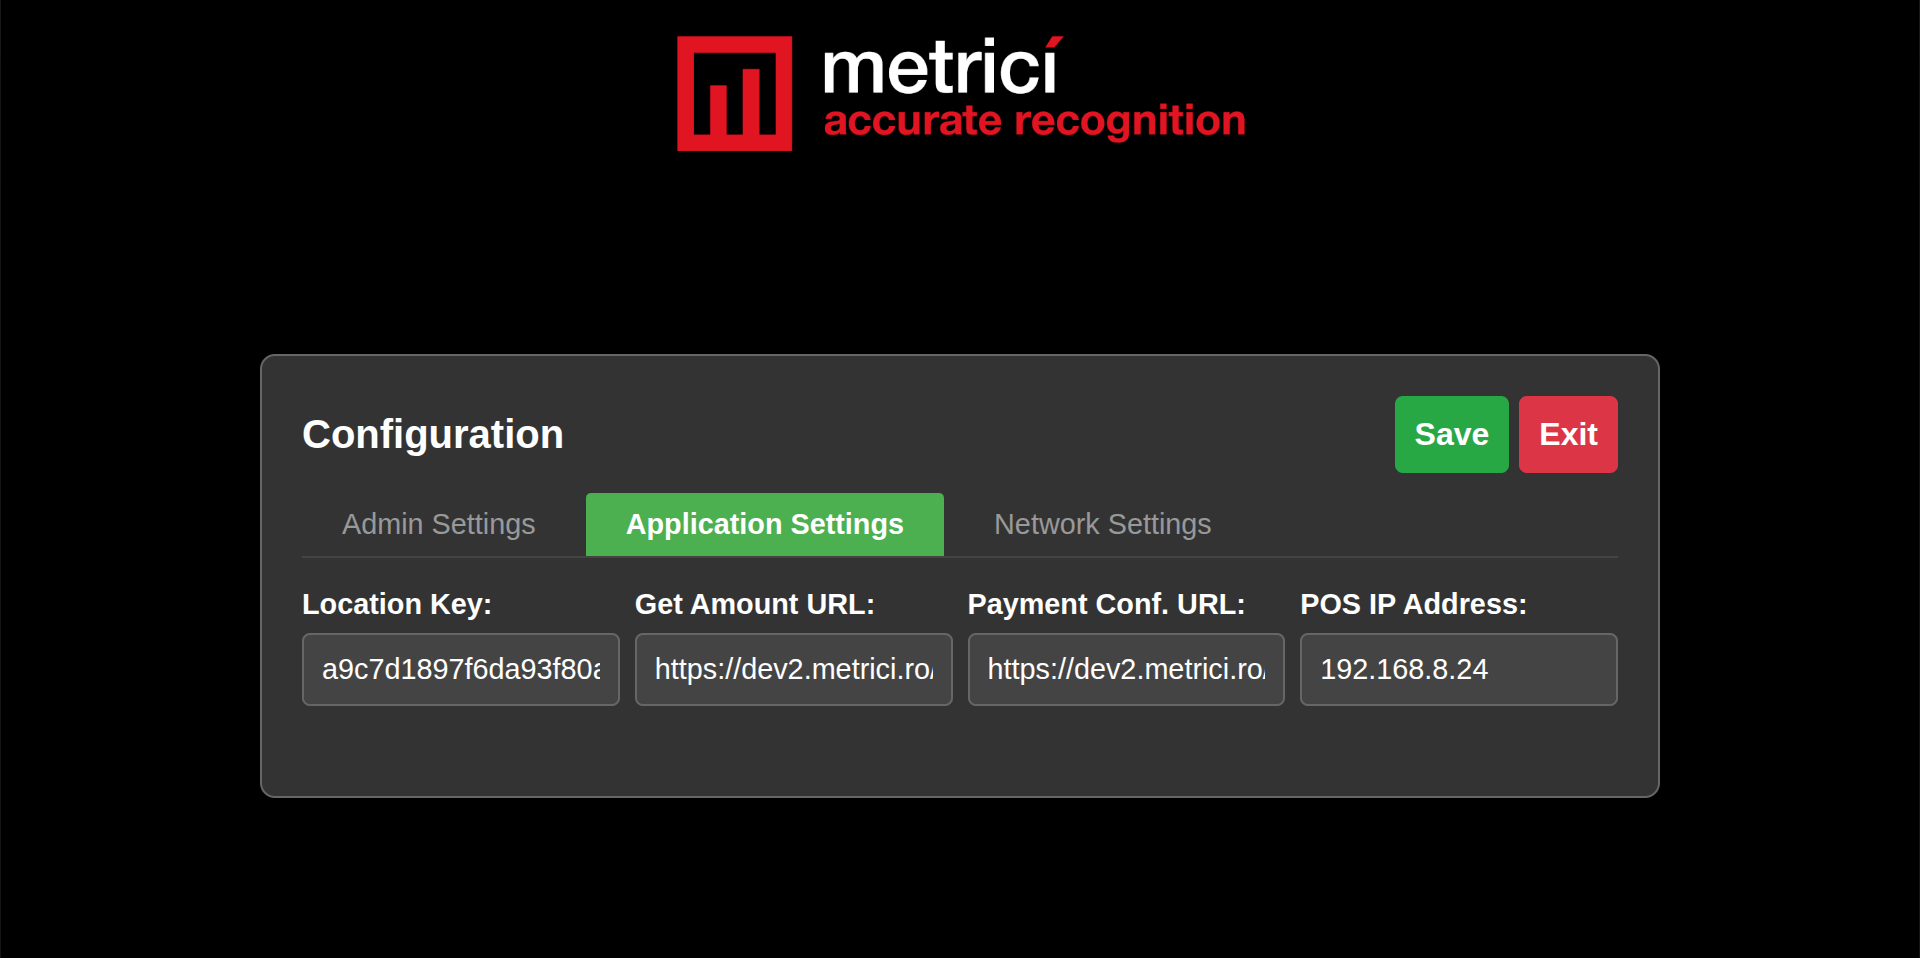
The Application Settings tab configures how the terminal communicates with the Metrici server and the POS card reader — see Fig.4 Application Settings.
| Field | Description |
|---|---|
| Location Key | A unique authentication key that identifies this terminal to the Metrici server. This key is generated by the Metrici Web Application and must match the one registered for this location. |
| Get Amount URL | The URL the terminal calls to retrieve the parking fee for a given license plate. Replace the IP with your Metrici server address:http://YOUR_SERVER_IP/io/lpr/get_amount.php |
| Payment Conf. URL | The URL the terminal calls to confirm a successful payment. This notifies the Metrici server that the vehicle has paid and can exit:http://YOUR_SERVER_IP/io/lpr/confirm_payment.php |
| POS IP Address | The IP address of the built-in POS card reader on the local network. The terminal sends payment commands to this address. For example: 192.168.8.24 |
3.3 Network Settings
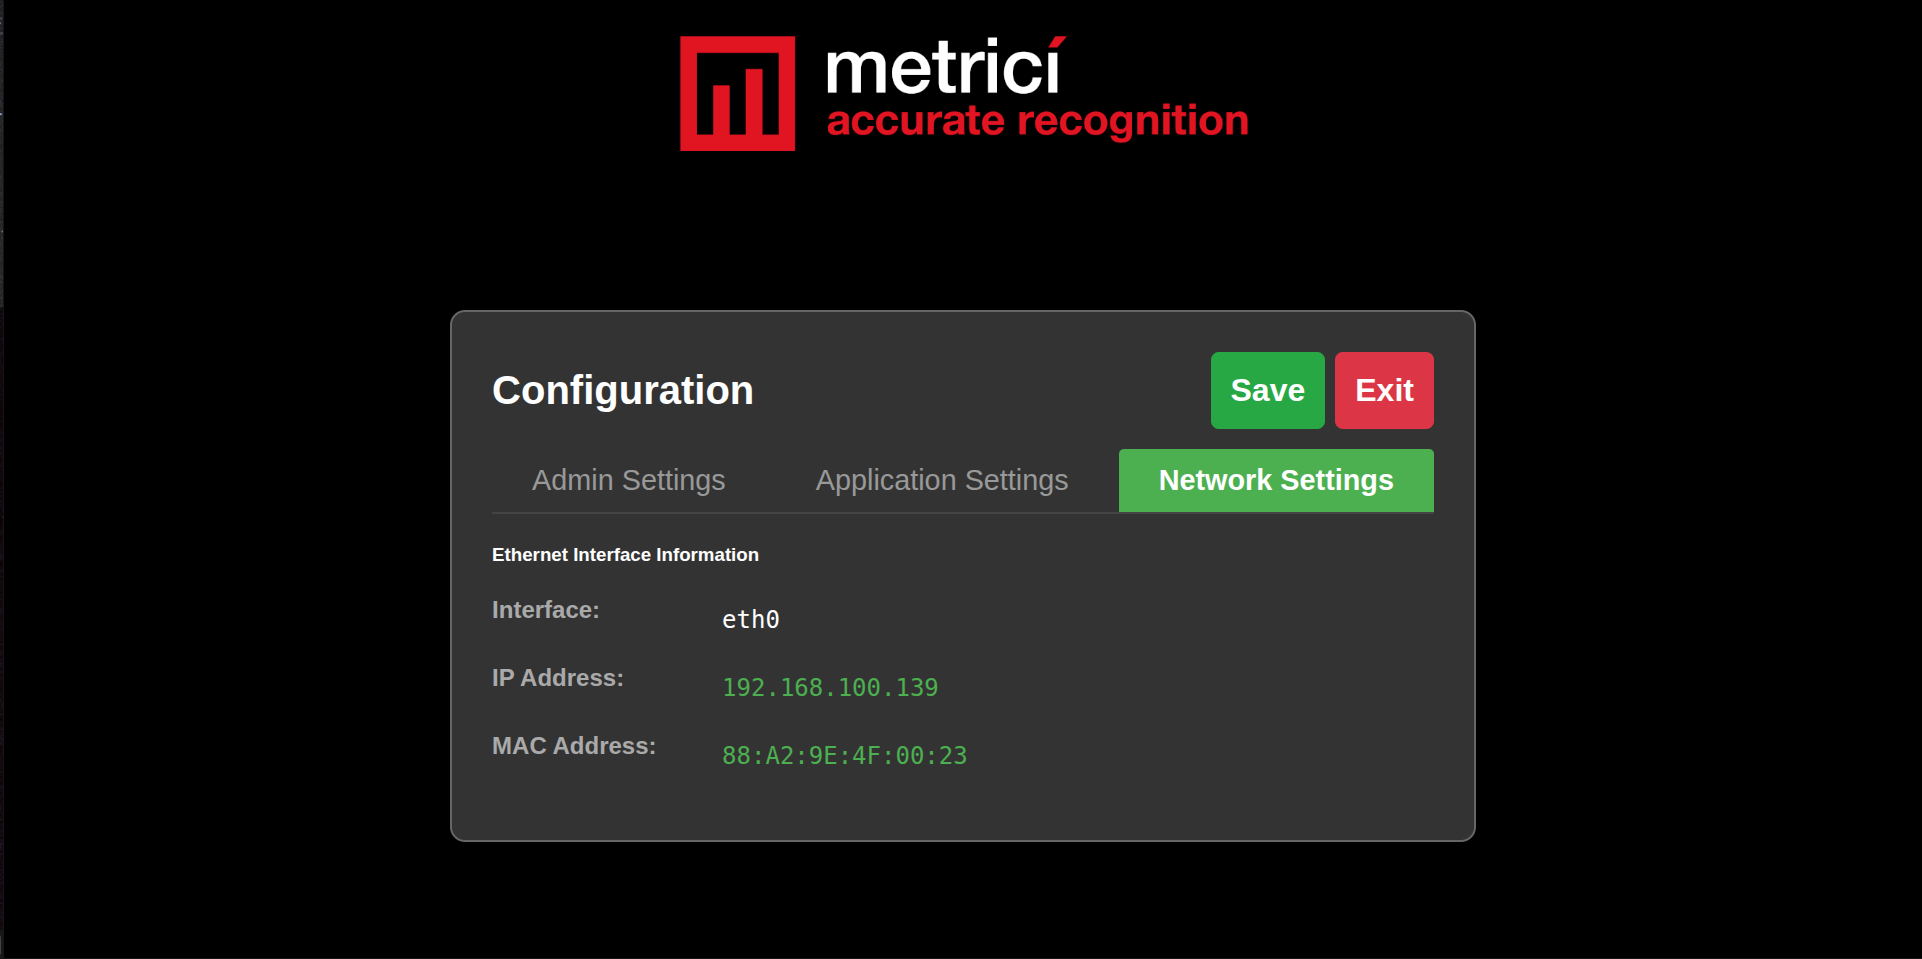
The Network Settings tab displays the current network configuration of the terminal — see Fig.6 Network Settings.
| Field | Description |
|---|---|
| Interface | The network interface name. This is always eth0 (Ethernet). Do not change this unless instructed by Metrici support. |
| IP Address | The terminal's current IP address on the local network. This address is used to access the terminal from the network. |
| MAC Address | The unique hardware address of the terminal's Ethernet port. This cannot be changed and is used for network identification. |
4. User Flow (Payment Process)
This section describes what the driver sees and does when using the terminal to pay for parking.
4.1 Language Selection
The first screen displayed to the driver is the language selection — see Fig.1 Language Selection. The terminal supports 15 languages. The driver taps their preferred language to proceed.
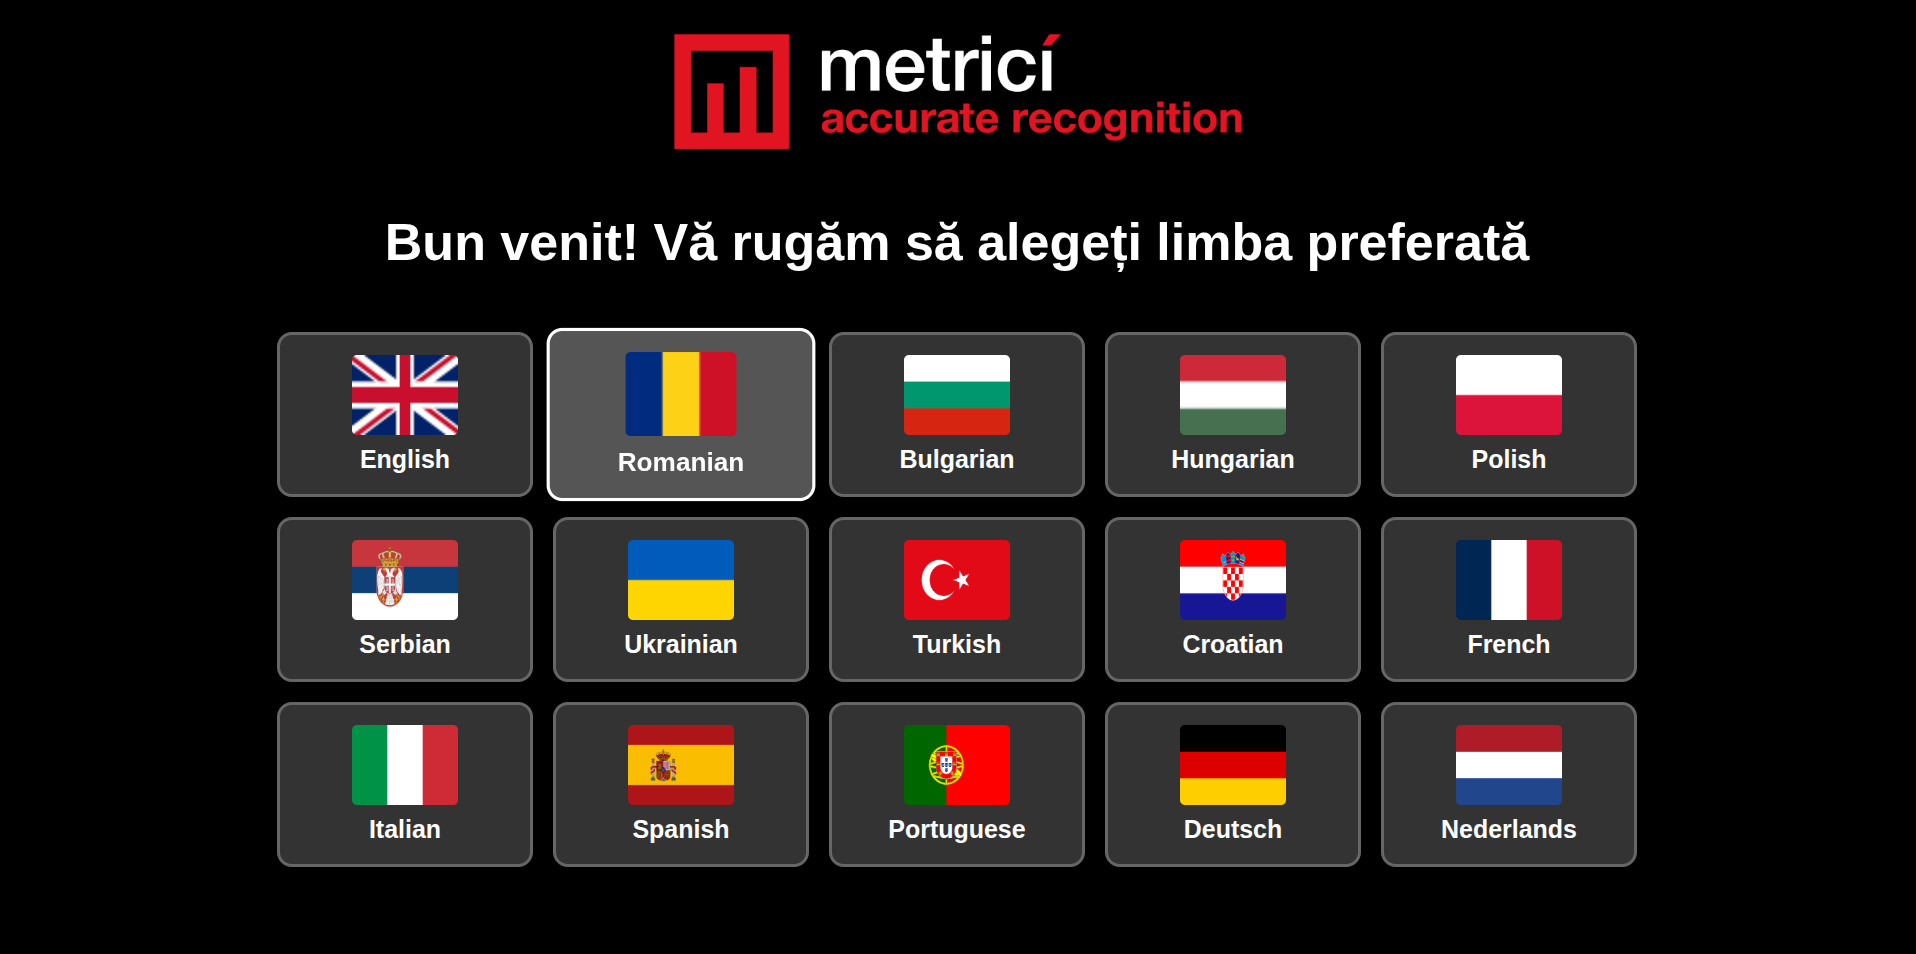
After selecting a language, all subsequent screens will be displayed in the chosen language.
4.2 Plate Number / Code Input
The driver is prompted to enter their vehicle's license plate number or a received code using the on-screen keyboard — see Fig.2 Plate Input.
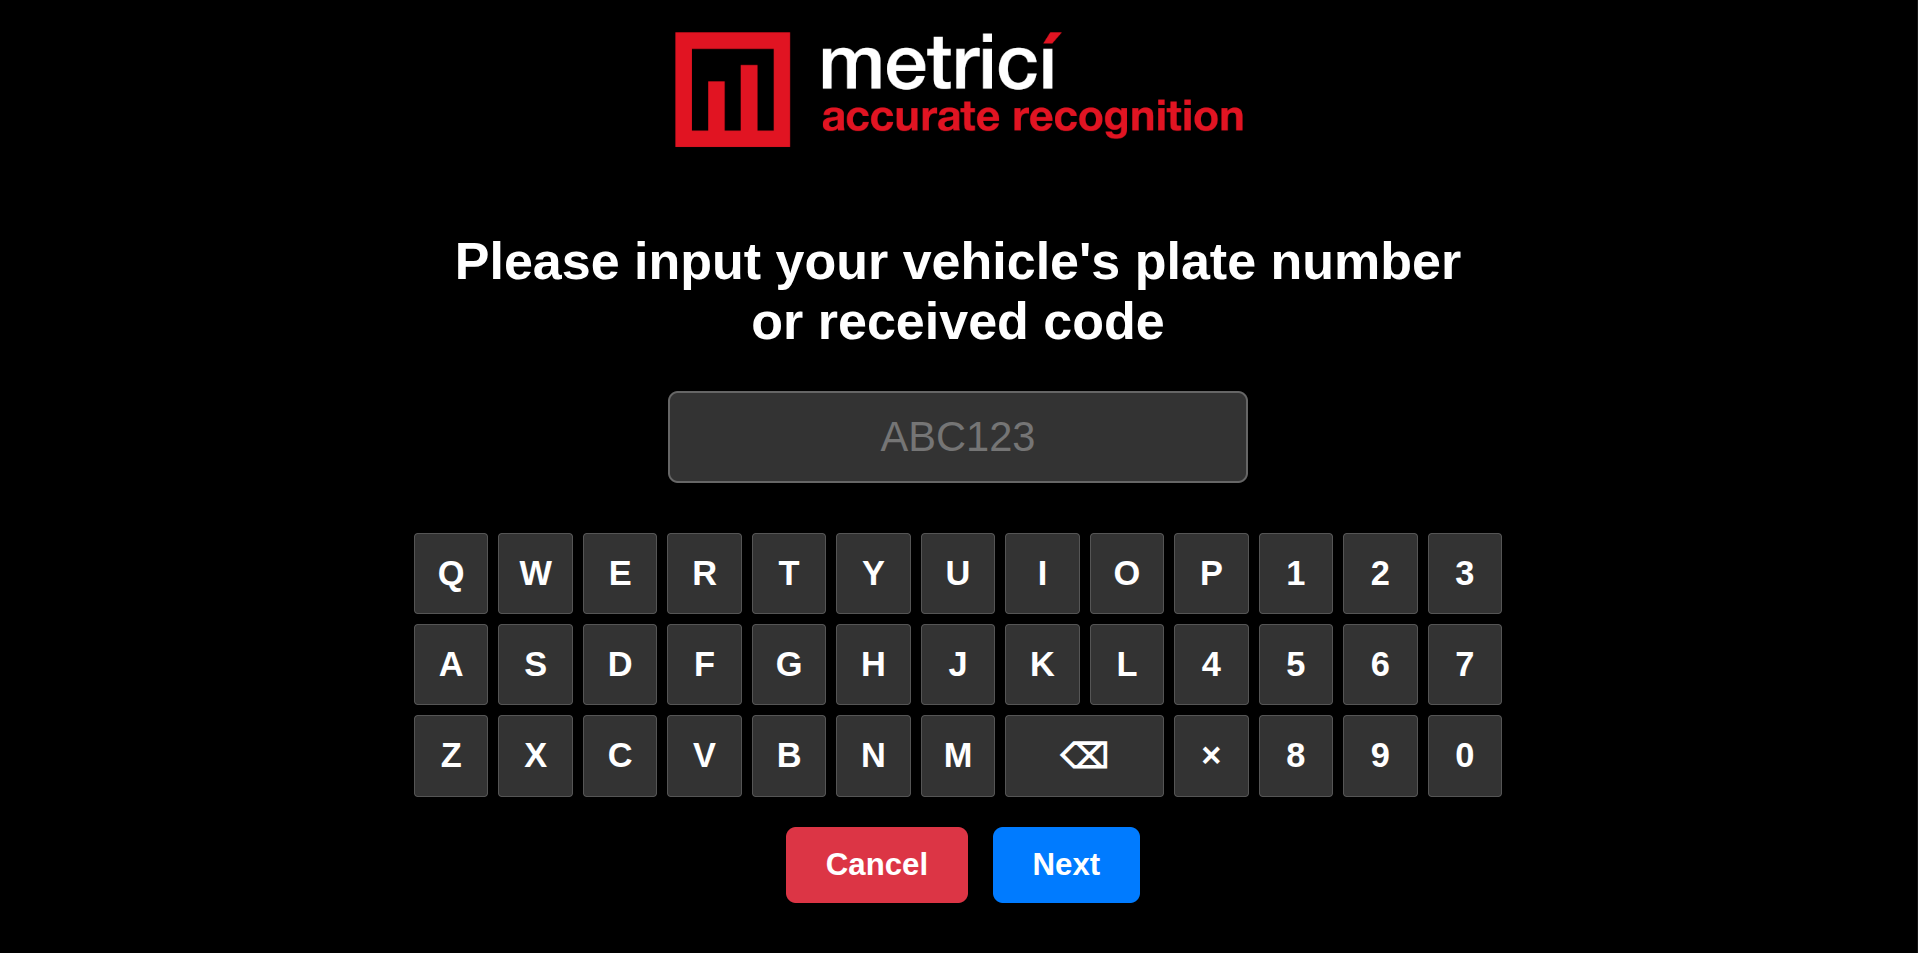
The keyboard includes letters (A–Z) and numbers (0–9), along with a backspace key and a clear (×) button. After entering the plate number, the driver presses Next to proceed or Cancel to return to the language selection screen.
The terminal sends the entered plate number to the Metrici server (via the Get Amount URL), which looks up the vehicle in the parking database and returns the calculated fee based on the time spent inside and the configured pricing rules.
4.3 Payment Amount
After the server responds, the terminal displays the amount due — see Fig.7 Payment Amount.
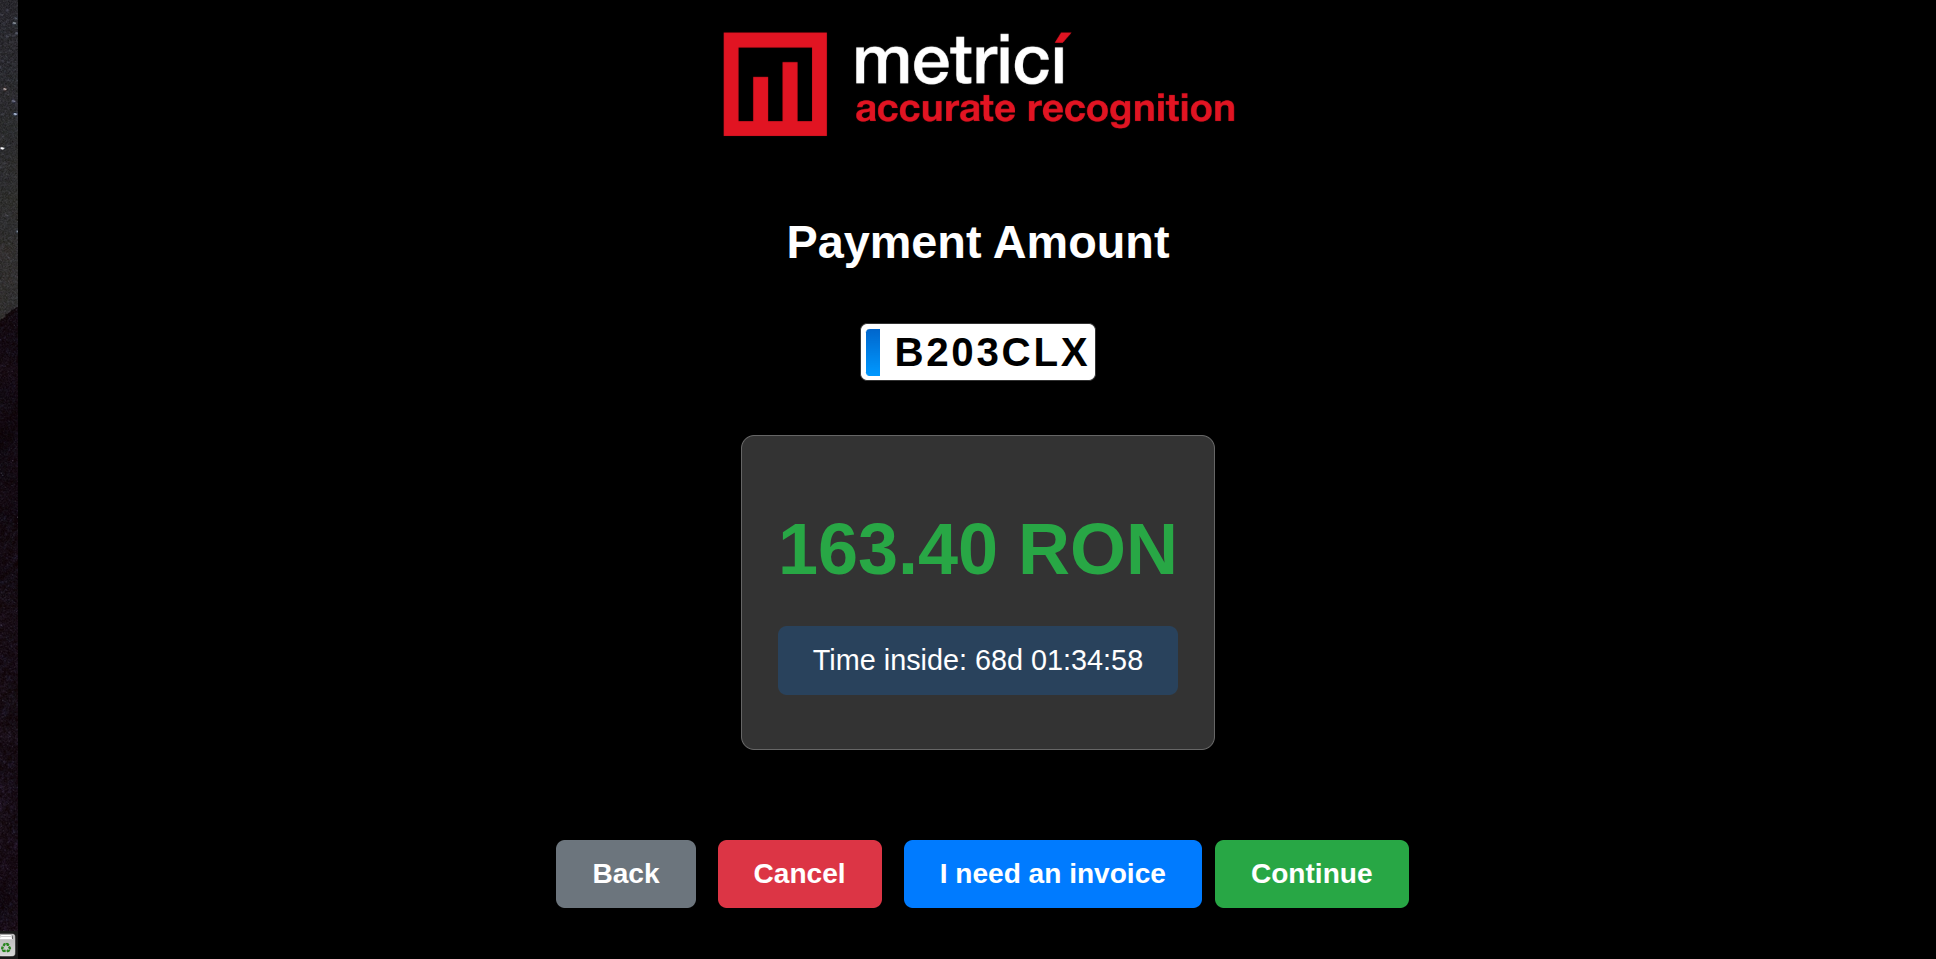
The screen shows:
- License plate number — the plate that was entered
- Amount due — displayed in the local currency (e.g., RON), calculated based on parking duration and pricing rules
- Time inside — how long the vehicle has been in the parking facility
The driver has the following options:
- Continue — proceed to payment
- I need an invoice — enter invoice details before paying
- Back — return to the plate input screen
- Cancel — cancel the transaction and return to the start
4.4 Invoice Details (Optional)
If the driver selects "I need an invoice," they are prompted to enter their billing information — see Fig.8 Invoice Details.
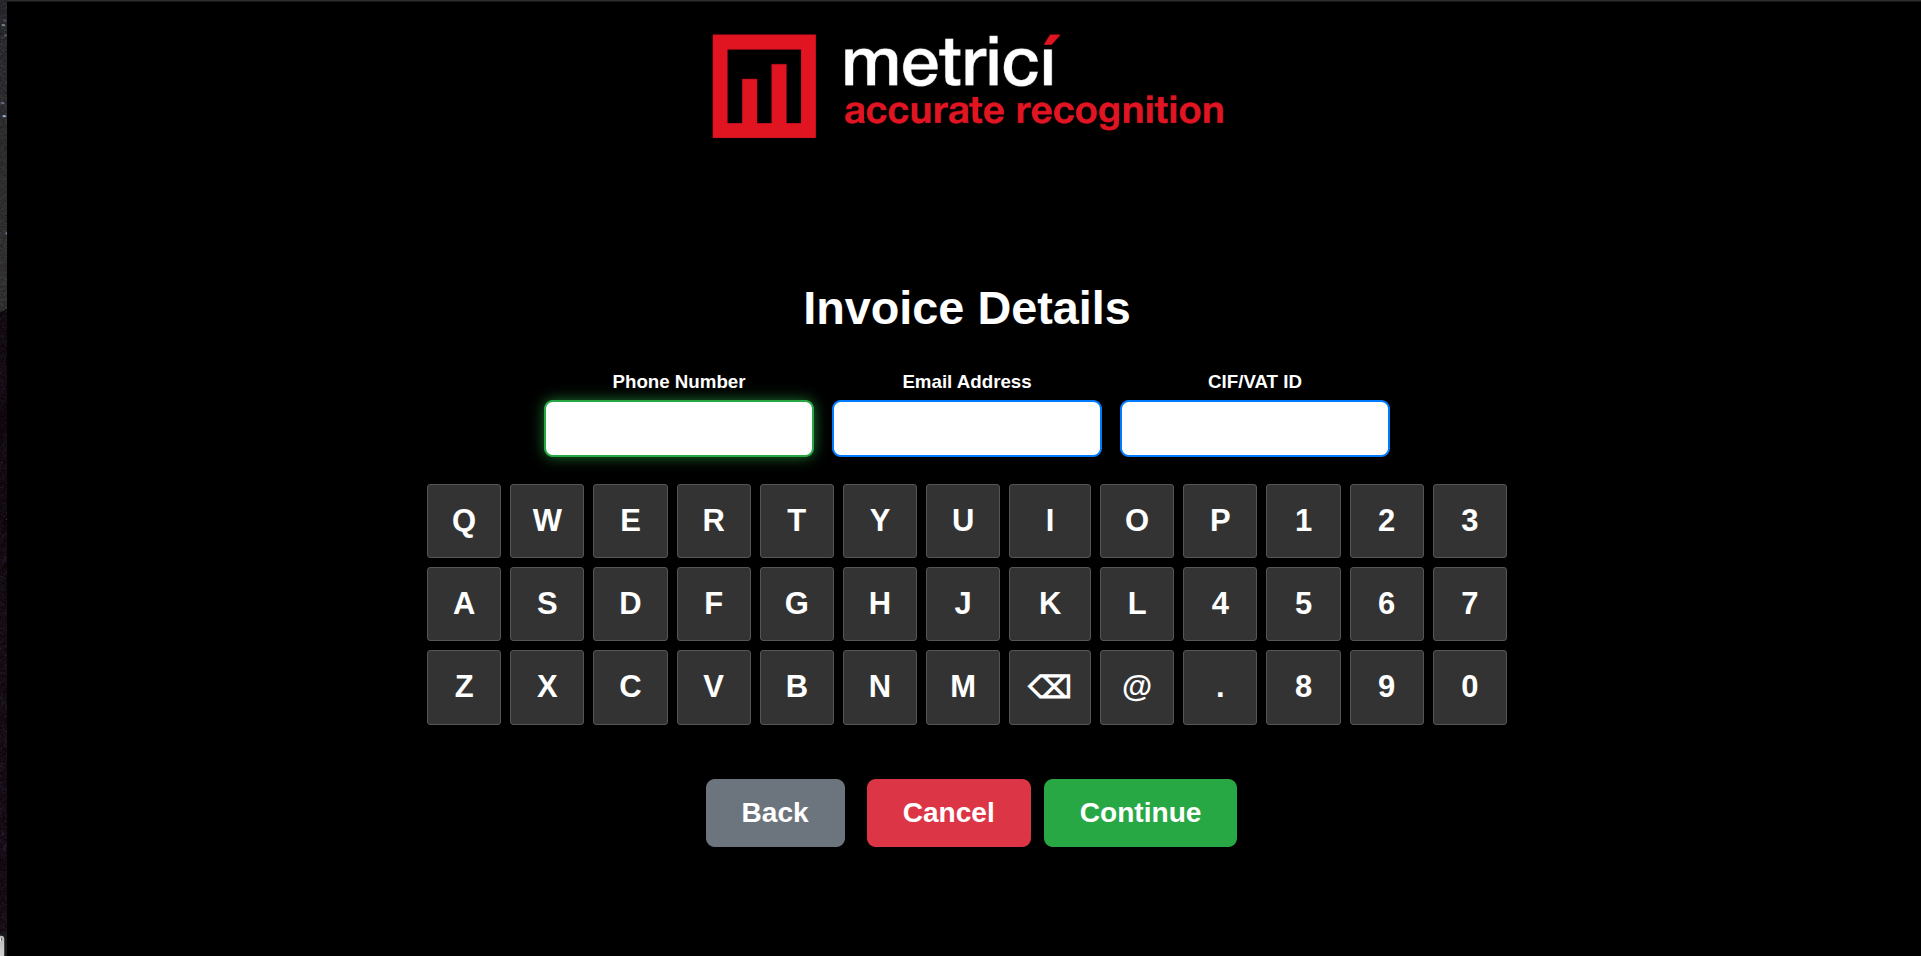
| Field | Description |
|---|---|
| Phone Number | The driver's phone number for the invoice |
| Email Address | The email address where the invoice will be sent |
| CIF/VAT ID | The company's tax identification number (for business invoices) |
The on-screen keyboard includes additional characters such as @ and . for entering email addresses. After entering the details, the driver presses Continue to proceed to the payment confirmation screen.
4.5 Confirm Payment
Before the payment is processed, a confirmation screen is displayed summarizing the transaction — see Fig.9 Confirm Payment.
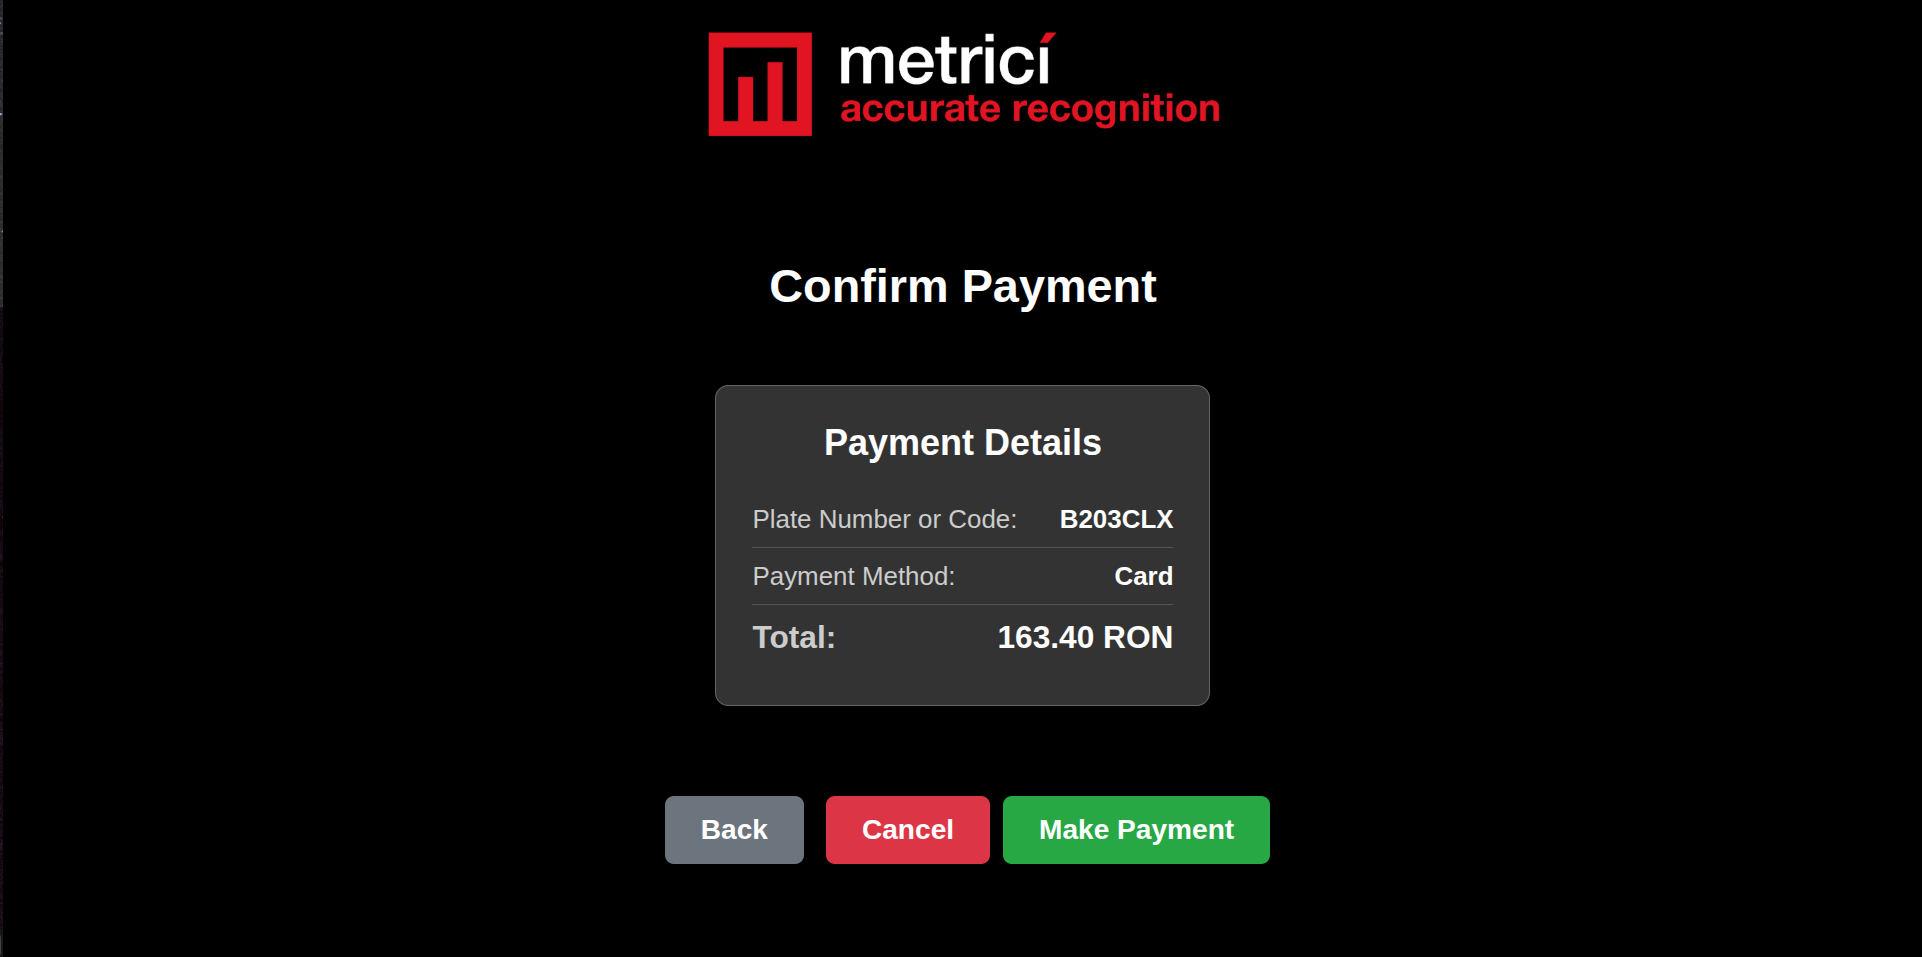
The confirmation screen shows:
- Plate Number or Code — the vehicle being charged
- Payment Method — Card (processed through the built-in POS terminal)
- Total — the final amount to be charged
The driver has the following options:
- Make Payment — initiates the card payment through the POS terminal. The driver then follows the POS instructions (tap, insert, or swipe their card).
- Back — return to the previous screen
- Cancel — cancel the transaction entirely
After a successful payment, the terminal sends a confirmation to the Metrici server (via the Payment Conf. URL). The server then clears the vehicle for exit, and the barrier will open automatically when the vehicle approaches the exit camera.
5. Web Application Integration
The Payment Terminal works in conjunction with the Metrici Web Application's Parking Module. The following must be configured on the server side for the terminal to function correctly.
5.1 Parking Module Setup
Before the terminal can process payments, the Parking Module must be properly configured in the Metrici Web Interface:
- At least one camera must be configured as type Parking for LPR under Global Settings → Locations & Cameras.
- A valid Metrici license with Parking Module support must be active.
- Parking Spaces must be defined — the total number of available spaces in the location.
- Parking Prices must be configured — at least one pricing rule (hourly, half-hour, or one-time).
- Optionally, Free Minutes After Arrival can be set to define a grace period for vehicles exiting without charge.
For detailed instructions on configuring the Parking Module, see the Parking Module for LPR documentation.
5.2 Cash Register
Each Payment Terminal must be linked to a Cash Register in the Metrici Web Interface. The Cash Register defines what appears on the receipt and how long receipts remain valid.
To create a Cash Register, go to the Parking Module in the Web Interface and click Add New Cash Register. Fill in the following:
- Name — an internal label to identify this cash register (e.g., "Exit Terminal 1")
- Default Item Name — the description printed on the receipt (e.g., "Parking Fee — Mall Promenada")
- Receipts Expire After — the time window during which the receipt remains valid for exit
5.3 Parking Prices
Parking prices are configured in the Metrici Web Interface under the Parking Module. You can define as many pricing rules as needed:
| Price Type | Description |
|---|---|
| Hourly | Charges the set amount for each hour of stay |
| Half-hour | Charges the set amount for each half-hour of stay |
| One-time | A fixed flat fee regardless of how long the vehicle stays |
Each price can be assigned to a specific timetable, allowing differentiated pricing for weekdays vs. weekends, daytime vs. overnight, or any other time-based structure.
6. Troubleshooting
Terminal shows "no connection" or cannot retrieve parking fee
- Verify the Ethernet cable is connected and the PoE switch/injector is providing power.
- Check the Network Settings tab in the admin menu — confirm the terminal has a valid IP address.
- Verify the Get Amount URL in Application Settings points to the correct Metrici server.
- Make sure the Location Key matches the one registered in the Metrici Web Application.
- Ensure the Metrici server is reachable from the terminal's network (same network or internet access via gateway).
Payment fails or POS does not respond
- Check the POS IP Address in Application Settings — it must match the card reader's actual IP.
- Verify the POS terminal is powered on and connected to the same network.
- Try a different payment card to rule out card-specific issues.
- Check that the POS terminal has an active connection to its payment processor (internet access required).
Payment succeeds but barrier does not open
- Verify the Payment Conf. URL in Application Settings is correct — this is how the terminal notifies the server.
- Check the Metrici Web Interface Billing section to confirm the payment was recorded.
- Verify the exit camera is correctly configured and detecting plates.
- Check that the receipt has not expired (configured in Cash Register settings).
Amount displayed is incorrect
- Check the parking prices configured in the Metrici Web Interface — ensure the correct timetables and price types are set.
- Verify the "Cars Inside" count is accurate in the Parking Module dashboard.
- Check if the Free Minutes After Arrival grace period applies to the vehicle.
- If using differentiated pricing, verify the correct timetable is active for the current time.
Cannot access admin menu
- Tap the bottom center of the screen exactly 8 times — tapping too fast or in the wrong area will not trigger the login.
- If you forgot the admin password, contact Metrici support for a reset procedure.
Terminal not receiving power
- Verify that your switch or injector supports PoE+ (IEEE 802.3at). Standard PoE (802.3af) is not sufficient.
- Try a different Ethernet cable — damaged cables can prevent PoE power delivery.
- Try a different port on the PoE switch.
- If using a PoE injector, make sure it is plugged in and powered on.
Language selection does not appear
- The terminal may still be booting — wait 30 seconds after connecting power.
- If the screen remains blank, check the Ethernet connection and PoE power supply.