Metrici Document Scanner
User Manual for End Users and System Administrators

Drag to rotate • Scroll to zoom • Right-click to move
Table of Contents
1. Introduction
The Metrici Document Scanner is a hardware device developed by Metrici for automated visitor, document, and deliverer registration at access points. The device uses a built-in camera to capture images, and Metrici then extracts the information from identity documents (national ID cards and passports) and travel documents (invoices, AWBs). It also integrates with the Metrici LPR (License Plate Recognition) system to associate each visitor with their vehicle plate number.
All captured data — personal details, document images, plate numbers, and travel documents — is transmitted to the Metrici Visitor Journal web interface. From the Visitor Journal, administrators can review, approve, and manage all visitor records in a centralized dashboard.
The device uses an AI-powered LLM (Large Language Model) to extract structured data from document images, supporting multiple document formats and languages. The built-in touch screen guides each user through the registration process with a simple, step-by-step interface available in 15 languages.
Key features:
- PoE+ powered — single Ethernet cable for both power and network data (requires PoE+ / IEEE 802.3at minimum), no separate power supply required
- ID & Passport scanning — captures and extracts personal data such as name, personal numeric code (CNP), nationality, birth date, serial number, and sex, using AI-powered tools
- License plate recognition — reads the visitor's vehicle plate number automatically, with the option for manual entry
- Document scanning (AWB / Invoice) — scans and attaches any travel documents
- Multi-language support — the interface is available in 15 languages: English, Romanian, Bulgarian, Hungarian, Polish, Serbian, Ukrainian, Turkish, Croatian, French, Italian, Spanish, Portuguese, German, and Dutch
- Role-based workflow — separate flows for Visitors, Carriers, and Deliverers
- Destination selection — visitors choose their destination within the facility from a configurable list
- Metrici Visitor Journal integration — all data is sent to the Metrici web application for centralized management
- Ethernet connectivity — connects via standard Ethernet (RJ45)
- Touch screen interface — intuitive guided workflow on built-in display
Technical Data
| Specification | Details |
|---|---|
| Description | Document scanning terminal for visitor registration with LPR integration |
| Document Types | National ID cards, passports, invoices, AWBs |
| AI Engine | LLM-based data extraction (configurable model, default: qwen3vl) |
| Connectivity | Ethernet 10/100/1000 Mbps (RJ45) |
| Power | PoE+ (Power over Ethernet Plus, IEEE 802.3at minimum) — power and data over a single cable. Standard PoE (802.3af) is not sufficient. |
| Display | Built-in touch screen with guided workflow |
| Camera | Built-in high-resolution document camera |
| Languages | 15 (English, Romanian, Bulgarian, Hungarian, Polish, Serbian, Ukrainian, Turkish, Croatian, French, Italian, Spanish, Portuguese, German, Dutch) |
| Integration | Metrici Visitor Journal, Metrici LPR |
| Configuration | Web-based interface accessible at device IP address |
| Extracted Fields | Personal Numeric Code (CNP), Document Type, Serial Number, Birth Date, Last Name, First Name, Nationality, Sex |
| Auto-restart | Configurable delay (default 20 seconds) — returns to start after session completion |
Workflow Overview
The Document Scanner follows a guided step-by-step flow for each visitor or carrier:
Connectivity & Power
The Metrici Document Scanner is powered through PoE+ (Power over Ethernet Plus). A single Ethernet cable delivers both electrical power and network data to the device — no separate power adapter is needed. Simply connect the device to a PoE+-capable switch or PoE+ injector using a standard RJ45 Ethernet cable, and the device will power on and connect to the network simultaneously.
2. First Boot
2.1 Language Selection
When the device starts, the first screen displayed is the language selection — see Fig.1 Language Selection. The visitor selects their preferred language by tapping the corresponding flag. The entire interface (instructions, buttons, and messages) will switch to the chosen language for the rest of the session.
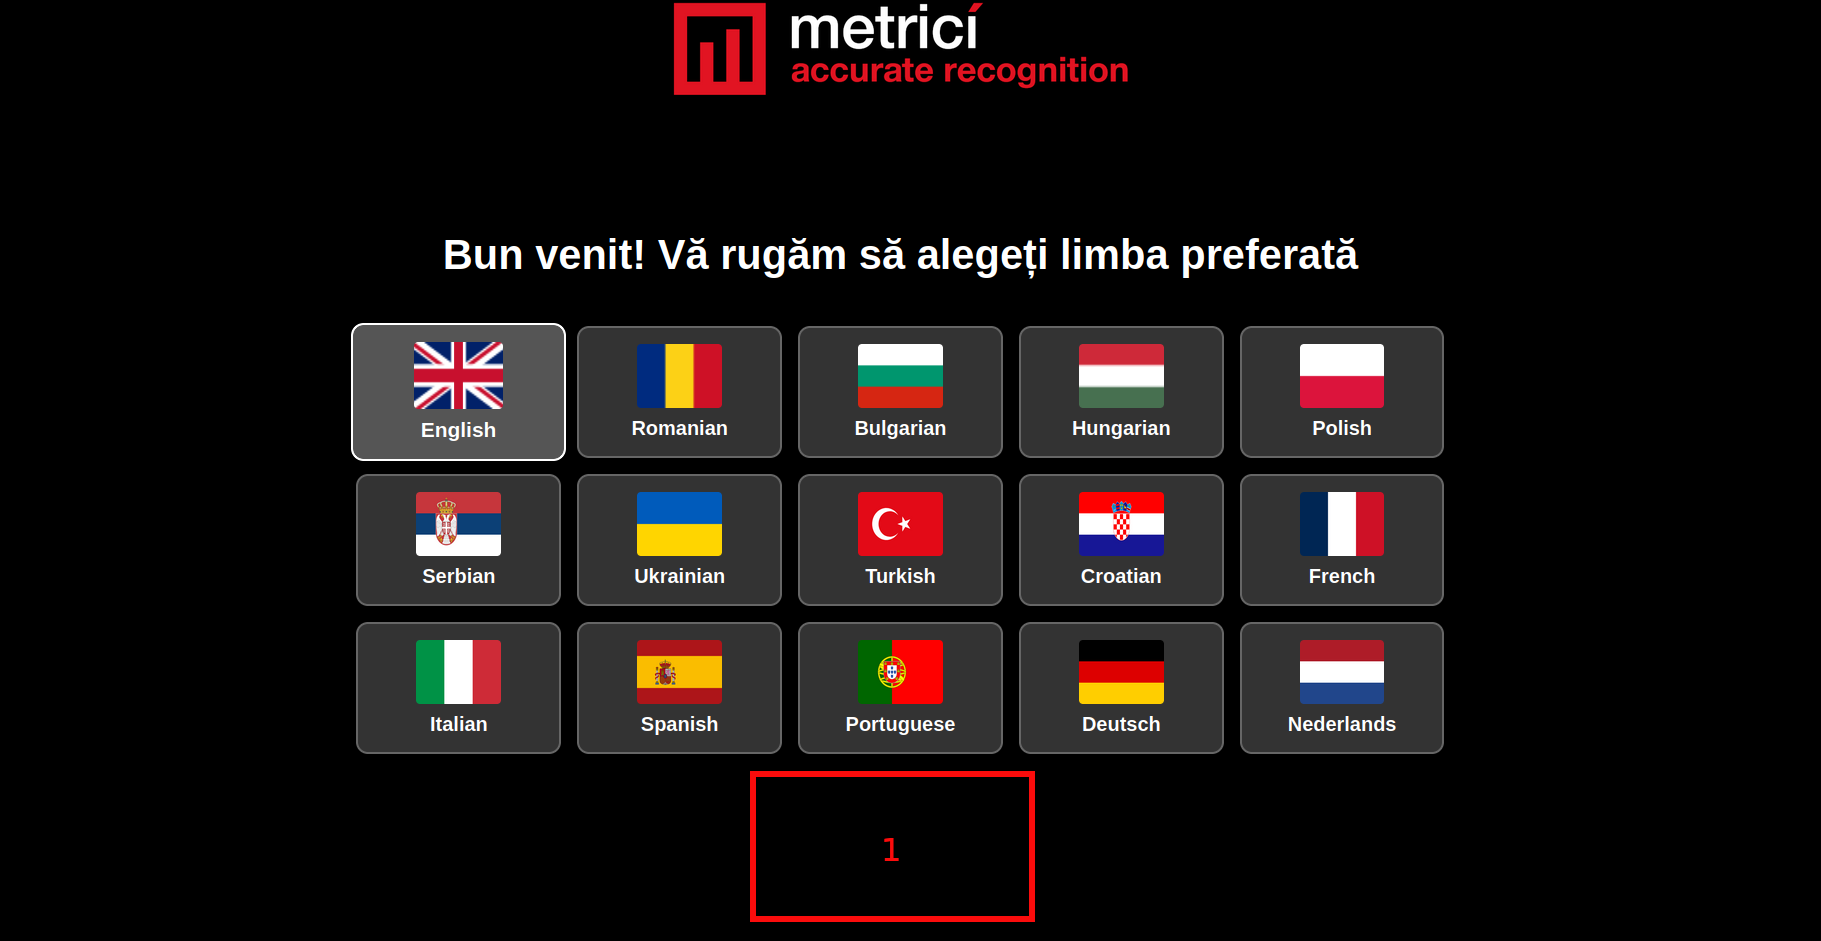
Supported languages: English, Romanian, Bulgarian, Hungarian, Polish, Serbian, Ukrainian, Turkish, Croatian, French, Italian, Spanish, Portuguese, German, and Dutch.
3. Settings
The device is configured through a web-based interface accessible at the device's IP address from any browser on the same network. The configuration page has three tabs: Admin Settings, Application Settings, and Network Settings.
3.1 Admin Settings
Accessing the Admin Menu
To access the admin menu on the device, tap the bottom area of the screen with your finger (on the device) or click with your mouse (in the browser) 8 times in succession — see Fig.1 Language Selection (1). After the 8th tap/click, the Admin Settings panel will appear.
The Admin Settings tab allows you to set or change the admin password used to access the configuration interface — see Fig.2 Admin Settings.
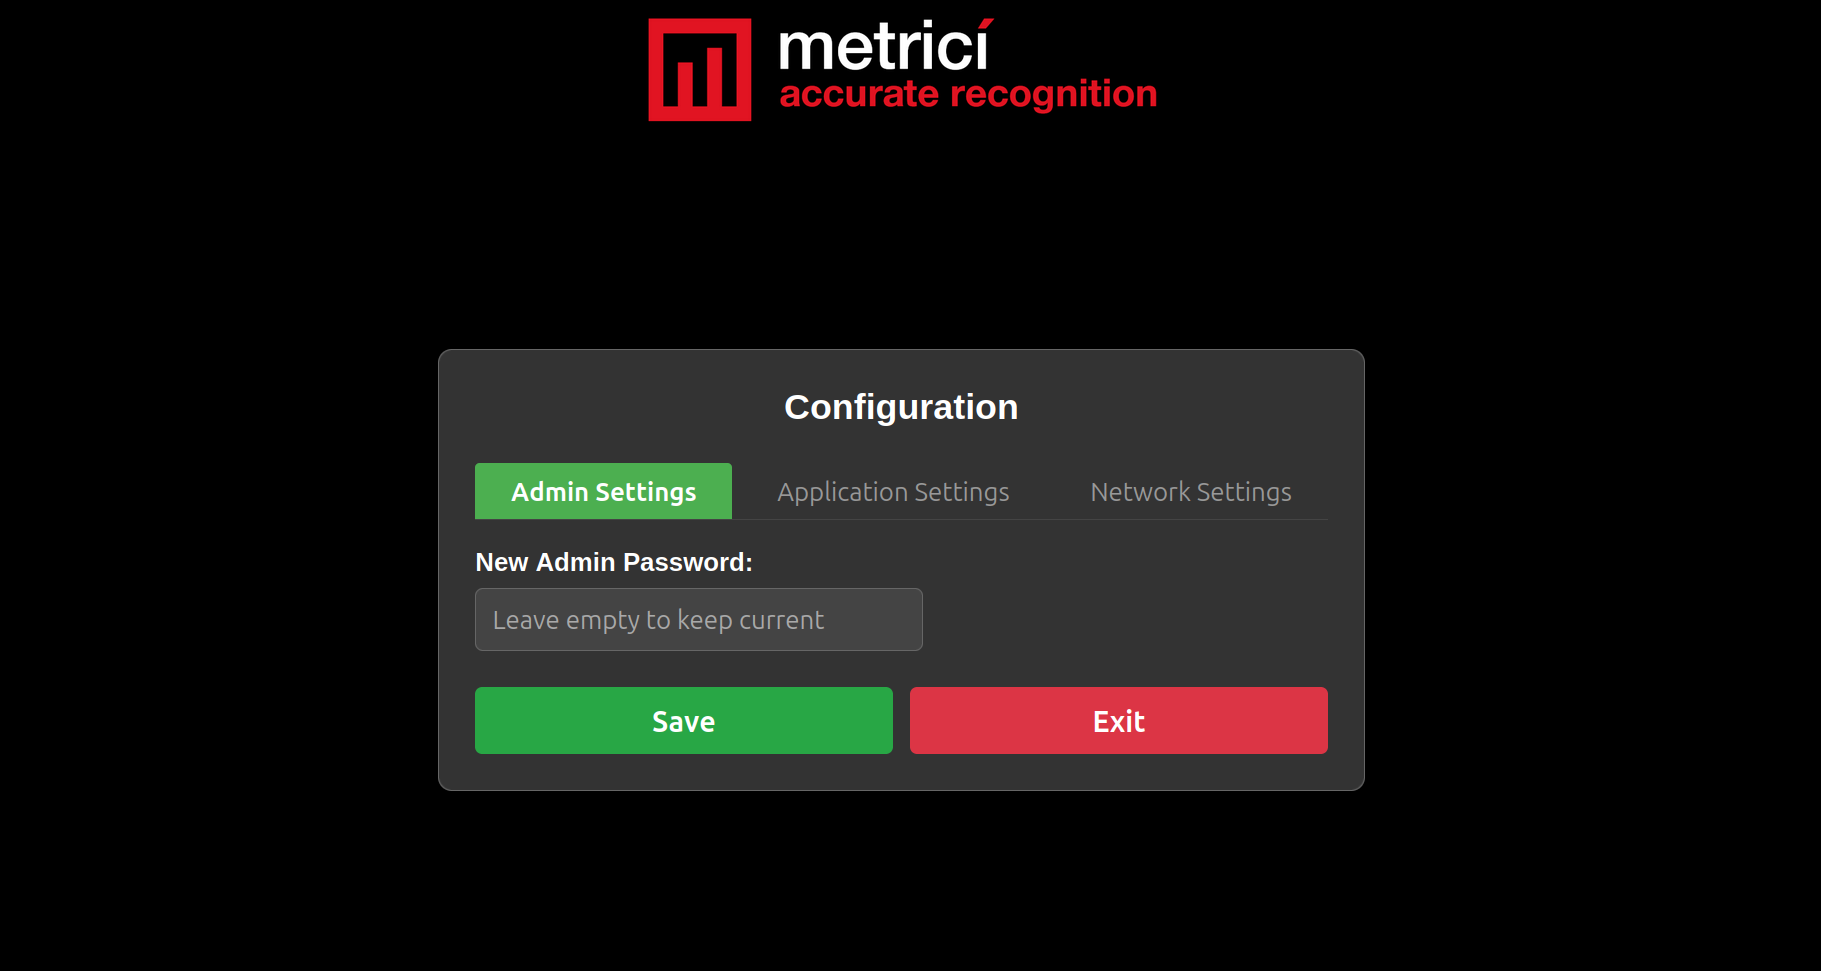
Enter a new password in the New Admin Password field and click Save. Leave the field empty to keep the current password. Click Exit to return to the main application without saving.
3.2 Application Settings
The Application Settings tab contains all API endpoints and operational parameters — see Fig.3 Application Settings.
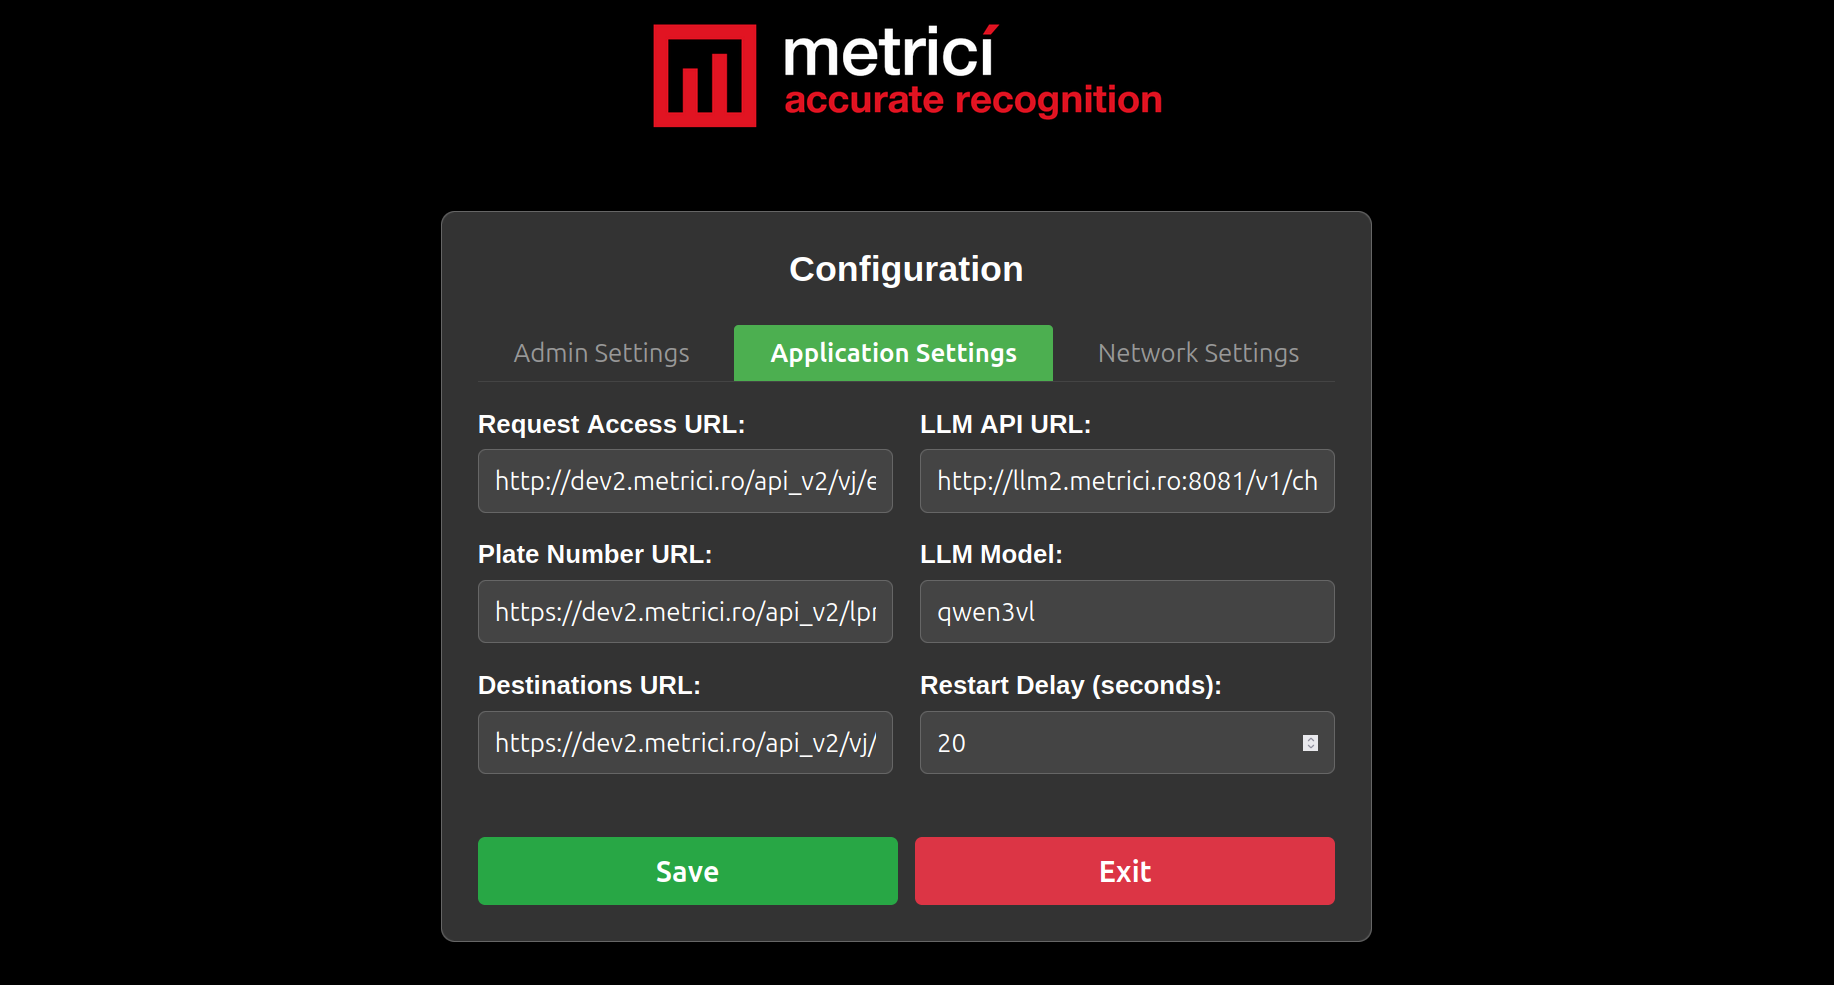
| Field | Description | Example Value |
|---|---|---|
| Request Access URL | The Metrici Visitor Journal API endpoint for submitting access requests | http://IP_ADDRESS/api_v2/vj/event_receiver.php |
| LLM API URL | The AI service endpoint used for document data extraction | http://LLM_ADDRESS:PORT/v1/chat/completions |
| Plate Number URL | The Metrici LPR API endpoint for retrieving the last recognized plate number | http://IP_ADDRESS/api_v2/lpr/get_last_plate.php?camera_id=2 |
| LLM Model | The AI model used for document recognition | qwen3vl |
| Destinations URL | The API endpoint for fetching the list of available destinations | http://IP_ADDRESS/api_v2/vj/get_destinations.php?location_id=1 |
| Restart Delay (seconds) | How many seconds the device waits before resetting to the start screen after a session completes | 20 |
Before saving, replace the placeholders in the URLs with the correct values for your setup:
| Placeholder | Description |
|---|---|
IP_ADDRESS |
The actual IP address of your Metrici server. |
LLM_ADDRESS:PORT |
The address and port of your LLM service. |
camera_id= |
The ID of the camera (in the web application) that detects your license plates. |
location_id= |
The ID of the location. Open the location in the web application and read it from the URL in your browser — for example, in http://localhost/pages/view_location/2, the location ID is 2. |
Make sure all URLs are reachable from the device's network, then click Save to apply the changes.
3.3 Network Settings
The Network Settings tab displays the current Ethernet interface information — see Fig.4 Network Settings.
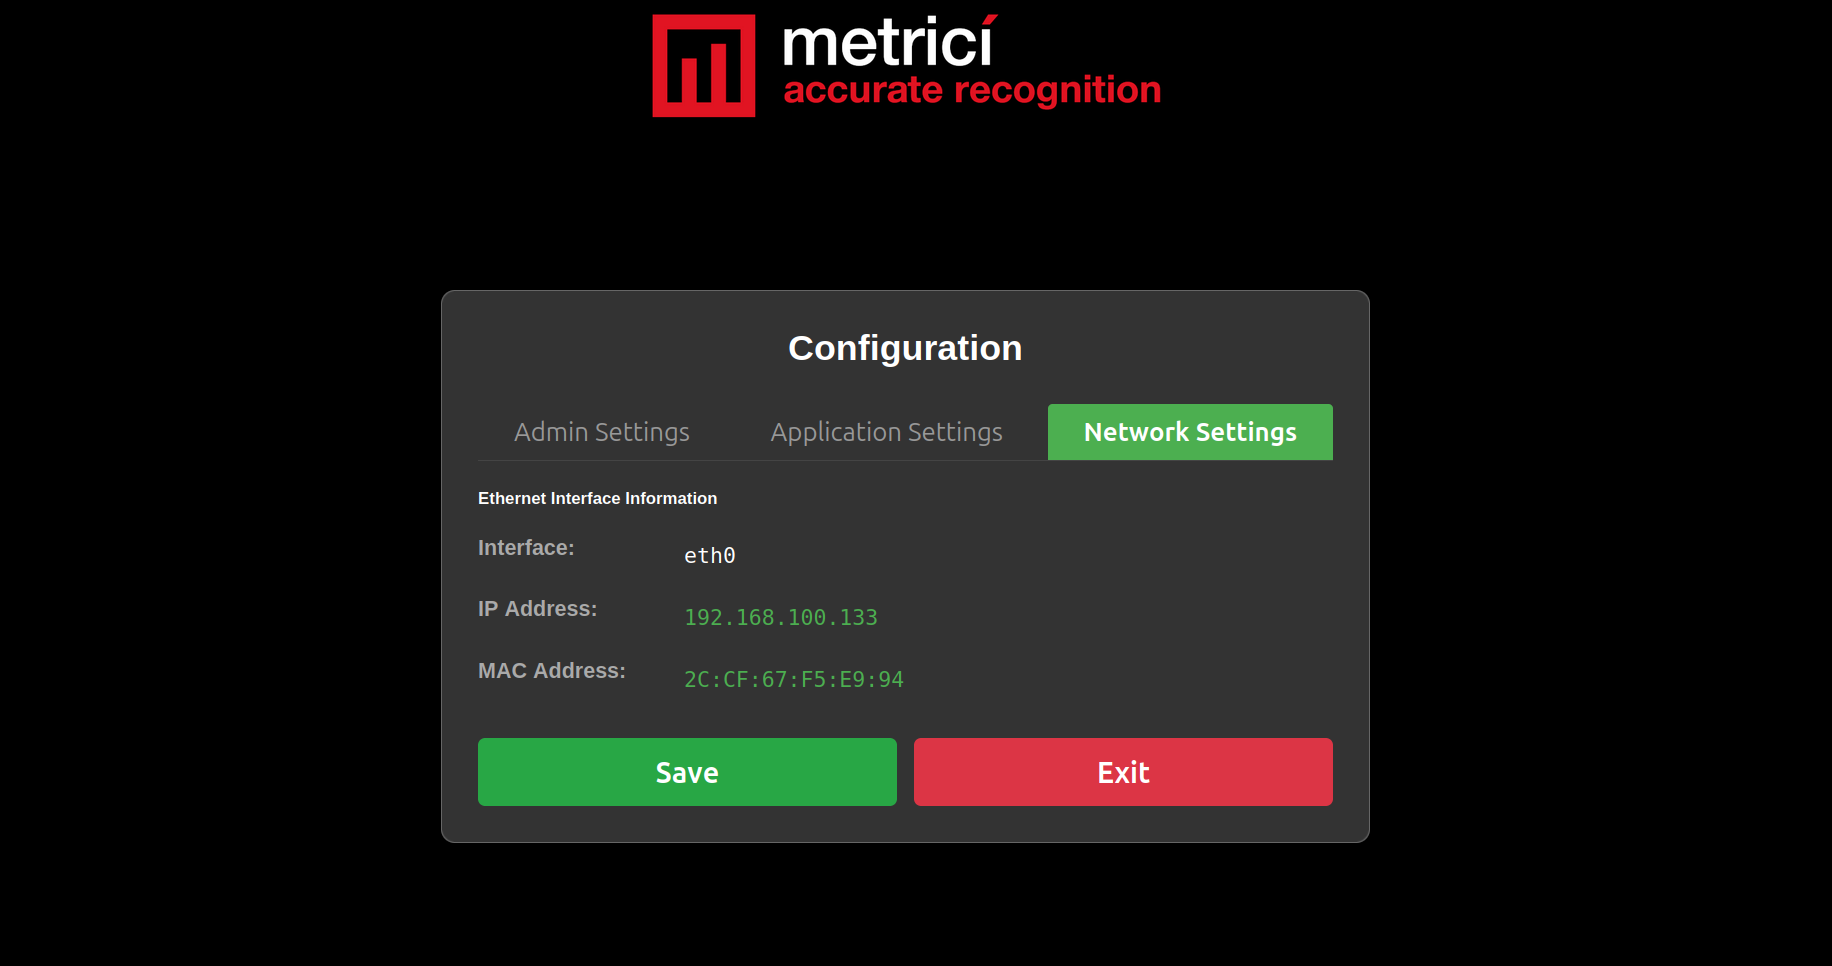
| Field | Description |
|---|---|
| Interface | The network interface name (e.g., eth0) |
| IP Address | The current IP address assigned to the device |
| MAC Address | The hardware MAC address of the Ethernet adapter |
To access the configuration interface, open a browser on the same network and navigate to the device's IP address.
Connecting via Browser
The device's full configuration is accessible remotely from any browser — you do not need physical access to the device to change settings. To connect:
- First, find the device's IP address. You can do this in two ways:
- From the device itself: open the admin menu (tap the bottom of the screen 8 times), go to the Network Settings tab, and read the IP Address field — see Fig.4 Network Settings.
- From your router: check your router's client list or connected devices page to find the IP assigned to the Document Scanner.
- Open any web browser (Chrome, Firefox, Edge, Safari) on a computer or phone connected to the same network as the device.
- Type the IP address in the browser's address bar. For example, if the Network Settings tab shows
192.168.100.133, navigate to:
http://192.168.100.133
The configuration page will load, giving you access to all three settings tabs (Admin Settings, Application Settings, Network Settings) without needing to be physically at the device.
4. Visitor Journal
The Metrici Visitor Journal is the web interface where all visitor, carrier, and deliverer records are managed. This section explains how to configure the Visitor Journal to work with the Document Scanner.
Before proceeding, the camera must be configured in the LPR engine and fully operational. You can find the documentation here: License Plate Recognition.
After the camera is set up, you need to add it to the Metrici Web Interface. You can learn how to add a camera by following the Locations & Cameras documentation. The camera type must be set to ID card reader — this is essential, as otherwise the Document Scanner integration will not work. In short: go to the Global Settings menu, open Locations & Cameras, create a location, and add a camera with the type set to ID card reader.
Once a document is scanned, the person is automatically added to the database with all the information extracted from their ID card or passport — including name, personal numeric code (CNP), birth date, nationality, and sex — see Fig.4.1 People.
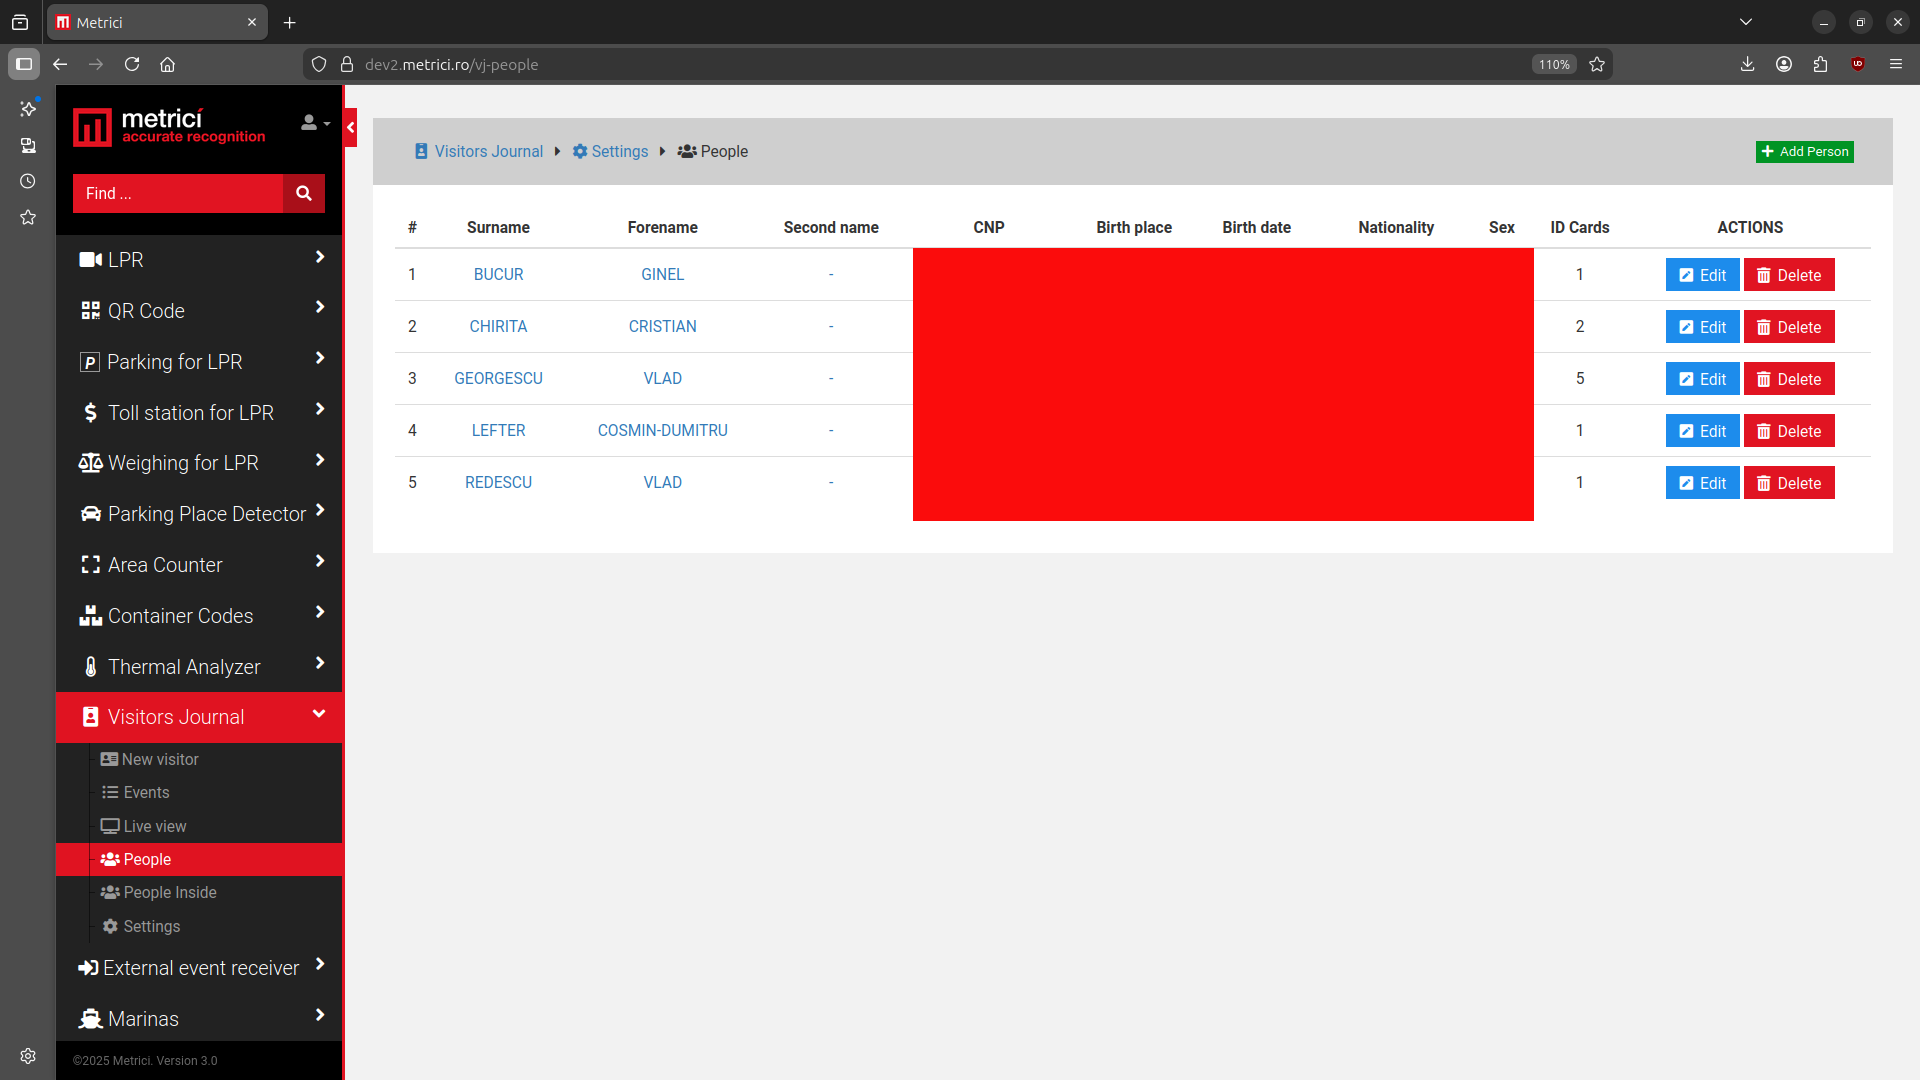
From the People page, administrators can edit or delete visitor records and view how many ID cards have been scanned for each person. Each entry is created automatically by the Document Scanner — no manual data entry is required.
You can also generate a report to see which people entered your location during a specific time interval. Use the Events page to filter by date, camera, location, event type, destination, or CNP — see Fig.4.2 Events.
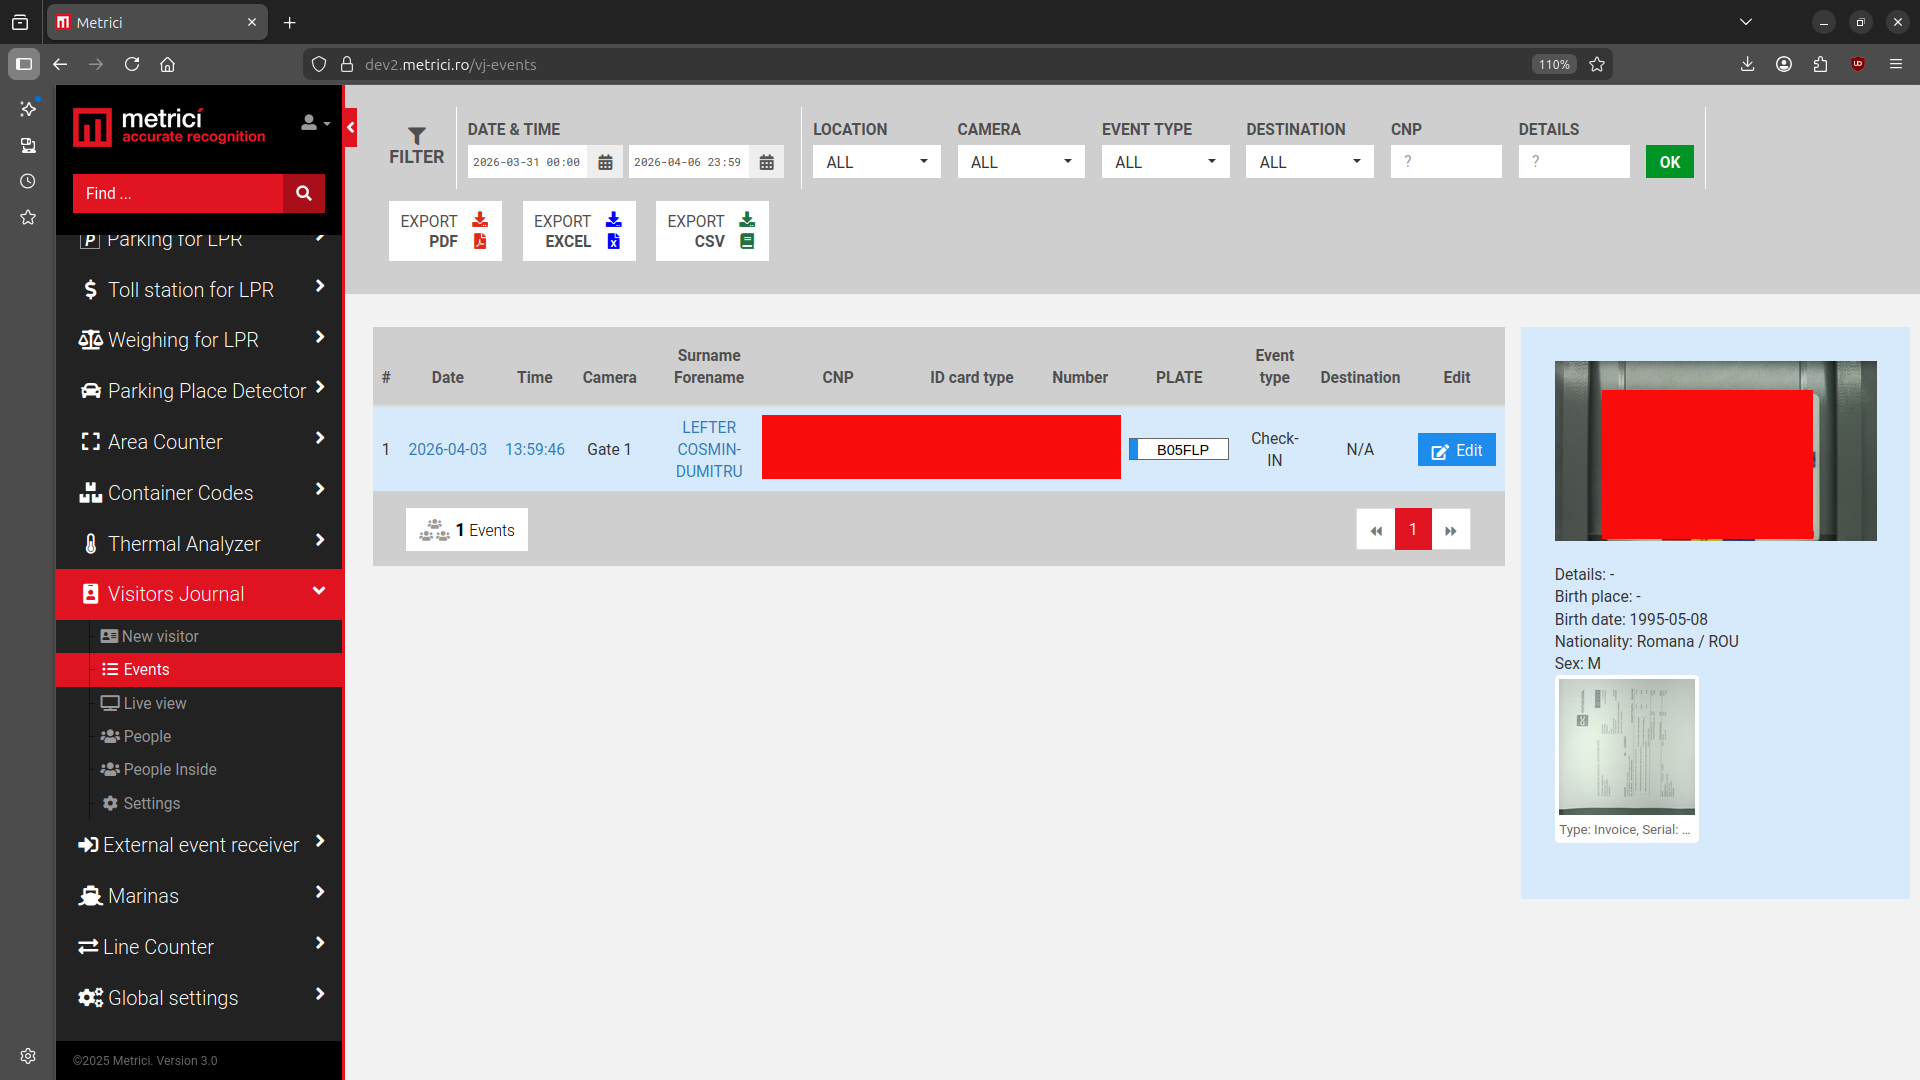
Events can be exported as PDF, Excel, or CSV files using the export buttons at the top of the page. The detail panel on the right shows the scanned ID card image, personal details, and any attached travel documents (invoices, AWBs) for the selected event.
5. API Reference
The Document Scanner communicates with the Metrici platform through several REST API endpoints. All URLs are configurable in the Application Settings. Replace IP_ADDRESS with your Metrici server's actual IP address.
5.1 Visitor Journal — Request Access
| Property | Details |
|---|---|
| Endpoint | http://IP_ADDRESS/api_v2/vj/event_receiver.php |
| Method | POST |
| Content-Type | application/json (with base64-encoded images) |
| Purpose | Submit a complete visitor/carrier/deliverer registration to the Visitor Journal |
5.2 Plate Number — LPR Integration
| Property | Details |
|---|---|
| Endpoint | http://IP_ADDRESS/api_v2/lpr/get_last_plate.php?camera_id=2 |
| Method | GET |
| Purpose | Retrieve the last recognized license plate number from the connected LPR camera |
5.3 Destinations — Facility Locations
| Property | Details |
|---|---|
| Endpoint | http://IP_ADDRESS/api_v2/vj/get_destinations.php?location_id=1 |
| Method | GET |
| Purpose | Fetch the list of available destinations within the facility for the dropdown selector |
5.4 LLM API — Document Data Extraction
| Property | Details |
|---|---|
| Endpoint | http://LLM_ADDRESS:PORT/v1/chat/completions |
| Method | POST |
| Purpose | Send a captured document image to the AI model for structured data extraction |
| Model | Configurable (default: qwen3vl) |
The device sends the captured document image to the LLM service, which uses computer vision to identify and extract structured fields (name, CNP, serial number, birth date, nationality, sex, document type). The model returns a JSON response with all extracted fields.
6. User Flow
6.1 Role Selection
After selecting a language, the user is presented with three role options — see Fig.5 Role Selection:
- Visitor (blue) — a person visiting someone at the facility. The workflow includes: plate recognition → ID/passport scan → destination selection → access request.
- Carrier (orange) — a transport carrier delivering or picking up goods. The workflow adds document scanning (AWBs, CMR, invoices) in addition to the standard ID scan.
- Deliverer (green) — similar to carrier, includes document scanning for delivery receipts and invoices.
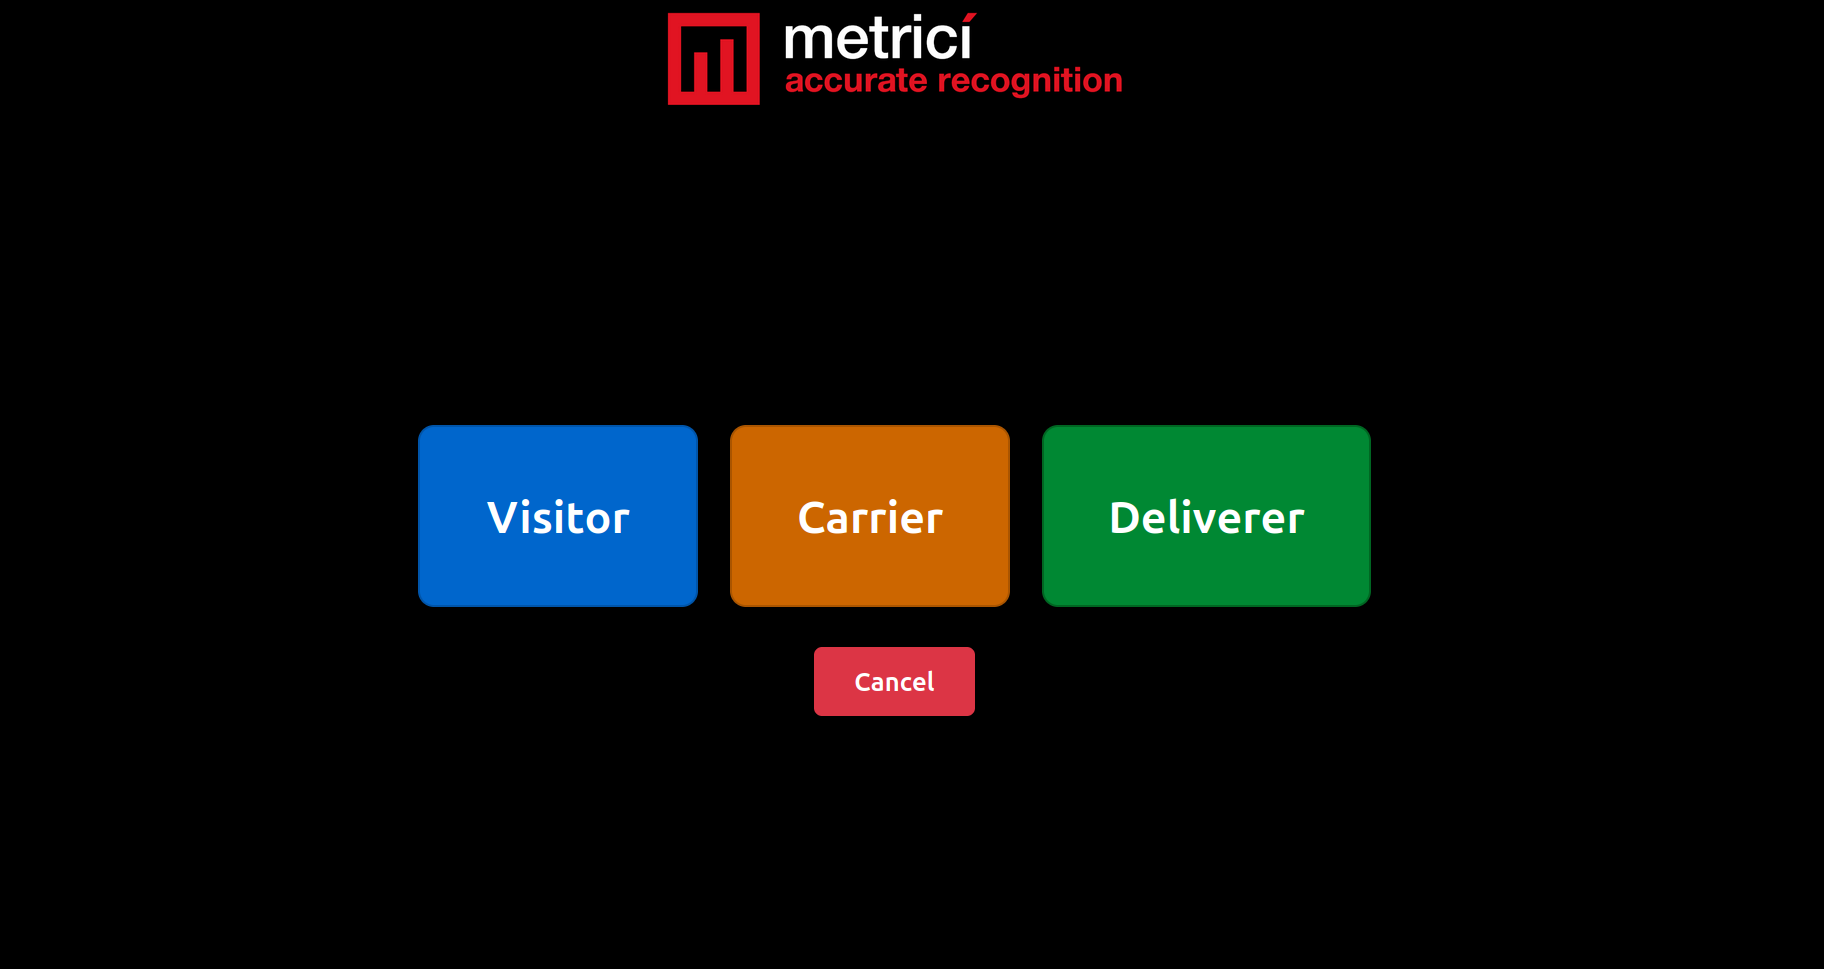
Pressing Cancel returns to the language selection screen.
6.2 Plate Number Recognition
The system automatically extracts the vehicle's license plate number from the Metrici LPR engine. The recognized plate is displayed on screen for confirmation — see Fig.6 Plate Confirmation.
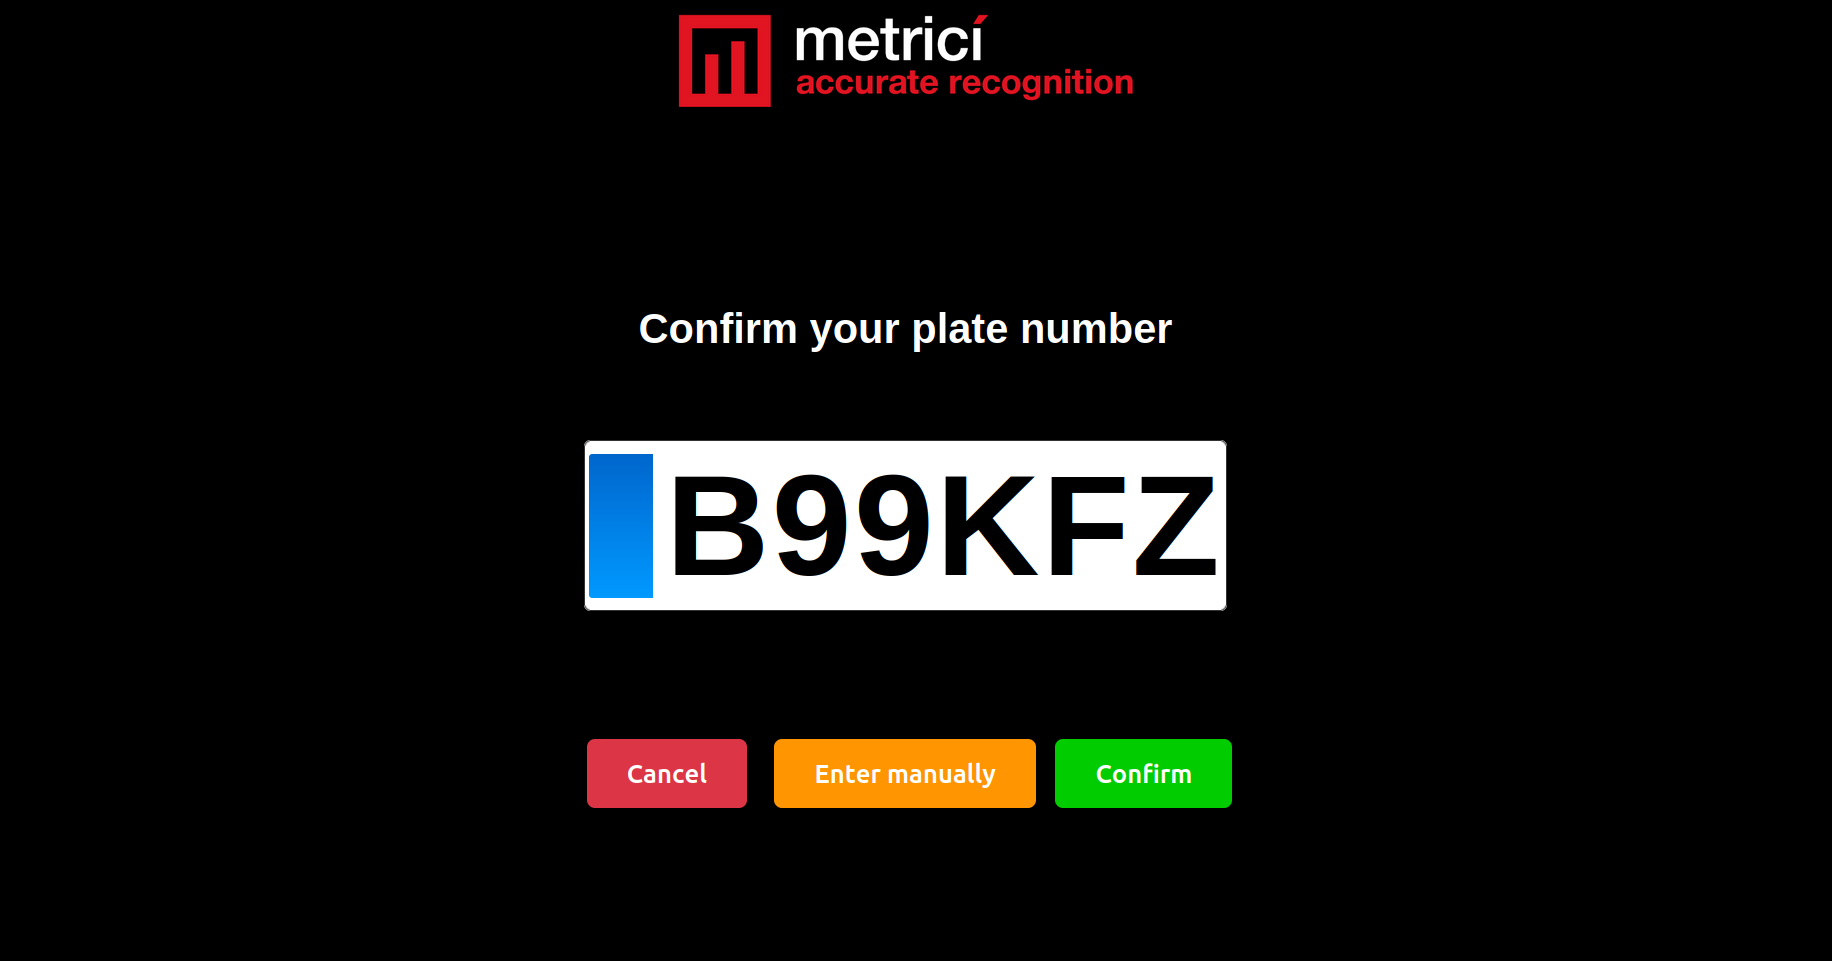
Three options are available:
- Confirm (green) — accept the recognized plate and proceed
- Enter manually (orange) — type the plate number by hand if the automatic recognition is incorrect
- Cancel (red) — go back to the previous step
http://IP_ADDRESS/api_v2/lpr/get_last_plate.php?camera_id=2 — to retrieve the last recognized plate number from the connected LPR camera, in this case the camera with ID 2. The plate number is then displayed for user confirmation before proceeding.
6.3 ID Card / Passport Scanning
The user is prompted to place their ID card or passport on the document tray — see Fig.7 ID Scanning. The built-in camera captures an image of the document.
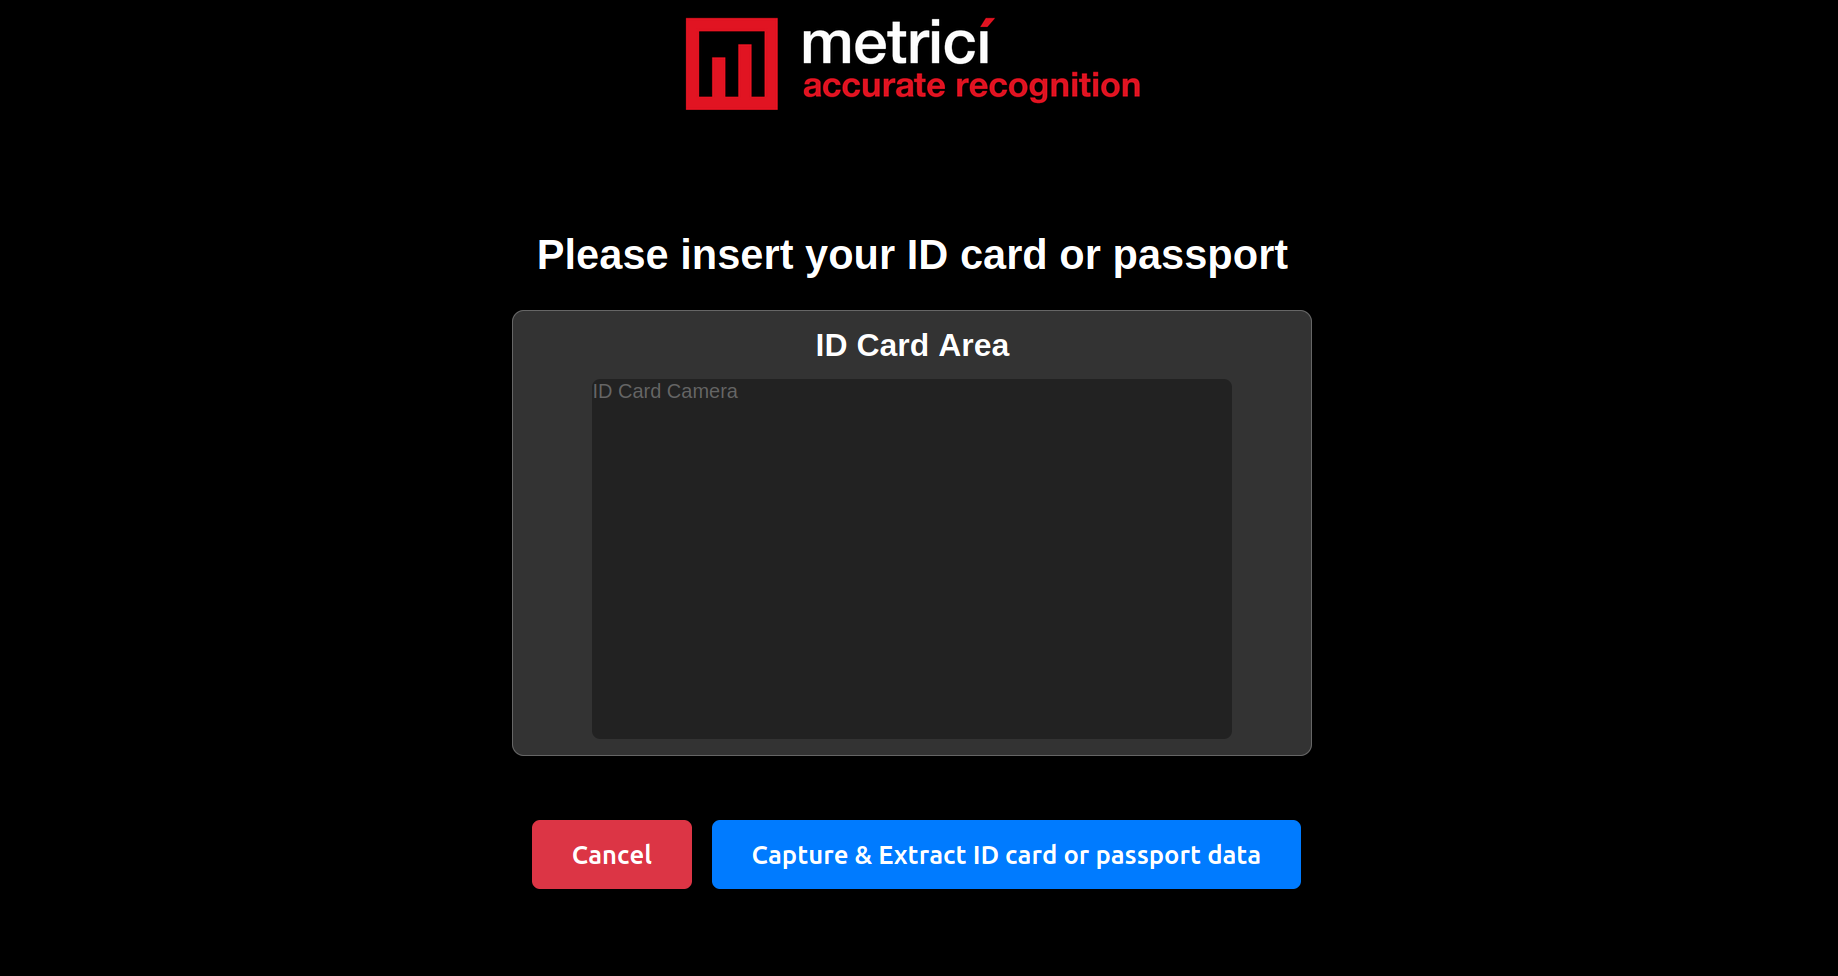
The user presses Capture & Extract ID Card or Passport Data to take the photo. The captured image is then sent to the LLM API for AI-powered data extraction.
6.4 Extracted Data Review
After the AI processes the document image, the extracted data is displayed for review — see Fig.8 Extracted Data. The following fields are extracted:
| Field | Description |
|---|---|
| CNP | Personal Numeric Code (national identifier) |
| Document Type | IDENTITY CARD or PASSPORT |
| Serial Number | Document serial number |
| Birth Date | Date of birth |
| Last Name | Surname |
| First Name | Given name(s) |
| Nationality | Nationality as printed on the document |
| Sex | M or F |
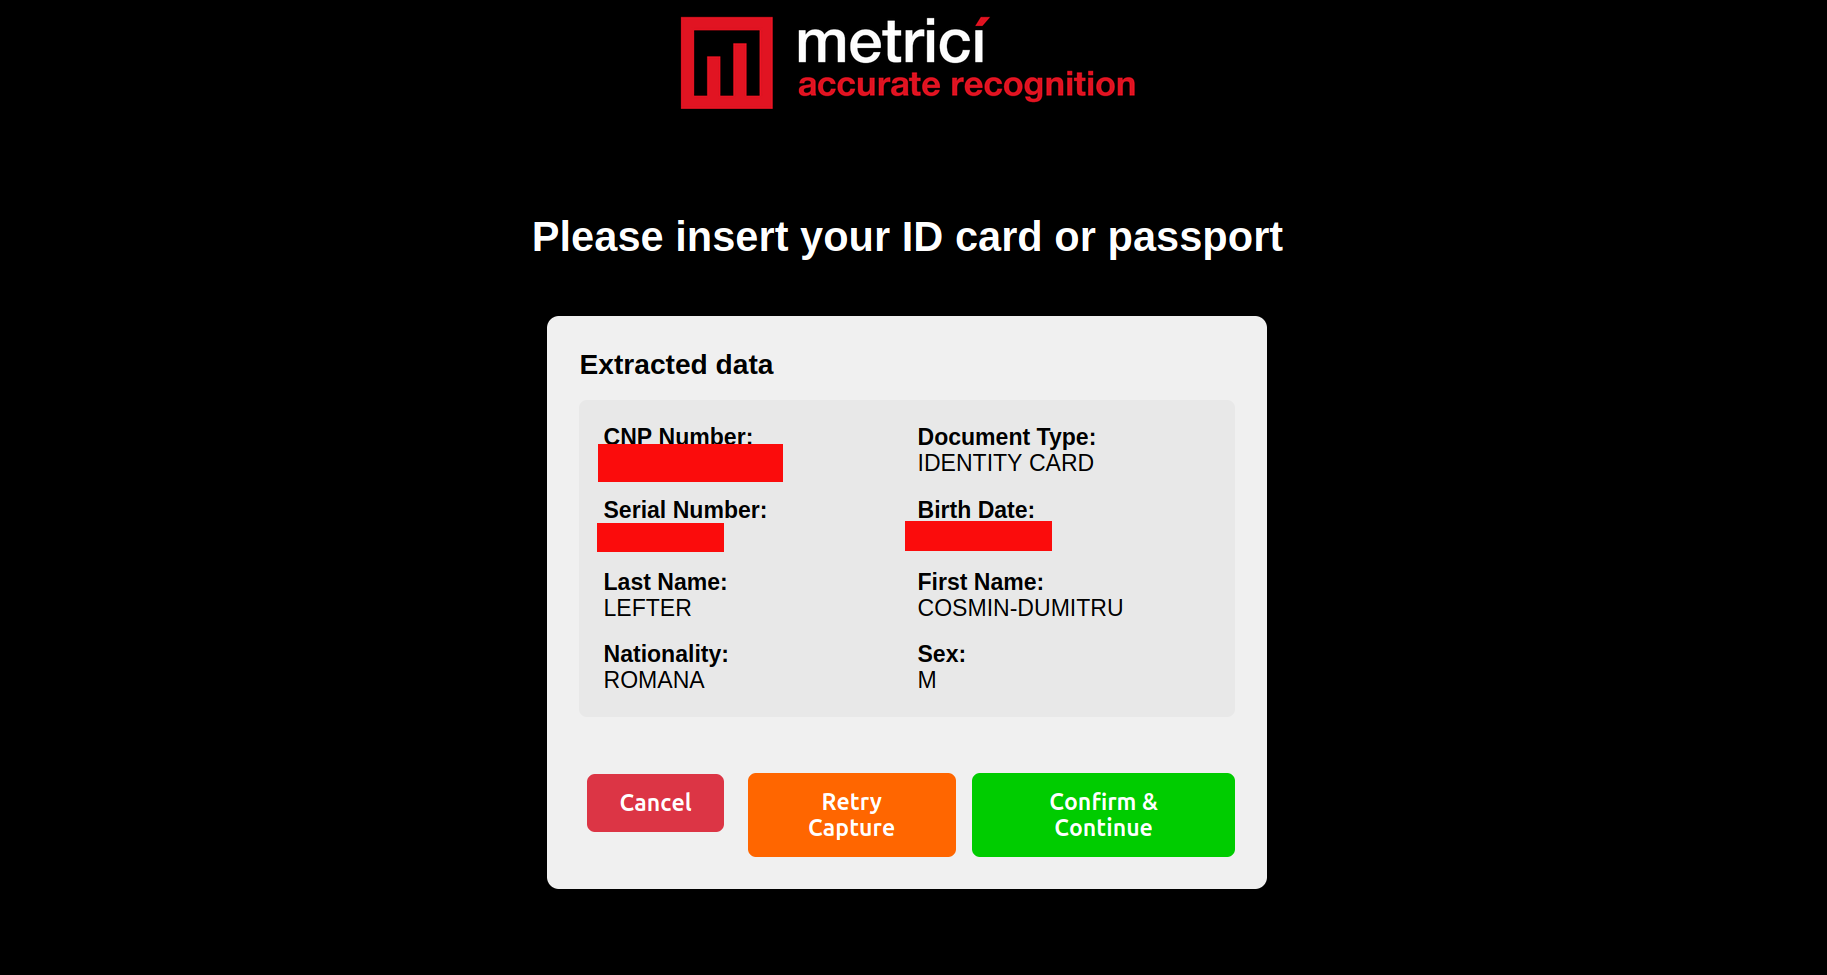
Three actions are available:
- Confirm & Continue (green) — accept the extracted data and proceed
- Retry Capture (orange) — retake the photo if the data is incorrect or incomplete
- Cancel (red) — abort and return to the start
6.5 Document Scanning (AWB / Invoice / CMR)
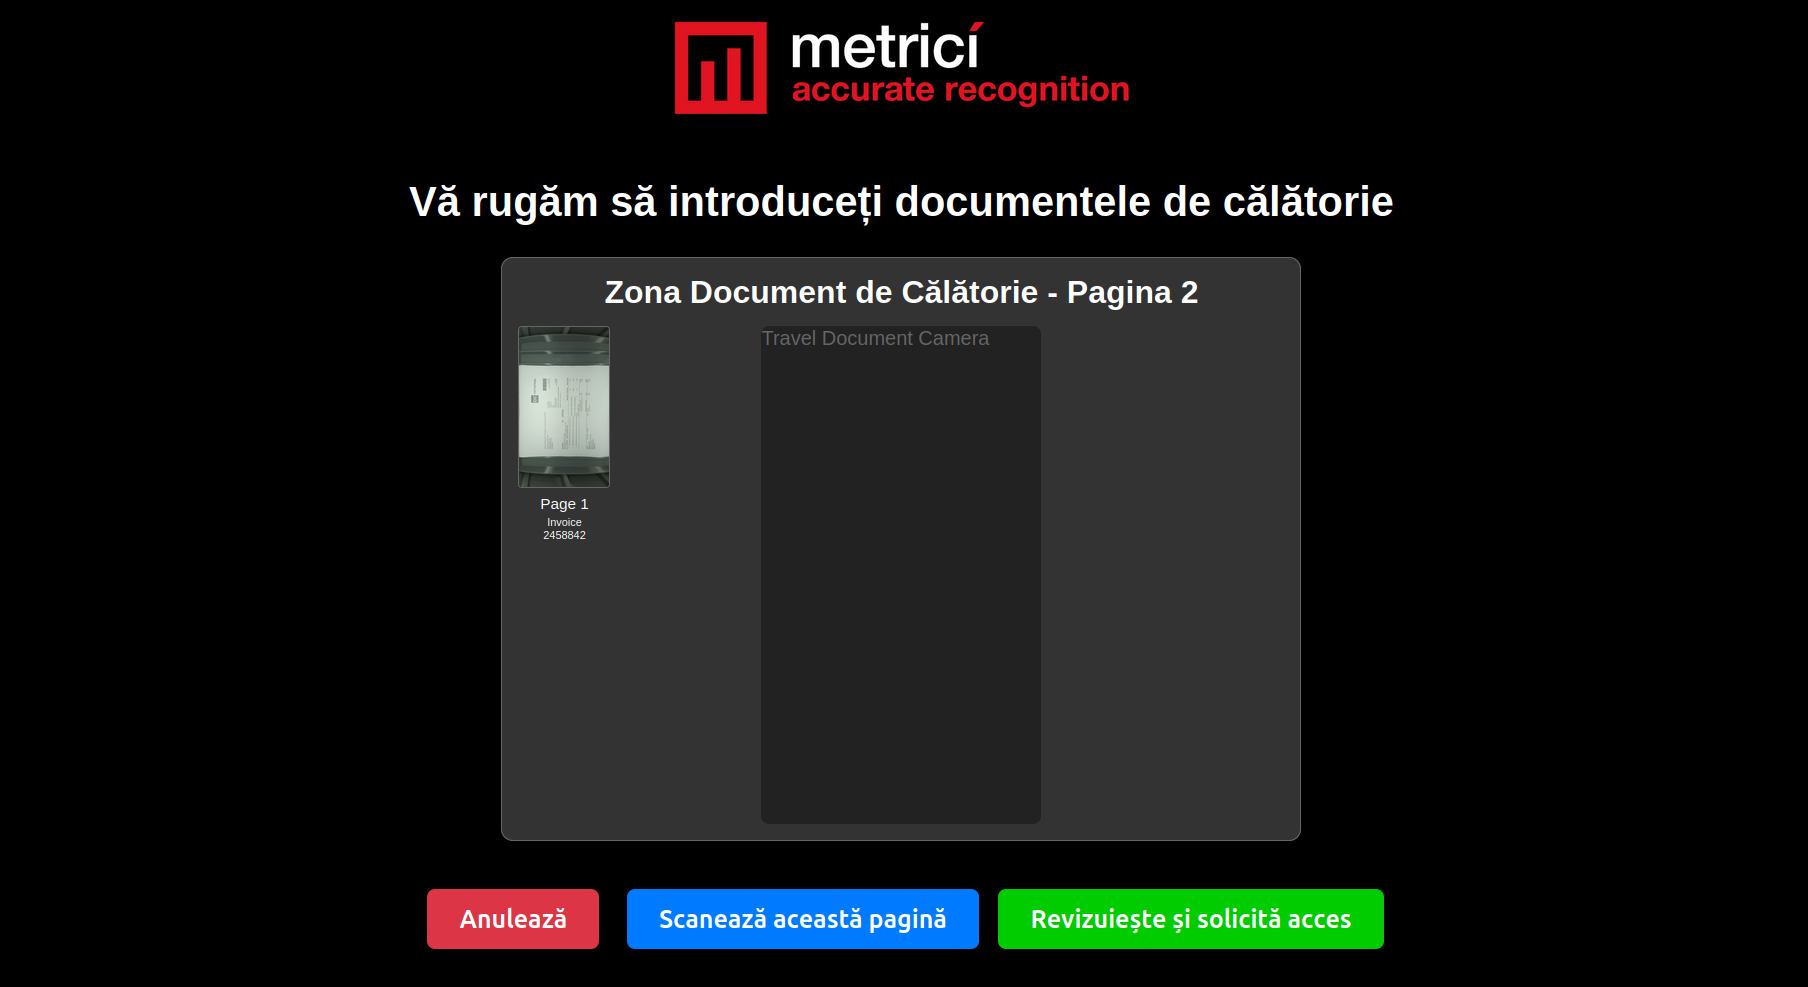
For Carrier and Deliverer roles, an additional step is available to scan travel documents such as AWBs, CMRs, invoices, or delivery receipts. These documents are captured by the same built-in camera and attached to the visitor record — see Fig.8.1 Scan Documents.
Scanned documents appear in the Travel Documents panel alongside the ID Card / Passport data in the summary screen. Each document page is numbered and classified (e.g., "Invoice 2458842").
6.6 Summary & Review
Before requesting access, the user is shown a full summary of all captured data — see Fig.9 Summary Screen. This screen displays:
- The confirmed plate number at the top
- ID Card / Passport section — scanned document image and all extracted personal data
- Travel Documents section — scanned AWBs, invoices, or delivery receipts (for Carrier/Deliverer roles)
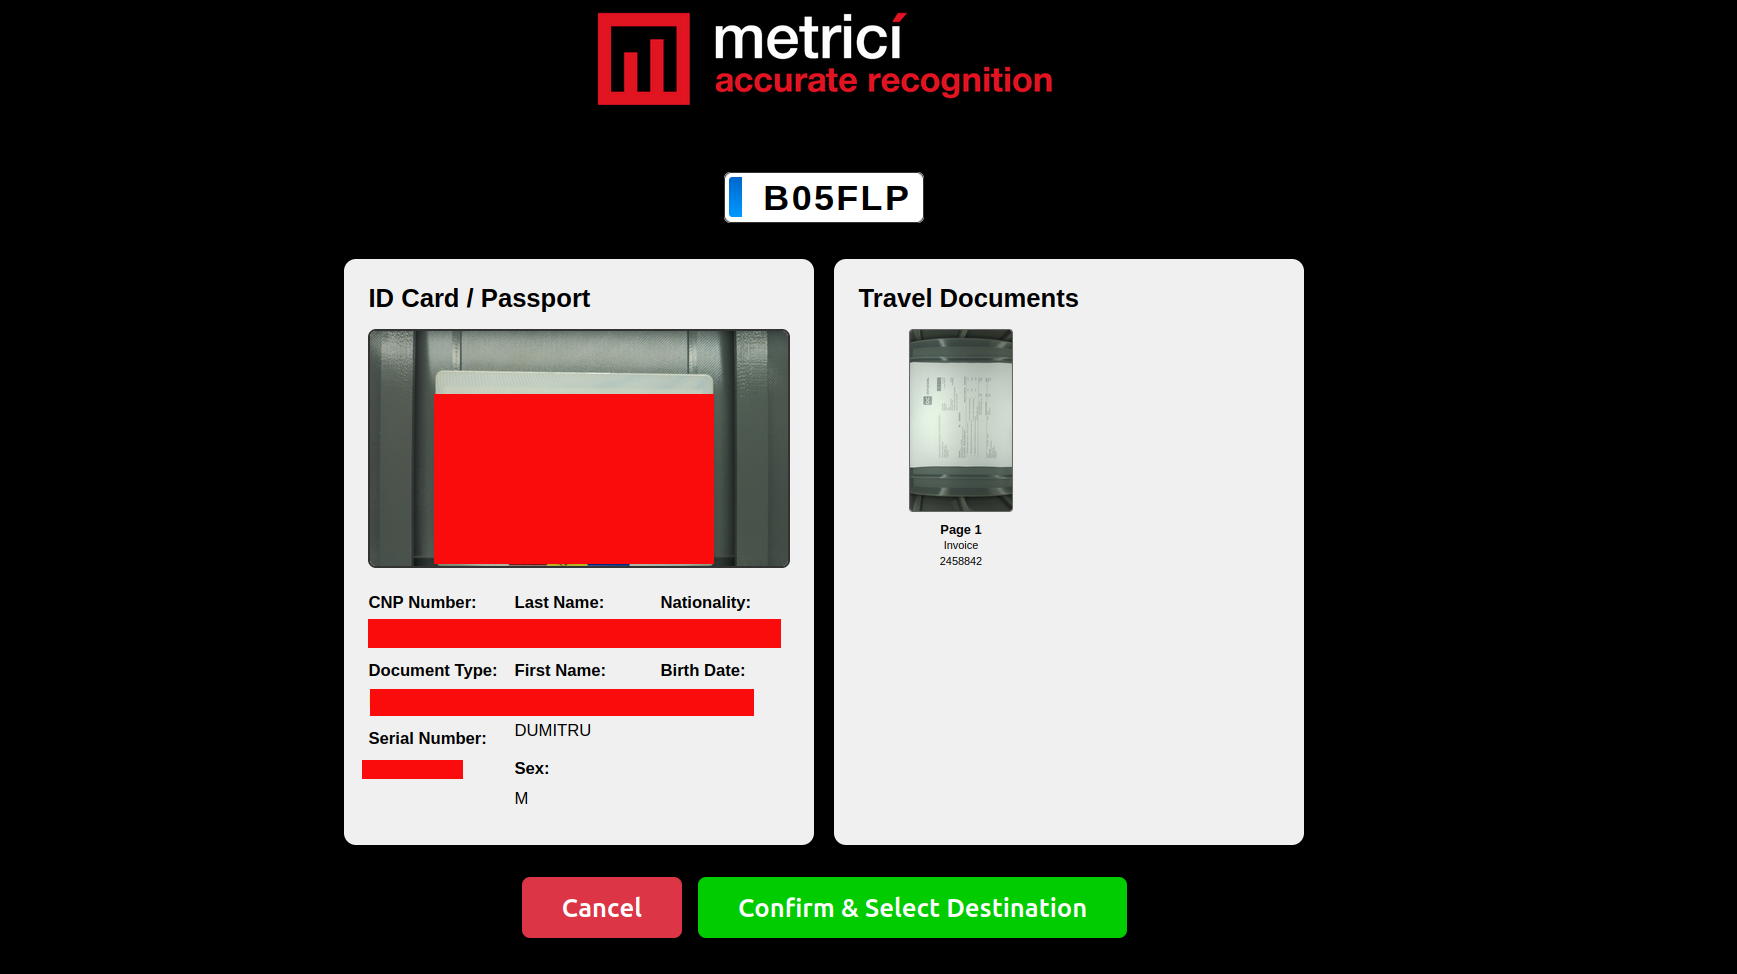
Two actions are available:
- Confirm & Select Destination (green) — proceed to choose where the visitor is going
- Cancel (red) — abort the entire session
6.7 Select Destination
The user selects their destination within the facility from a dropdown list — see Fig.10 Destination Selection. The list of available destinations is fetched from the Metrici Visitor Journal. To add or create destinations for your location, go to the Visitor Journal menu, open Settings, choose a location, and click on its name. You can add as many destinations as you need using the green +Add destination button.
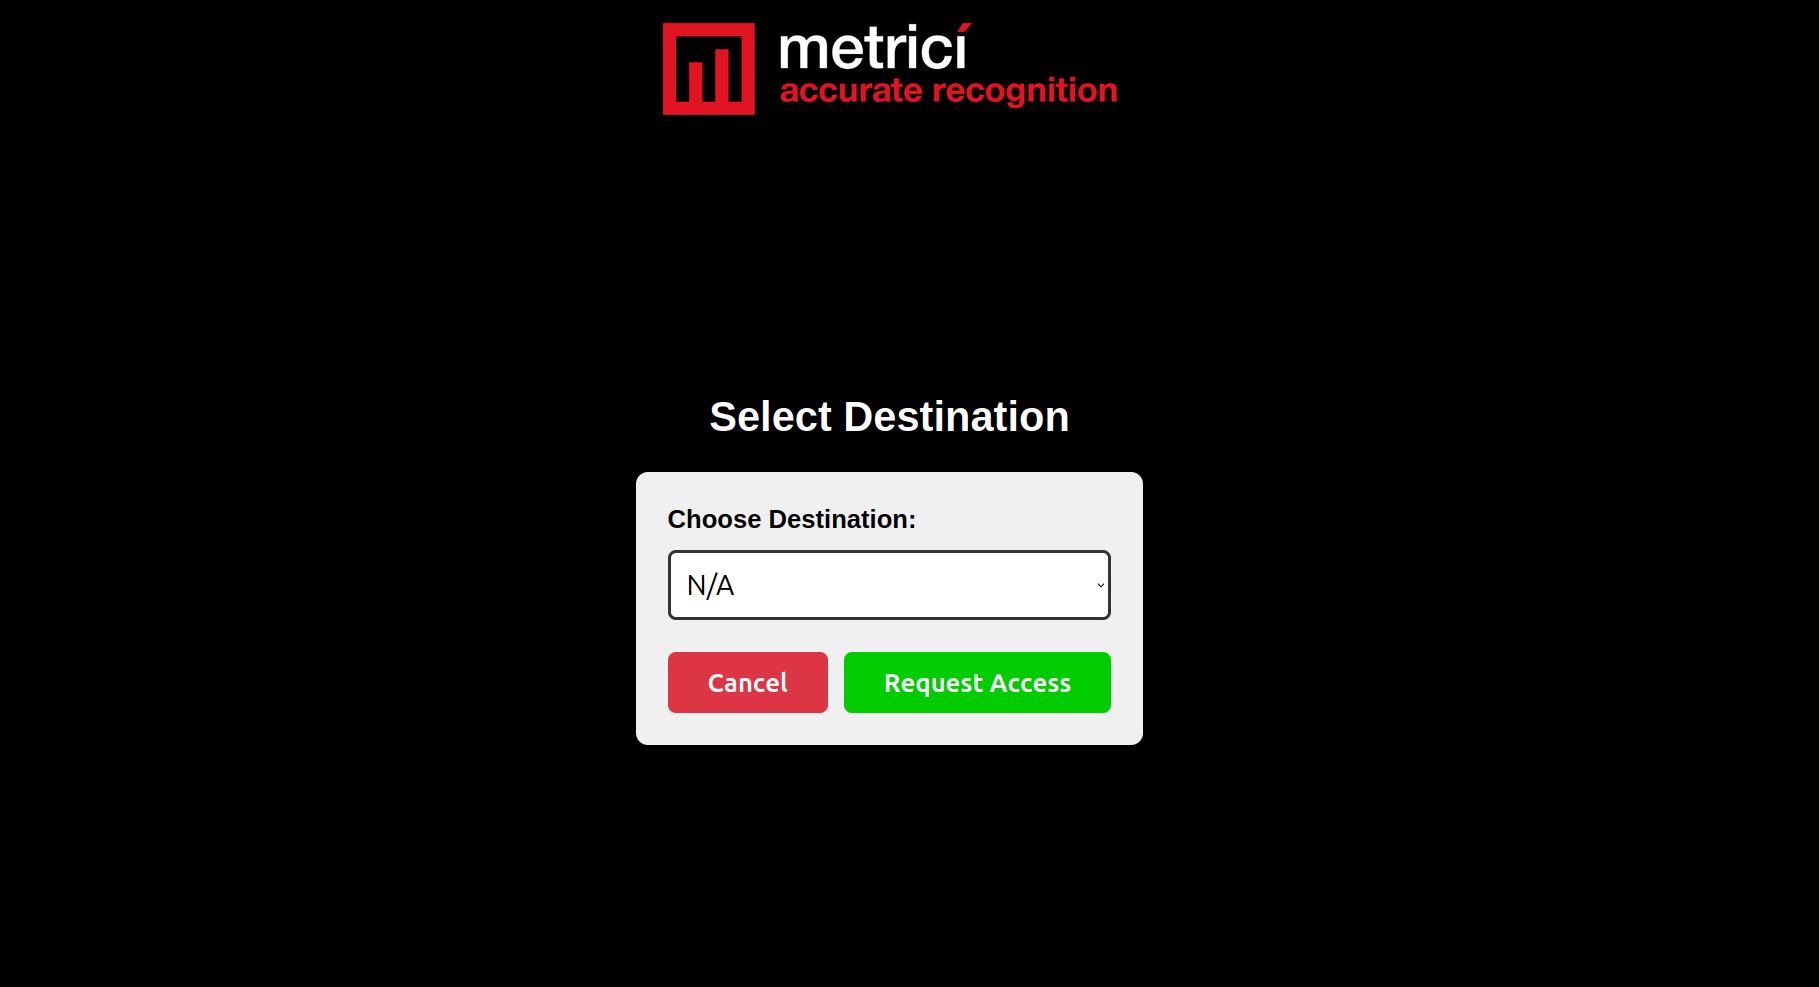
After selecting a destination, press Request Access to submit all data to the Metrici Visitor Journal.
http://IP_ADDRESS/api_v2/vj/event_receiver.php containing all collected data: plate number, personal details, document images, travel documents, and the selected destination. The Metrici web application processes the request and grants or denies access.
6.8 Access Granted
If the access request is approved, a green confirmation message is displayed — see Fig.11 Access Granted.
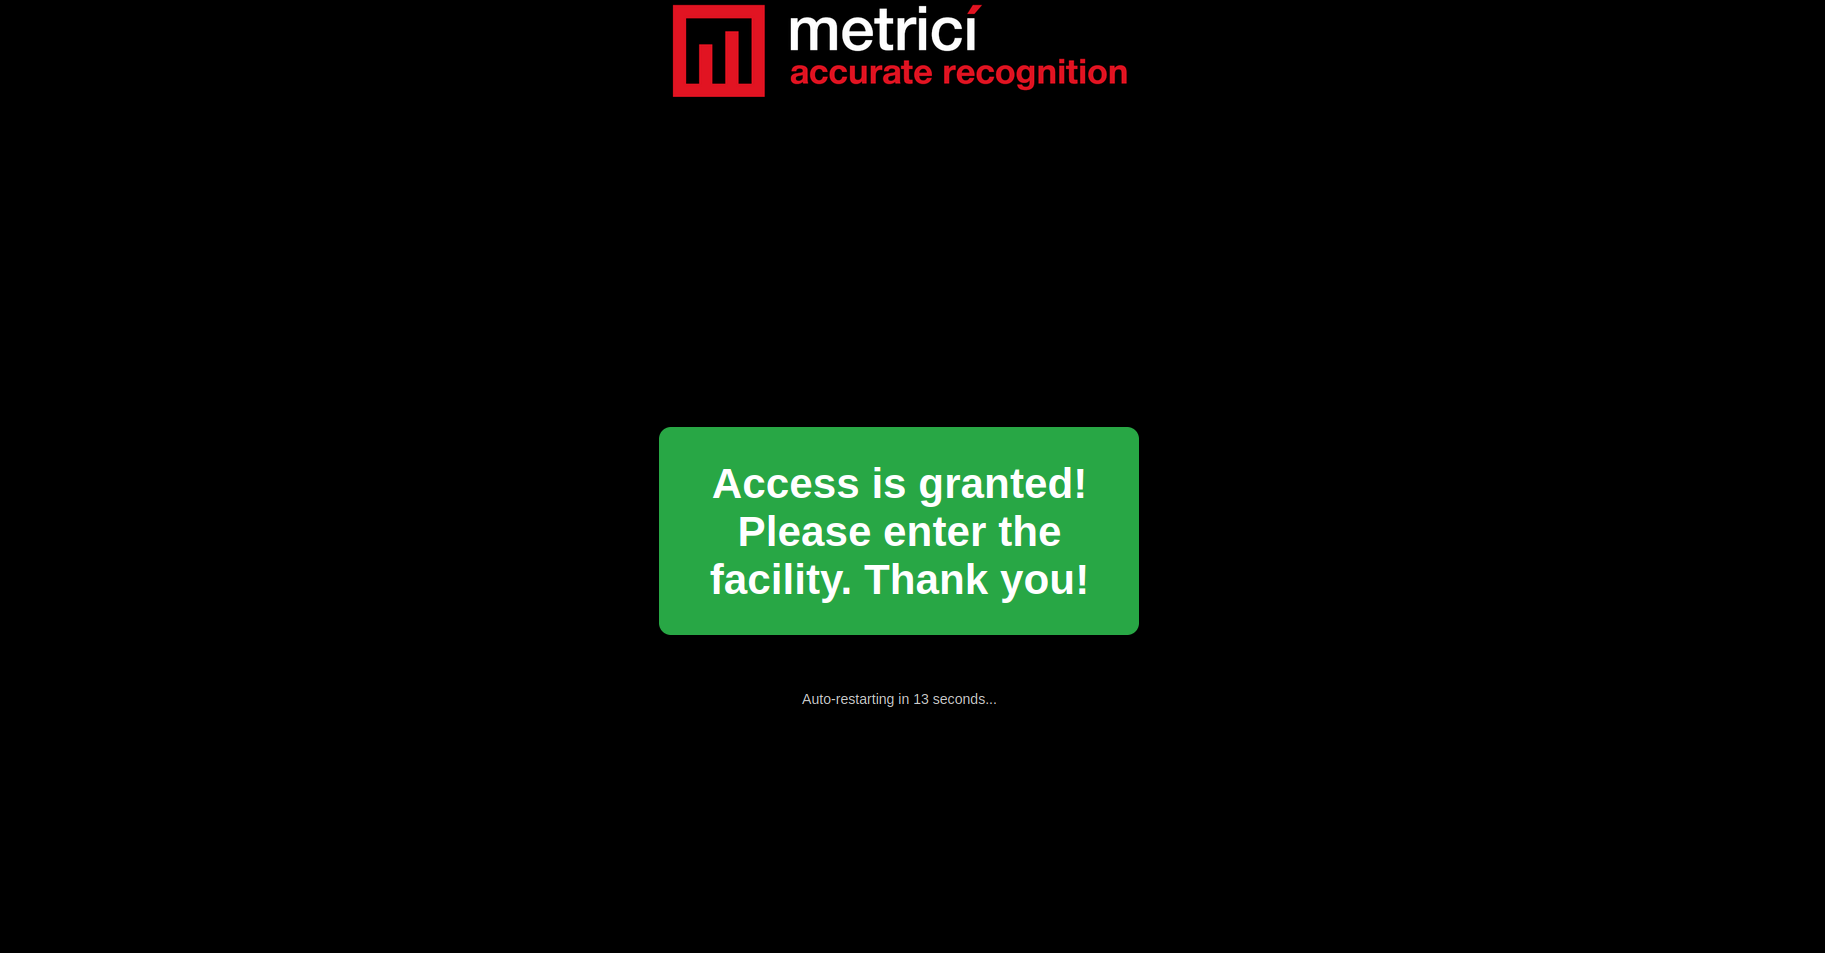
The screen shows "Access is granted! Please enter the facility. Thank you!" along with a countdown timer. After the configured restart delay (default: 20 seconds), the device automatically returns to the language selection screen, ready for the next visitor.
7. Troubleshooting
Cannot access the configuration interface
- Verify that the device is powered on and the Ethernet cable is connected.
- Make sure your computer is on the same network (same subnet) as the device.
- Check the device's current IP address — open the admin menu on the device (tap the bottom of the screen 8 times), go to Network Settings, and read the IP Address field. Then type that address into your browser (e.g.,
http://192.168.100.133). - If you cannot access the device physically, check your router's DHCP client list for the device's IP.
Device does not power on
- This device requires PoE+ (IEEE 802.3at) as a minimum. Standard PoE (802.3af) does not provide enough power — verify that your switch or injector supports PoE+ or higher.
- Try a different Ethernet cable — damaged cables can prevent PoE+ power delivery.
- Try a different port on the PoE+ switch.
- If using a PoE injector, make sure it is rated for PoE+ (802.3at) and is plugged in and powered on.
ID card or passport not recognized correctly
- Ensure the document is placed flat on the scanning tray with no folds or obstructions.
- Check that the camera lens is clean and unobstructed.
- Verify lighting conditions — the document should be evenly lit without glare or shadows.
- Use Retry Capture to take a new photo if the first attempt fails.
- Check that the LLM API URL is correctly configured and the AI service is running.
Destination list is empty or shows N/A
- Verify that the Destinations URL in Application Settings is correct.
- Check that destinations have been configured in the Metrici Visitor Journal web application.
- Ensure the Metrici server is reachable from the device's network.
Device does not restart after session
- Check the Restart Delay value in Application Settings. If set to 0, the device may not auto-restart.
- Set the restart delay to a value greater than 0 (recommended: 20 seconds).