Metrici Payment Terminal
User Manual for End Users and System Administrators

Table of Contents
1. Introduction
The Metrici Payment Terminal is an unattended self-service kiosk that lets users pay for parking without staff assistance. A driver identifies their parking session — either by typing the license plate number on the touchscreen or by scanning a session QR code from the virtual parking ticket issued at entrance — the device calculates the amount due by interrogating the Metrici API, and the driver completes the payment from their own phone by scanning a second QR code shown on the screen. Payment is handled by Stripe, so the kiosk does not contain a card reader, cash slot, or any other on-device payment hardware.
The terminal communicates with the Metrici cloud or on-premise web application through two unique credentials: a Location Key that identifies the parking lot, and an API Key that authorises the terminal to talk to the server. Once configured, the device operates fully autonomously and only needs a single Ethernet cable for both data and power.
Key features:
- Self-service payment — drivers pay with their own phone, no staff needed
- Multi-language support — 15 languages available out of the box
- No on-device card reader — Stripe-hosted checkout means PCI scope stays off the terminal
- Built-in QR scanner — drivers with a parking session QR code from the entry barrier can skip typing
- Invoice generation — drivers can optionally request a fiscal invoice with VAT ID, phone, and email
- PoE+ powered — single Ethernet cable for both power and network connectivity
- Real-time integration — communicates with the Metrici Parking module for pricing, billing, and grace periods
- On-screen keyboard — full QWERTY + numeric keyboard for plate and invoice data entry
Technical Data
| Specification | Details |
|---|---|
| Description | Unattended parking payment kiosk with built-in camera for QR scanning |
| Display | 1920 × 1200 capacitive touchscreen (16:10) |
| Input | Touchscreen + integrated QR code camera |
| Payment | Stripe checkout via user's mobile phone (Card, Apple Pay, Google Pay, Link, Klarna) |
| On-device payment hardware | None — no card reader, no cash slot |
| Connectivity | 1 Ethernet port (RJ45, Cat6A compatible) |
| Power | PoE+ (IEEE 802.3at), 48 V DC over Ethernet, ≤ 25.5 W |
| Front face dimensions | 302 mm × 292 mm × 150 mm depth |
| Languages | English, Romanian, Bulgarian, Hungarian, Polish, Serbian, Ukrainian, Turkish, Croatian, French, Italian, Spanish, Portuguese, German, Dutch |
| Software Compatibility | Metrici Web Interface Application with Parking Module license |
| Interface | Touchscreen for end users, admin configuration panel for installers |
| Weight | 3.5 KG |
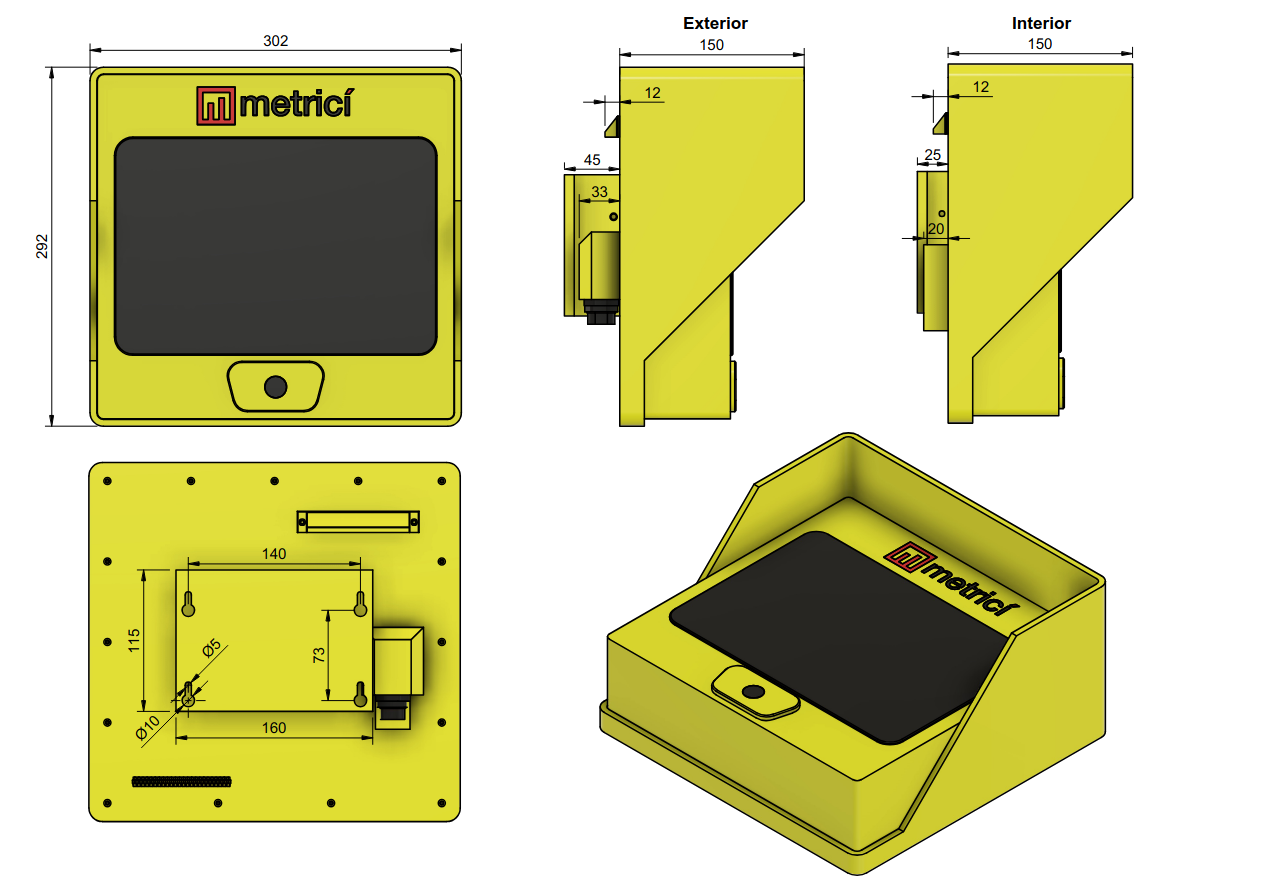
2. First Boot & Network Configuration
The Metrici Payment Terminal is powered via PoE+ (Power over Ethernet Plus). Connect a single Ethernet cable from a PoE+ switch or PoE+ injector to the device's Ethernet port. This cable provides both network connectivity and electrical power — no separate power adapter is needed.
After powering on, the terminal boots into the language selection screen within 30 seconds. Before the terminal can quote amounts or accept payments, an installer must access the admin menu to configure the Application Settings (Location Key, API URL, API Key) and verify the Network Settings.
The factory-default network configuration is Static IP at:
http://192.168.100.102
3. Admin Menu
There are two ways to reach the admin menu — directly on the touchscreen, or from a browser on the same network. Both routes land on the same login page and use the same default password "metriciadmin" — see Fig.2 Admin Login.
On the terminal touchscreen
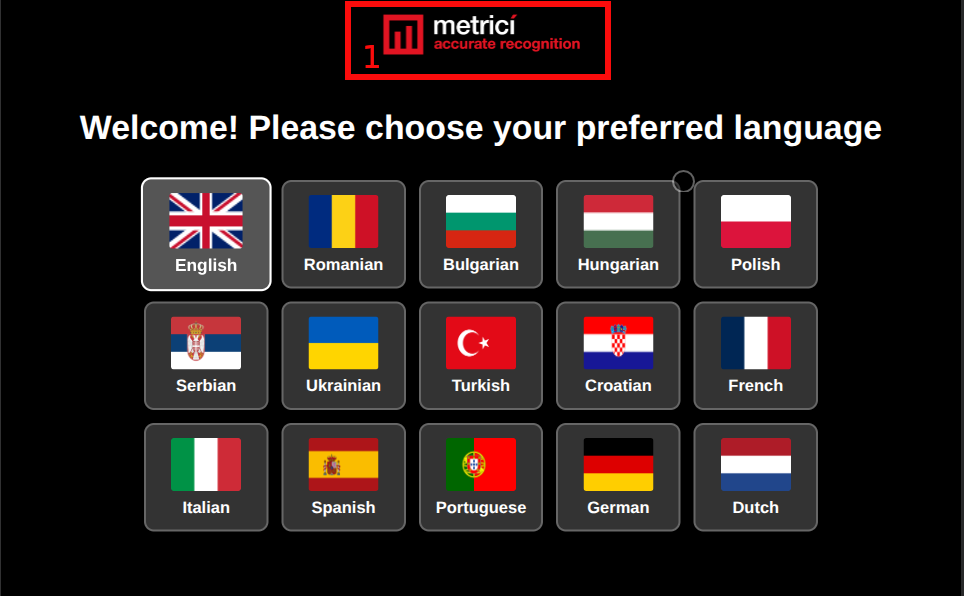
Tap the top-centre of the screen 8 times in a row (around the logo on the language selection menu) — see Fig.9 Language Selection (1) The gesture is intentionally hidden so that the public cannot stumble into the configuration screens. After the eighth tap the login page opens.
From a browser
Open a browser on any computer or phone connected to the same local network as the terminal and navigate
to the terminal's IP address — by factory default this is http://192.168.100.102. The same
login page appears. If the IP has been changed during
installation, find the current value, walk up to the terminal, enter the admin menu via the 8-tap
gesture, and open the Network Settings tab — the live IP is shown in the read-only strip at the top.
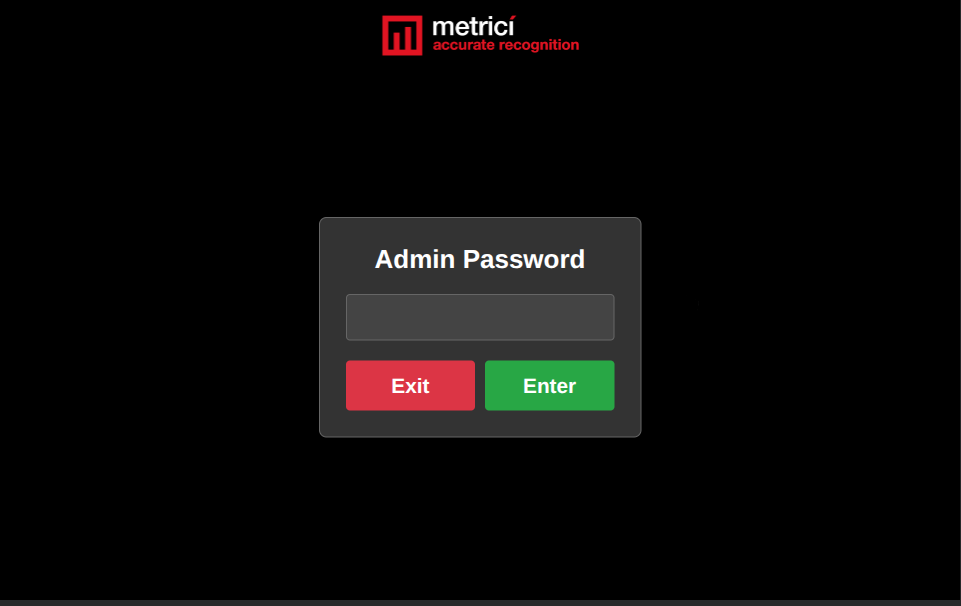
metriciadmin) immediately after the first login — see Admin
Settings. Anyone with eight taps' worth of patience could otherwise get into the configuration.
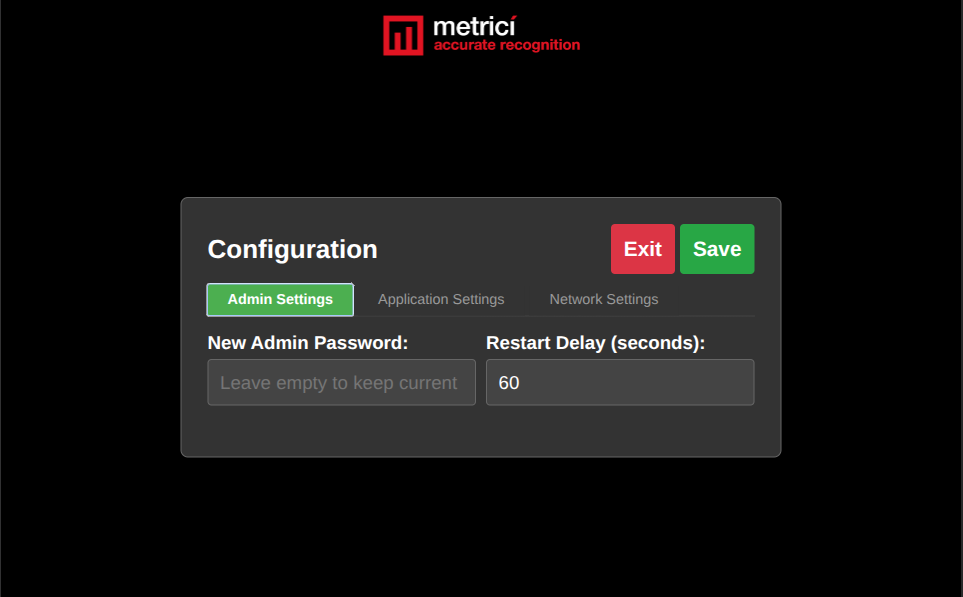
Once authenticated, the operator lands on the Configuration panel. It has three tabs: Admin Settings, Application Settings, and Network Settings. After making any changes, click the green Save button to apply. Click the red Exit button to return to the public flow.
3.1 Admin Settings
The Admin Settings tab holds the security-related options — see Fig.3 Admin Settings.
| Field | Description |
|---|---|
| New Admin Password | Enter a new password to replace the current one. Leave empty to keep the existing password. |
| Restart Delay (seconds) | How long the terminal waits on an idle screen before automatically resetting back to the language selection. The purpose is to recover from abandoned sessions — if a user starts a payment and then walks away (or leaves mid-flow without tapping Cancel), the kiosk clears itself after this delay so the next driver sees a fresh welcome screen instead of someone else's half-typed plate or invoice form. Default is 60 seconds. |
3.2 Application Settings
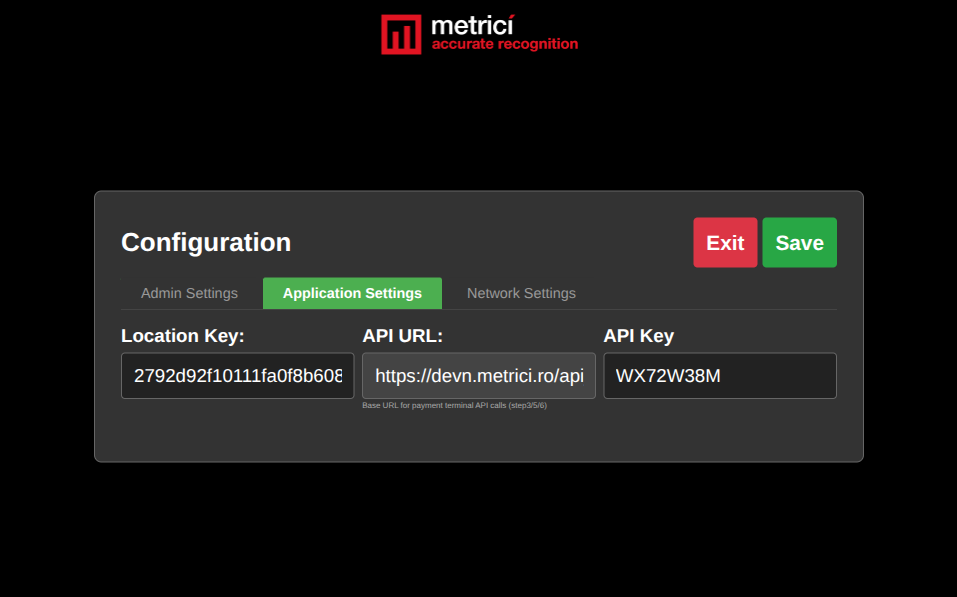
The Application Settings tab is where the terminal is linked to a specific parking location on the Metrici server — see Fig.4 Application Settings.
4. Web Application Integration
The Payment Terminal works in conjunction with the Metrici Parking Module. This is where the terminal gets its parameters from- vehicle, time of entry, duration, price to be paid based on tarriffs and timetables set in that Interface. The following must be configured on the server side for the terminal to function correctly.
4.1 Parking Module Setup
Before the terminal can quote an amount, the parking location must be fully set up in the Interface. Open Parking for LPR → Settings for the relevant location and make sure the items below are configured. The detailed documentation lives in the Parking for LPR section of the web interface manual.
- At least one camera must be configured as type License Plate Recognition — Parking under Global Settings → Locations & Cameras.
- A valid Metrici license with Parking Module support must be active.
- Parking Spaces must be defined — the total number of available spaces in the location.
- Parking Prices must be configured — at least one pricing rule (hourly, half-hour, or one-time) — see Parking Prices.
- Cash Register — at least one cash register named Cloud (or similar) must exist on the location — see Cash Register.
- Optionally, Grace minutes after payment can be set to define a free-exit window after a successful payment.
4.2 API Key & Location Key
The Application Settings on the terminal (section 3.2) need two values that come from the Metrici Interface: the global API Key and the per-location Location Key.
Server API Key
The API Key is server-wide, not per-location. Find it in Global settings → Application settings. Choose a location from the list (if more), click on it. and see the Api Key — see Fig.6 Server API Key.
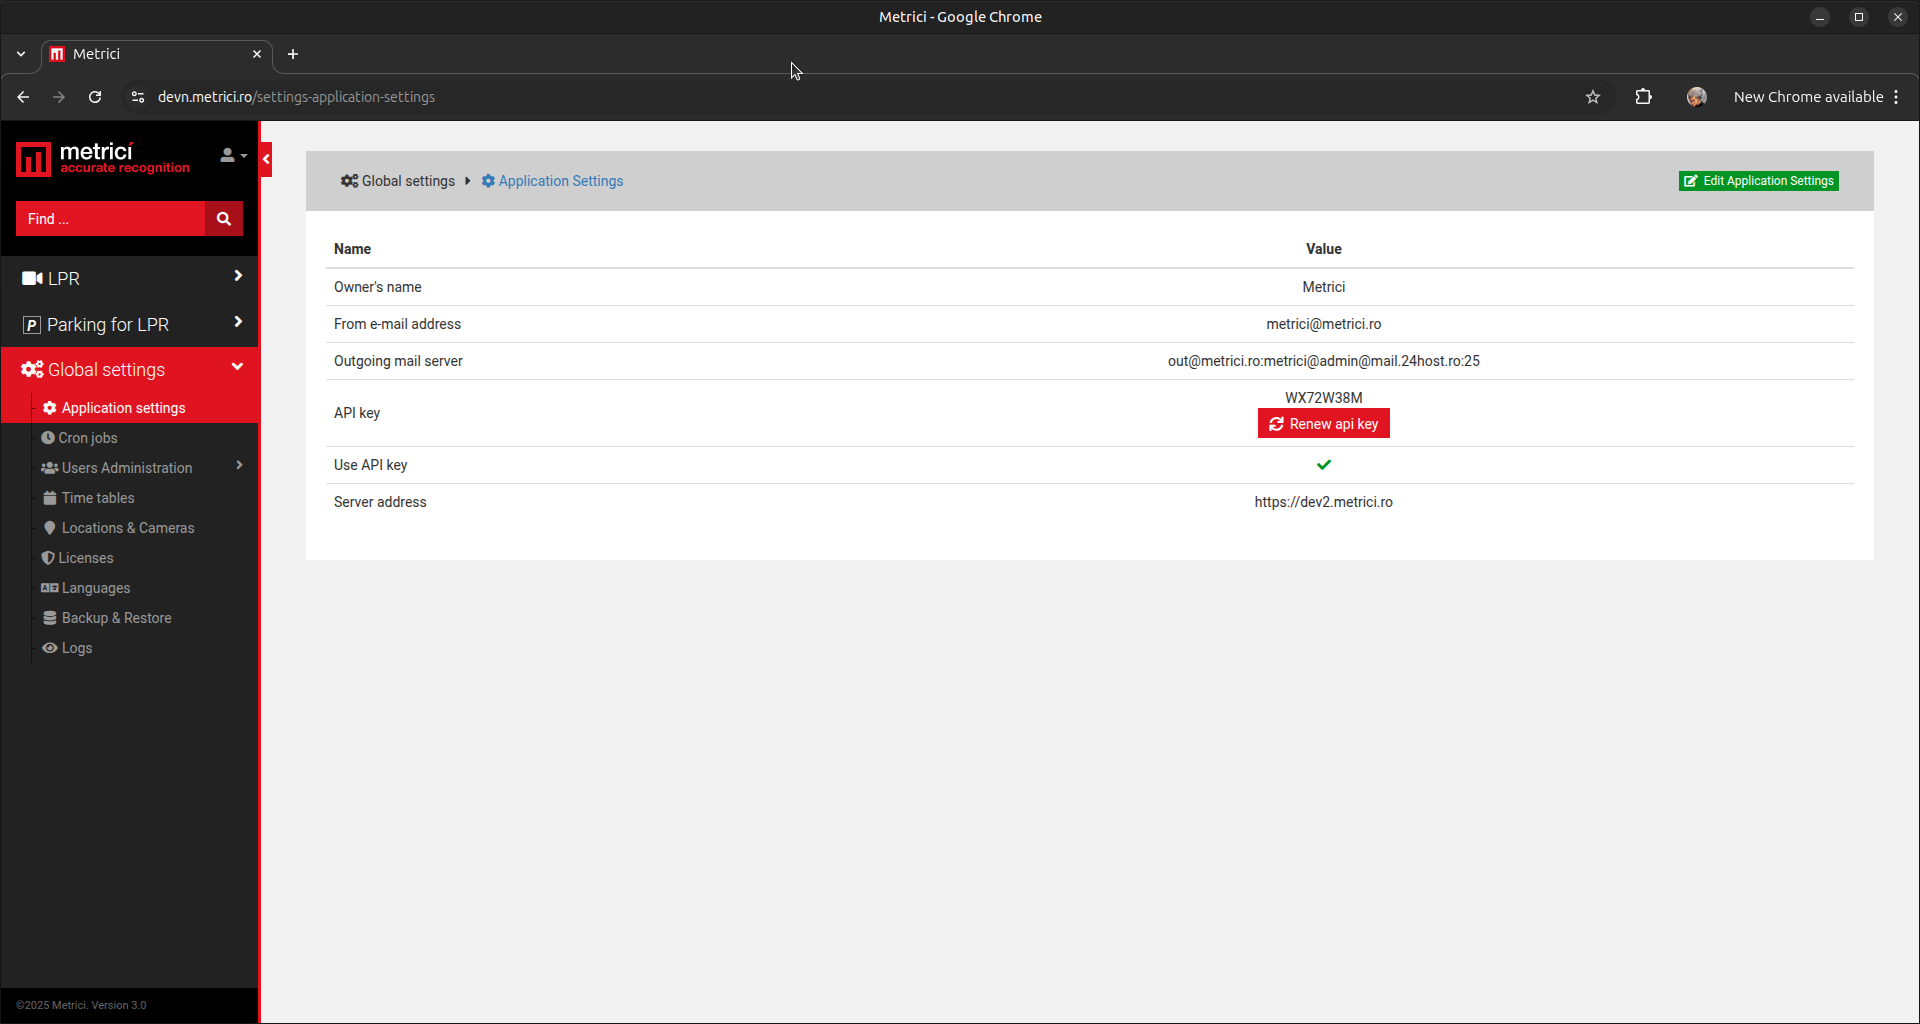
Make sure Use API key is enabled (green tick). The API key field shows the current value; the red Renew api key button rotates the value to a new random token.
Location Key
If you have purchased the Metrici Cloud solution, you have access to the Location Key and the Cloud API URL for online payments.
The Key lives at the bottom of the location's Parking Settings table — see Fig.7 Location Key. Open Parking for LPR- Settings- choose location - and at Parking Settings tab locate the Location Key row Location Key. Same for Cloud API URL.
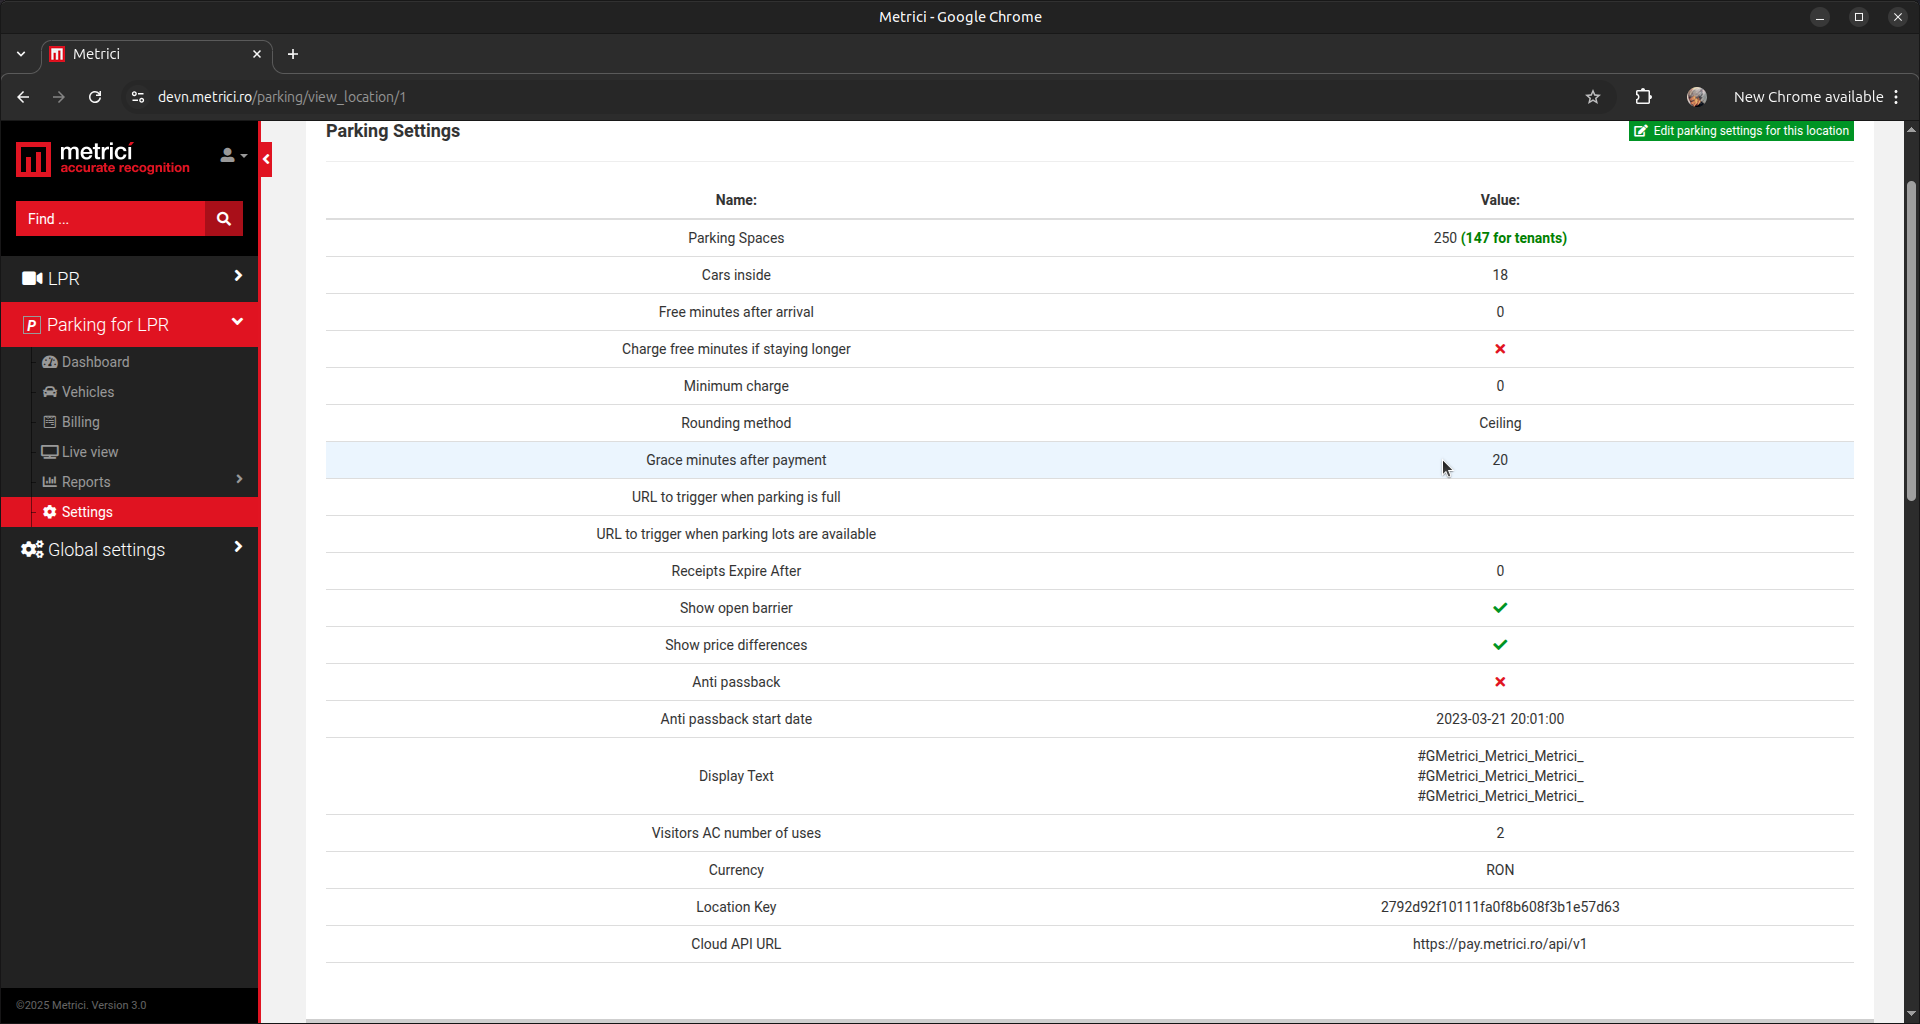
Copy the full hex string (32 characters) and paste it into the terminal's Application Settings → Location Key field.
4.3 Cash Register
Each Payment Terminal must be linked to a Cash Register in the Metrici Web Interface. The Cash Register defines what appears on the receipt and how long receipts remain valid — see Fig.8 Cash Registers & Prices.
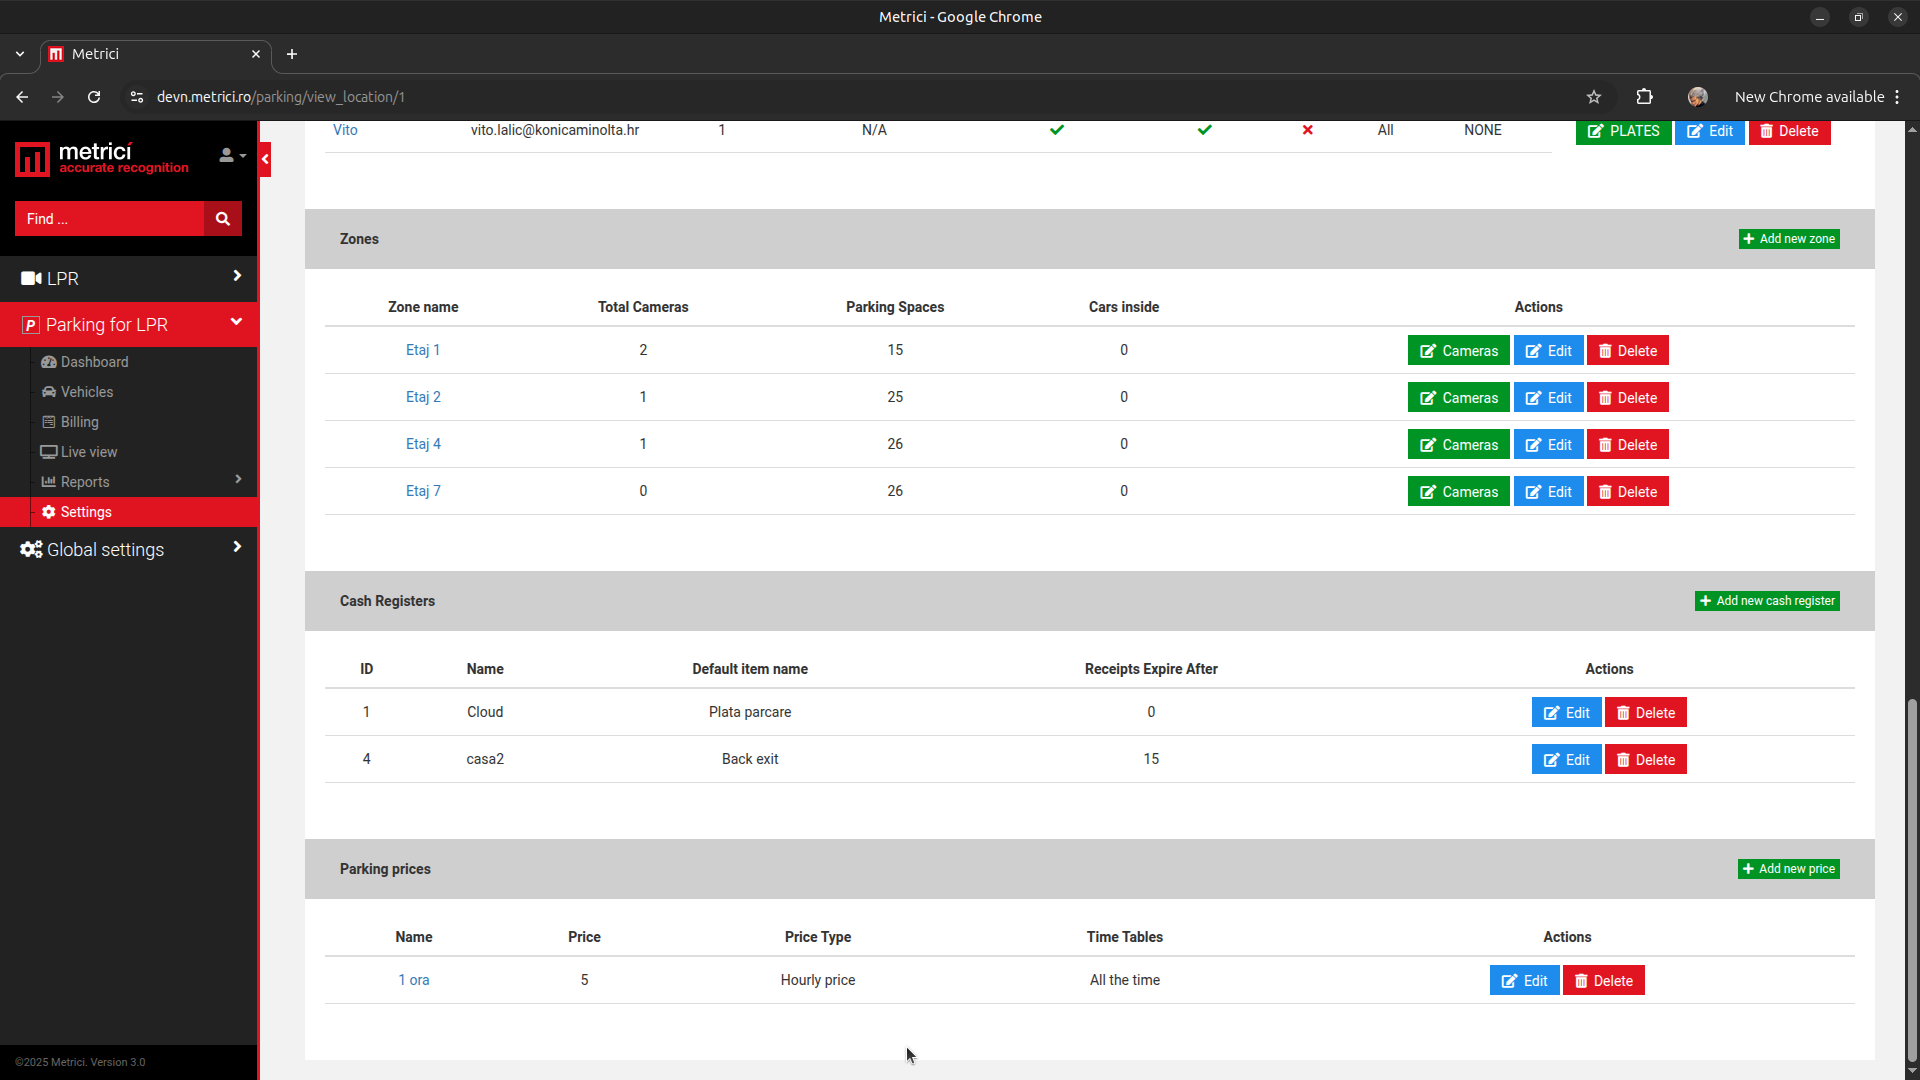
To create a Cash Register, go to the Parking for LPR Module in the Web Interface - Settings-Location-and click Add new cash register. Fill in the following:
- Name — an internal label to identify this cash register (e.g.
Cloud). - Default Item Name — the description printed on the receipt (e.g. Plata parcare).
- Receipts Expire After — the time window during which the receipt remains valid for
exit.
0means the grace period is controlled by Grace minutes after payment on the location instead.
4.4 Parking Prices
Parking prices are configured in the Metrici Web Interface under the Parking for LPR Module- Same steps and menu as above — see again Fig.8 Cash Registers & Prices. You can define as many pricing rules as needed:
| Price Type | Description |
|---|---|
| Hourly | Charges the set amount for each hour of stay. |
| Half-hour | Charges the set amount for each half-hour of stay. |
| One-time | A fixed flat fee regardless of how long the vehicle stays. |
Each price can be assigned to a specific timetable, allowing differentiated pricing for weekdays vs. weekends, daytime vs. overnight, or any other time-based structure.
5. User Flow
This section describes what a driver sees and does when they walk up to the terminal to pay for parking. The entire flow is a guided sequence of full-screen pages on the touchscreen, designed so that anyone can complete payment in well under a minute.
5.1 Language & GDPR Consent
The first screen displayed to the driver is the language selector menu — see Fig.9 Language Selection. 15 languages are bundled by default. The currently active language is highlighted with a white border.
After the language is chosen, the GDPR consent notice appears — see Fig.10 GDPR Consent. Because the terminal handles personal data (license plate, optional phone and email for the invoice, and payment details through Stripe), the user must accept this notice before proceeding.
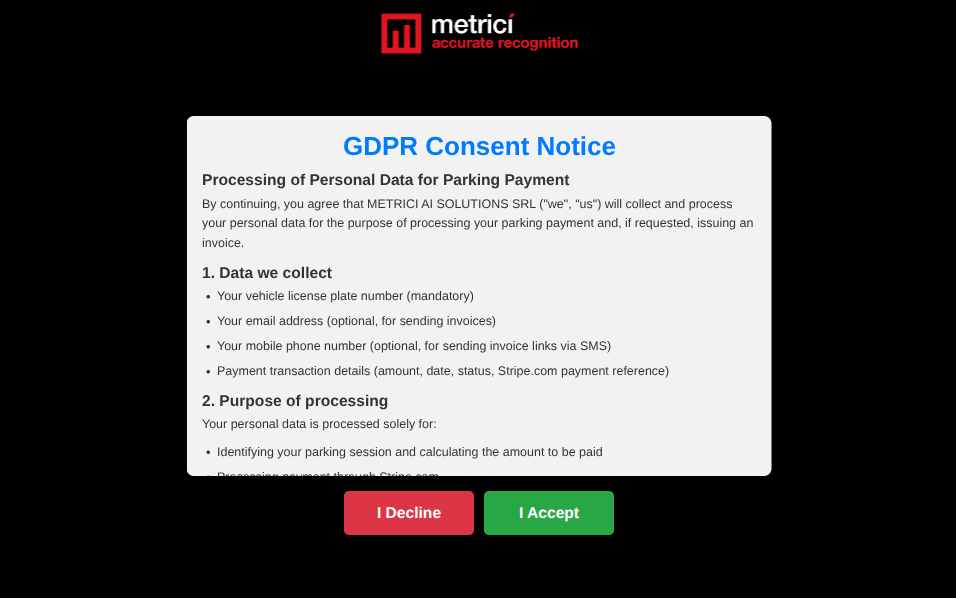
- I Decline — sends the user back to the language screen; no data is collected.
- I Accept — continues to the plate-entry screen.
5.2 Plate / Code Input
Next the user identifies their parking session. There are two ways to do this — see Fig.11 Plate / Code Input.
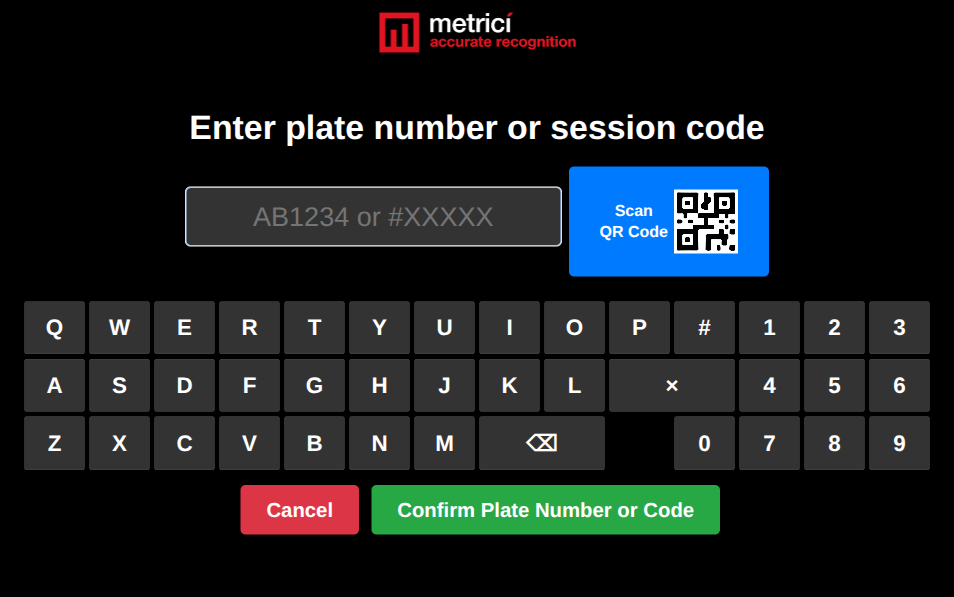
| Method | How | When to use |
|---|---|---|
| Type the plate | Use the on-screen QWERTY + numeric keyboard. The field accepts a license plate in the format
AB1234. The × key clears the field; the ⌫ key deletes one character. |
Standard option — works at every Metrici parking location. |
| Scan QR Code | Tap the blue Scan QR Code button and hold the QR in front of the built-in
camera. If the parking is equipped with a Metrici Access Terminal at the entry, that
device issues a QR code and a session code (#XXXXX) the driver can use here. Availability
depends on the site. |
Only at parkings with a Metrici Access Terminal installed. |
Once the plate or code is filled in, the user taps Confirm Plate Number or Code. The terminal sends the value to the Metrici server, which looks up the vehicle in the parking database and returns the calculated fee. The Cancel button returns to the language screen at any time.
5.3 Payment Amount
After the server responds, the terminal displays the amount due — see Fig.12 Payment Amount.
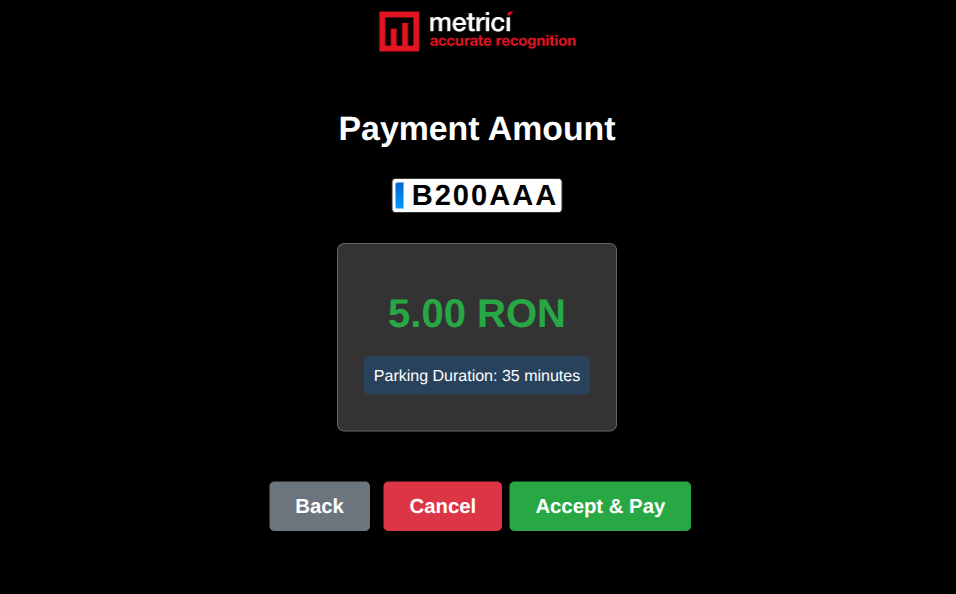
The screen shows three pieces of information:
- Plate — the plate number/code, drawn inside a stylised license-plate frame.
- Amount — the total amount due, in the parking location's configured currency (e.g.
5.00 RON). - Parking Duration — how long the vehicle has been inside, in minutes.
The driver has the following options:
- Accept & Pay — continues to the invoice question.
- Back — returns to the plate entry screen to correct a mistyped plate.
- Cancel — abandons the session and returns to the language screen.
5.4 Invoice Details
Romanian and EU law allows the user to request a fiscal invoice. Before showing the payment QR, the terminal asks "Do you need an invoice?" — see Fig.13 Invoice Prompt.
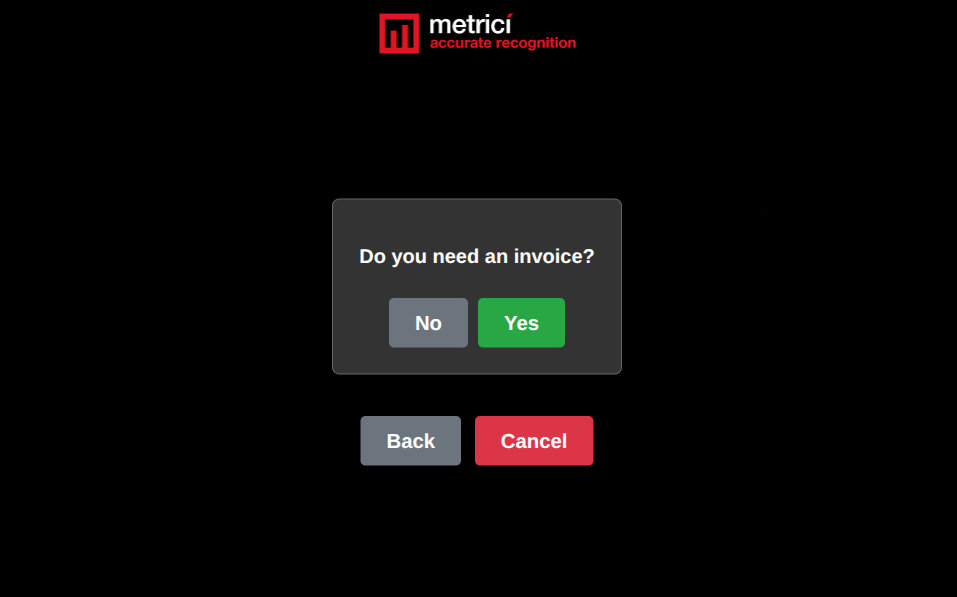
Tapping No skips the form and jumps straight to the payment QR. Tapping Yes opens the Invoice Details form — see Fig.14 Invoice Details.
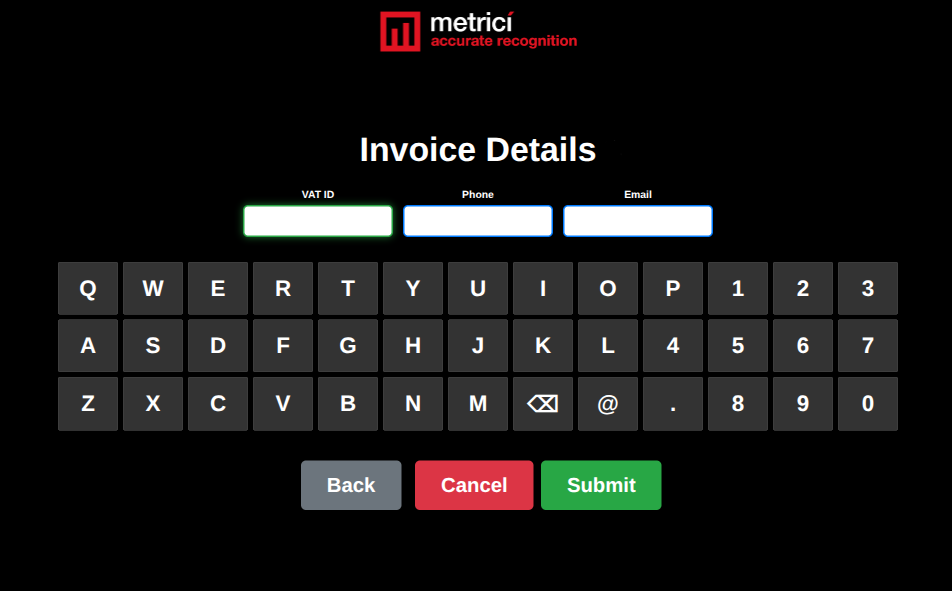
| Field | Required | Used for |
|---|---|---|
| VAT ID | Yes | The fiscal identifier of the company being invoiced (used to issue a B2B invoice). |
| Phone | Optional | For sending the invoice link via SMS. |
| Optional | For emailing the invoice PDF. |
The keyboard automatically includes @ and . to make typing email addresses easy.
After filling in the form, tap Submit. Back returns to the invoice
prompt; Cancel abandons the session.
5.5 Payment QR & Receipt
The terminal now displays the on-screen payment QR code that the user must scan with their phone to complete the transaction — see Fig.15 Payment Required.
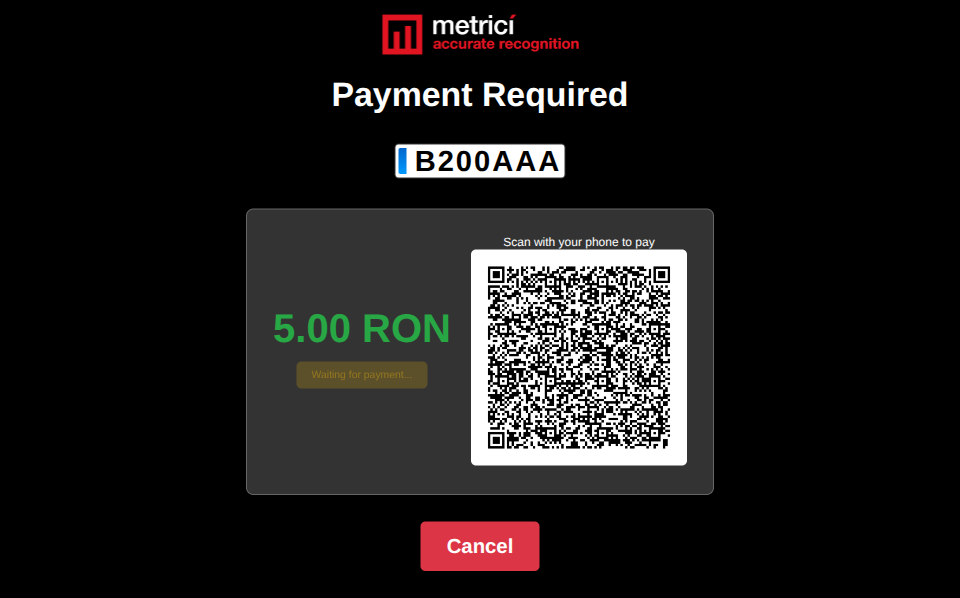
The user opens any QR scanner (most phones do this directly from the camera app) and points it at the QR code. Their phone opens the Stripe-hosted checkout in a mobile browser — see Fig.16 Stripe Checkout.
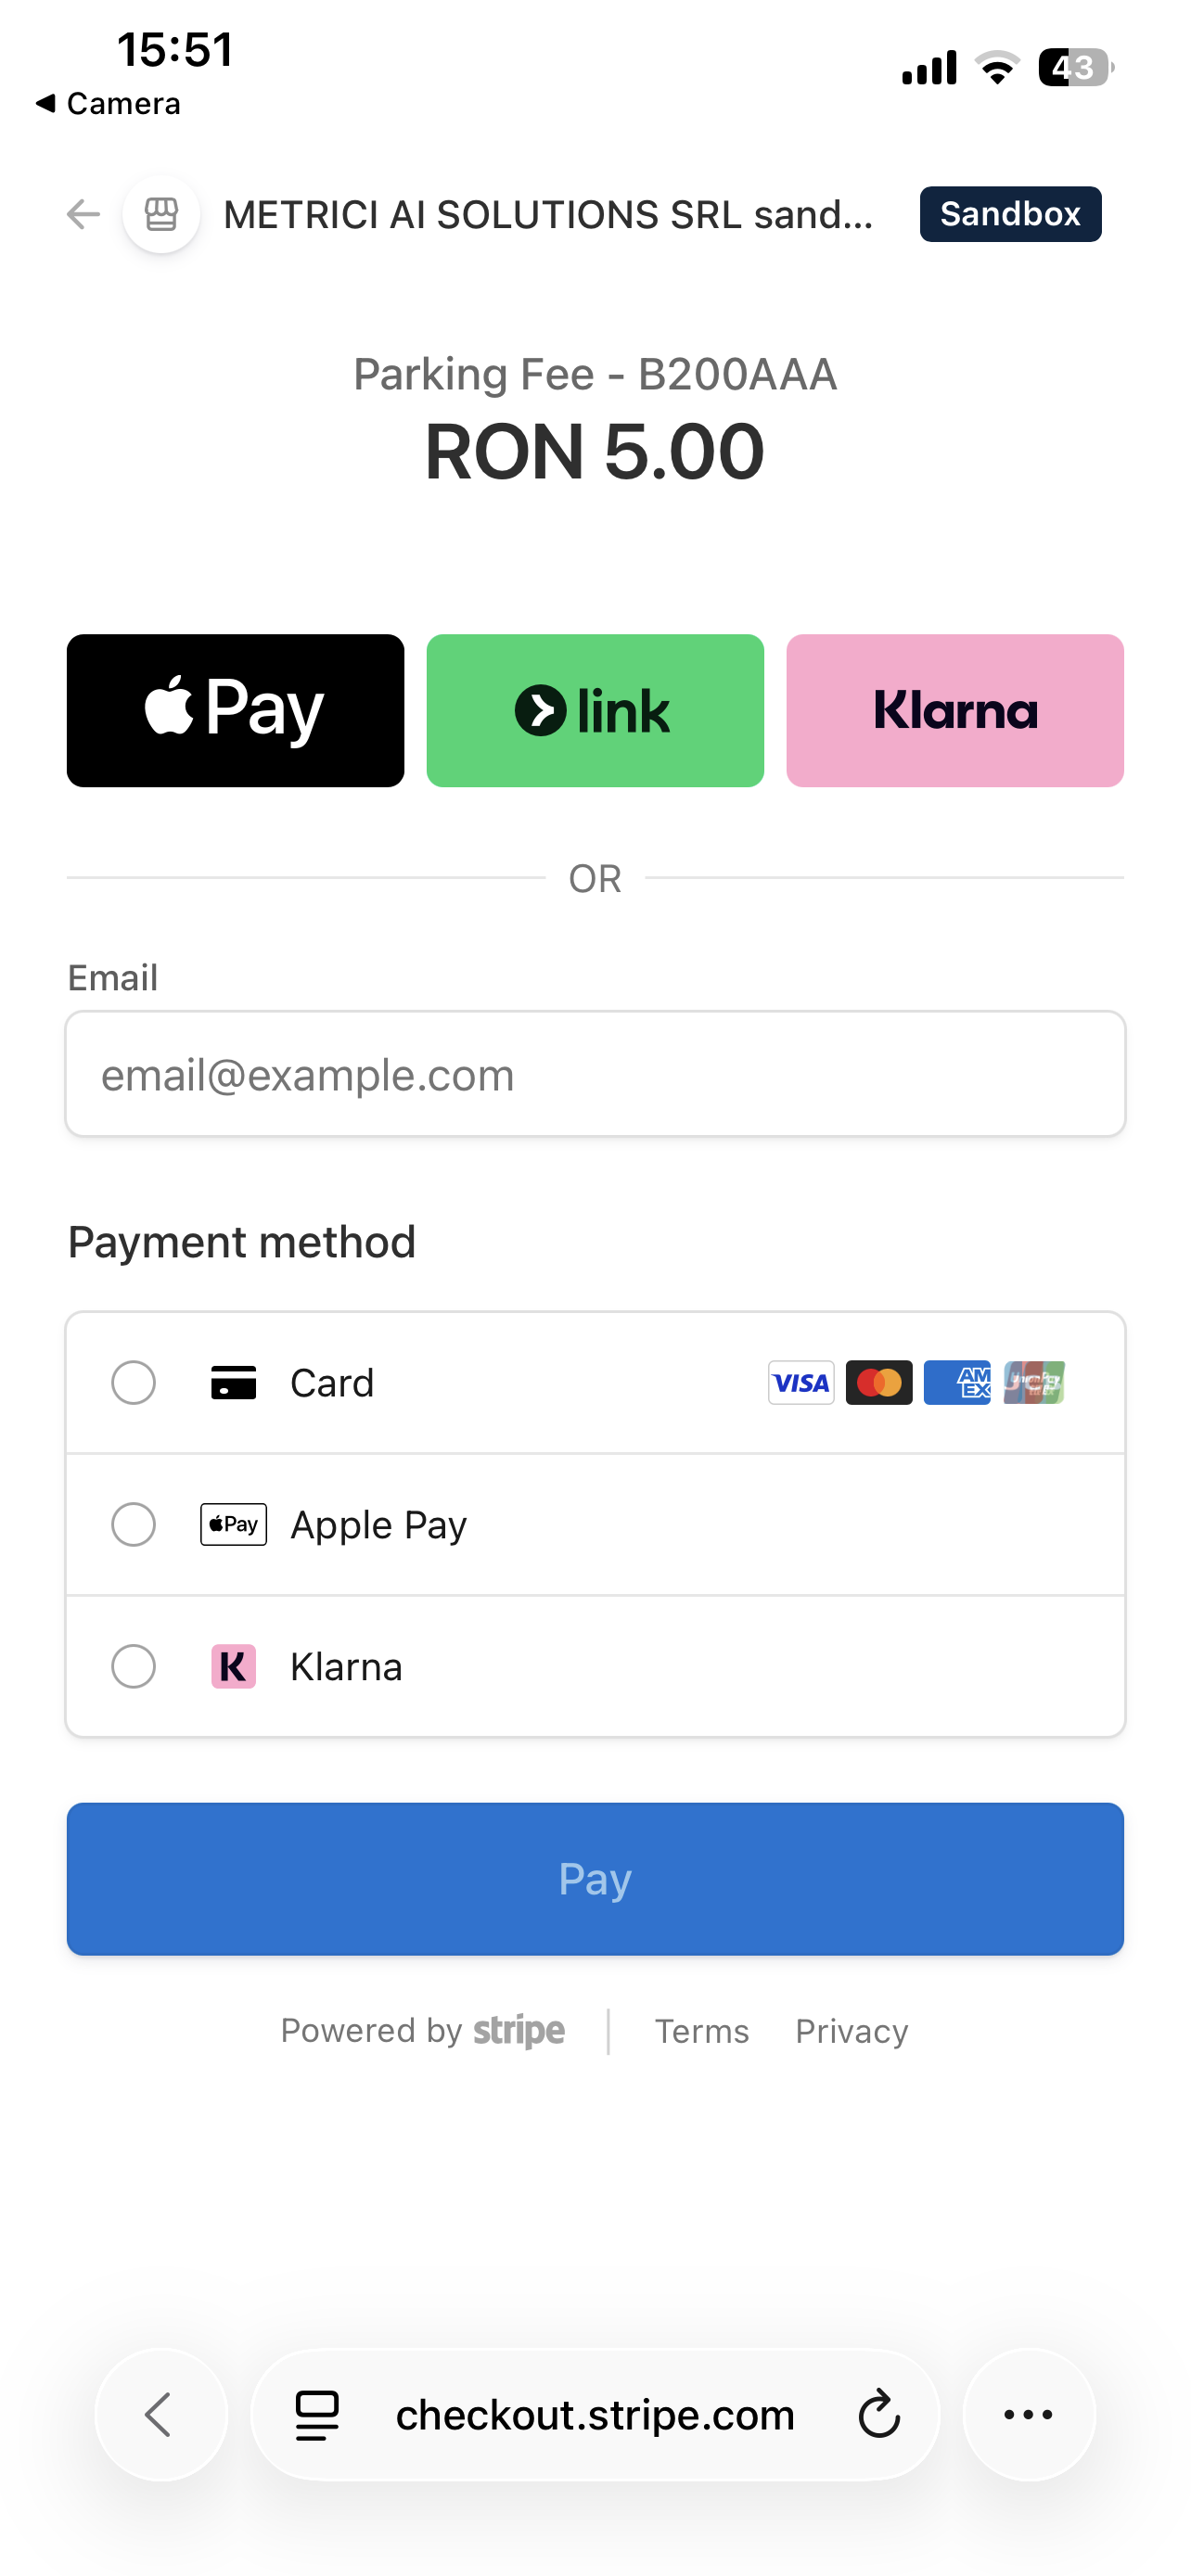
The user can pay using any method offered by Stripe — typically Card, Apple Pay, Google Pay, Link, or Klarna depending on the country and device. The terminal screen shows the badge Waiting for payment... and polls the server in the background until the transaction is confirmed.
As soon as Stripe confirms the payment, both the terminal and the user's phone are updated. On the terminal, a confirmation screen appears — see Fig.17 Payment Successful.
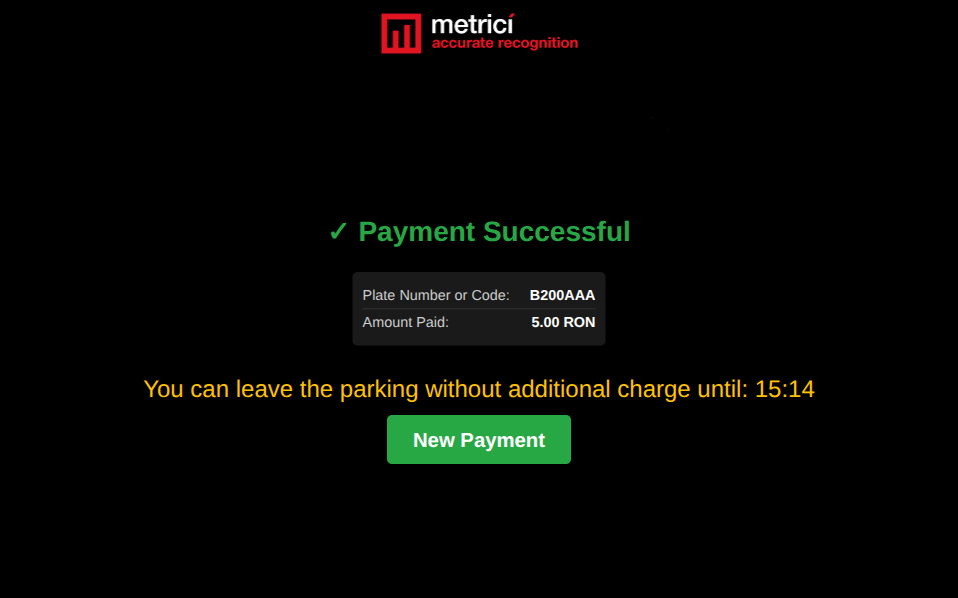
The terminal shows the plate, the amount charged, and a grace period message in orange ("You can leave the parking without additional charge until: HH:MM"). The length of the grace period is set by the parking operator in the Metrici Web Interface (Grace minutes after payment) — see Parking Module Setup. A New Payment button resets the kiosk for the next driver; the screen also auto-returns to the language selector after the Restart Delay.
On the user's phone, the receipt looks like Fig.18 Receipt on Phone.
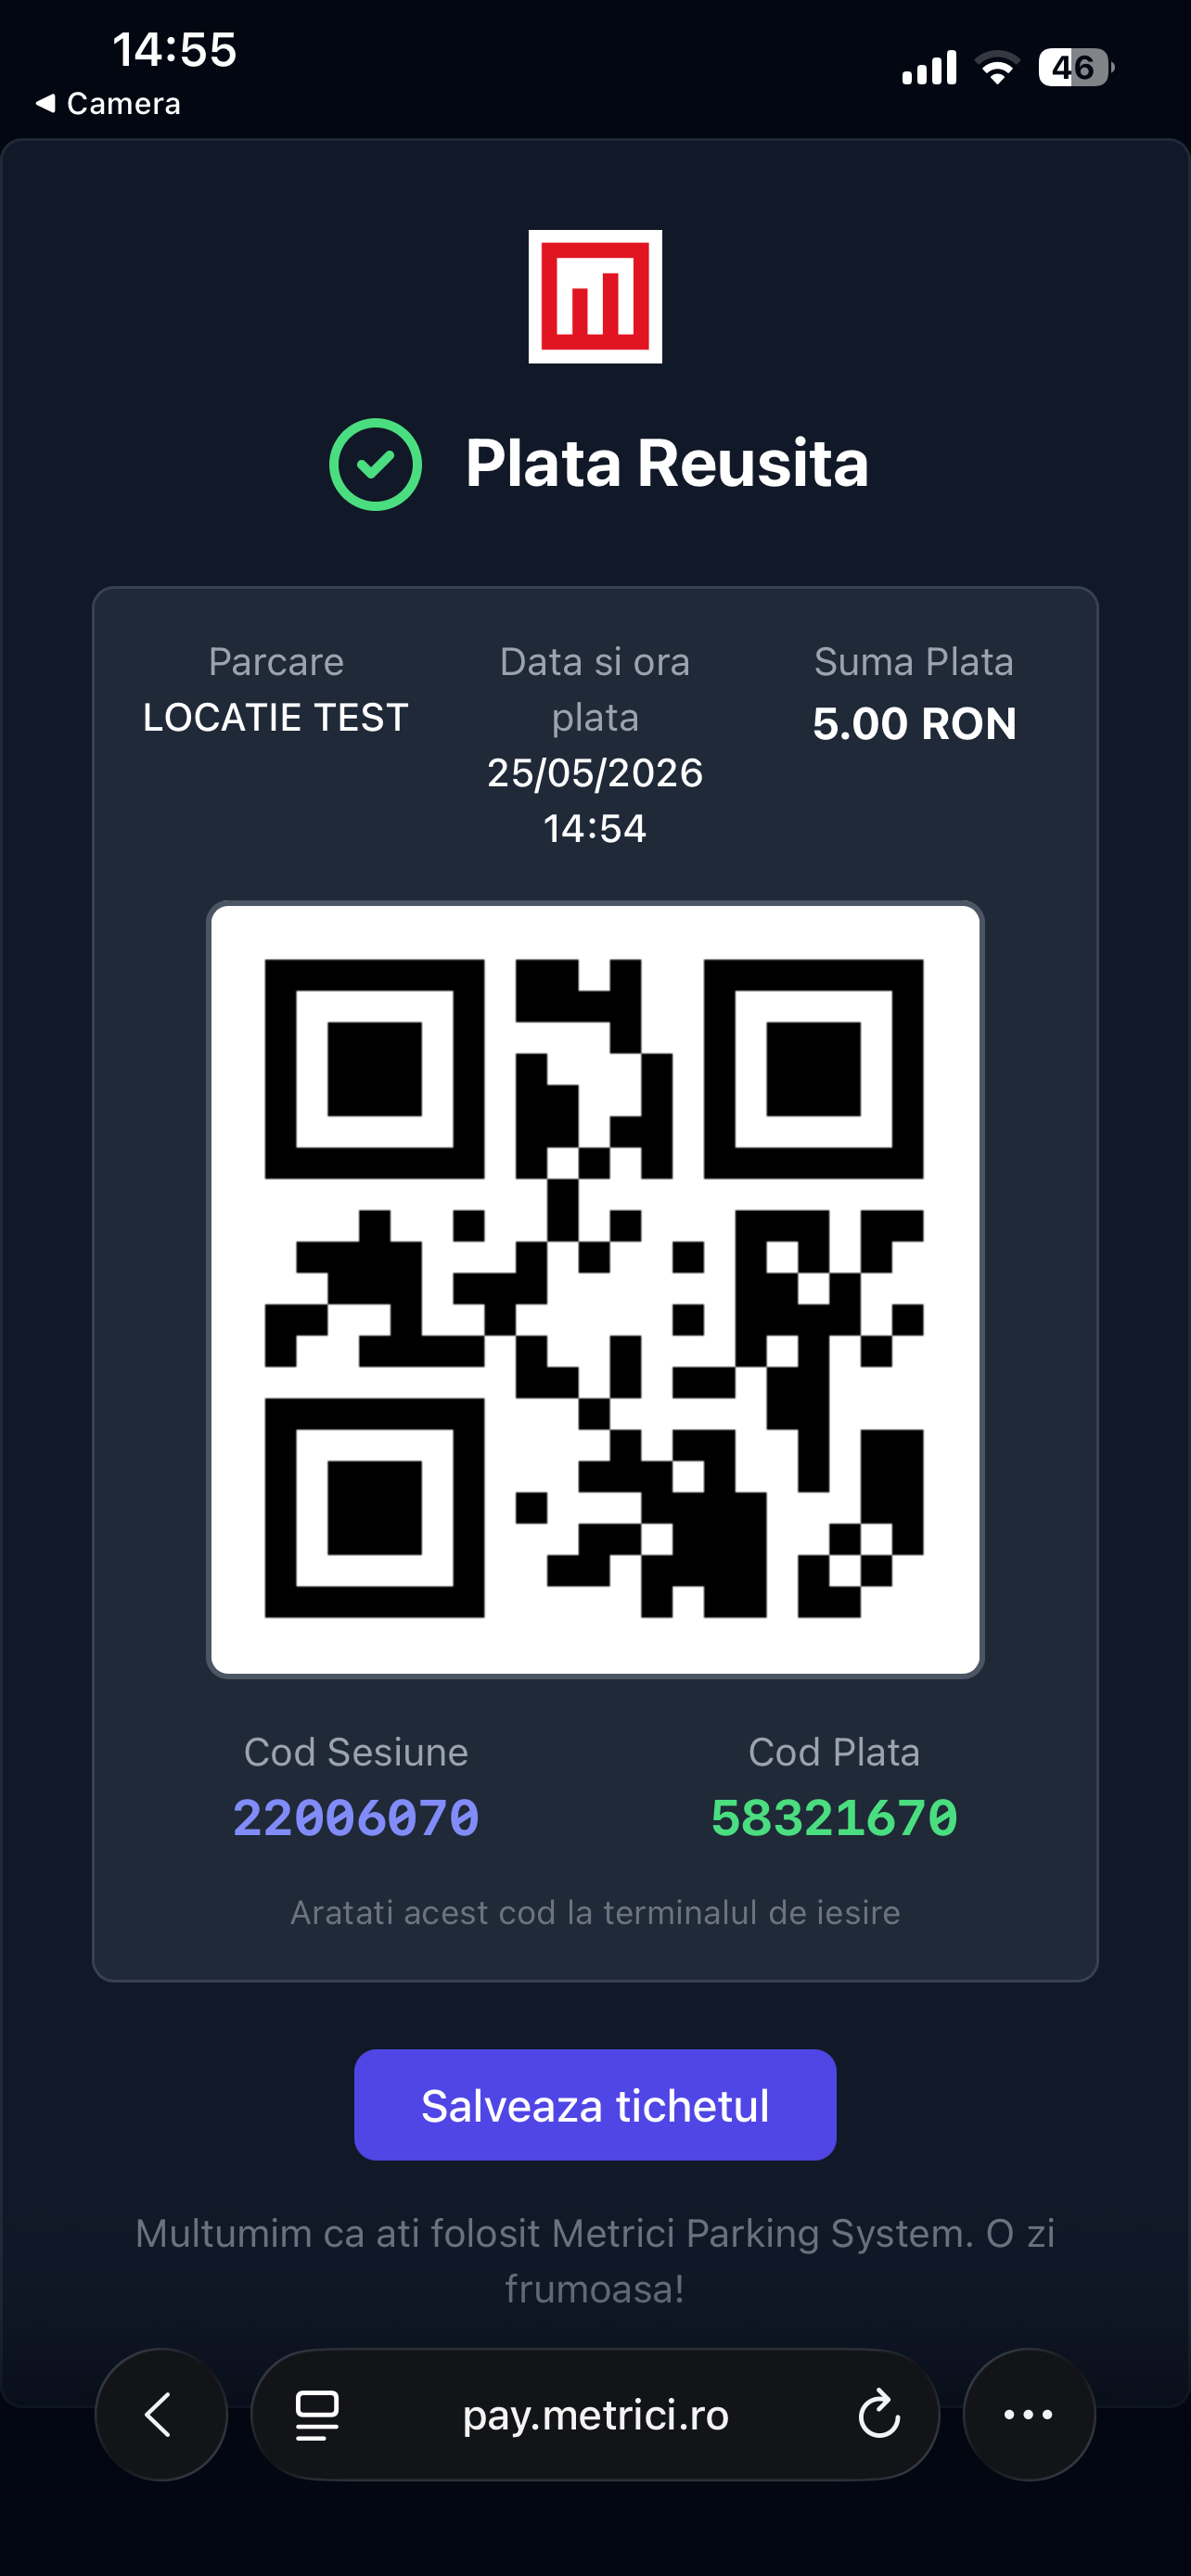
The mobile receipt contains the location, date and time of payment, the amount, the session code, the payment code, and a QR code that the user can present at the exit barrier. The Salveaza tichetul button saves the receipt to the phone for later reference.
6. Troubleshooting
The screen is dark / the device does not boot
- Verify the PoE switch or injector is on and the LED on the Ethernet port lights up.
- Make sure the switch or injector supports PoE+ (802.3at). Standard PoE (802.3af) is not enough for the touchscreen and will cause the device to undervolt.
- Try a different Ethernet cable — Cat5e or better, under 90 m total run.
- Plug the cable into another PoE port on the switch.
Plate is recognised but the terminal says no active session
- The vehicle has not been registered as "inside" by any LPR camera on this location. Verify that the entrance camera is configured and reporting events for the same parking location — see the License Plate Recognition documentation.
Amount displayed is incorrect
- Check the parking prices configured in the Metrici Web Interface — ensure the correct timetables and price types are set — see Parking Prices.
- Verify the "Cars Inside" count is accurate in the Parking Module dashboard.
- Check whether the Free Minutes After Arrival grace period applies to the vehicle.
- If using differentiated pricing, verify the correct timetable is active for the current time.
I forgot the admin password
- There is no software recovery for the admin password and no on-device reset. The terminal must be physically sent back to Metrici for a re-flash.
- Contact support@metrici.ro to arrange the return.
The browser cannot open http://192.168.100.102
- The IP has probably been changed during installation. Use the 8-tap gesture (top-centre of the screen) to enter the admin menu on the terminal itself and read the current IP from the top of the Network Settings tab.
- Your computer must be on the same subnet as the terminal. Check that both devices see the same gateway
(e.g.
192.168.100.1). - If the terminal is on DHCP, the IP may have changed at the last reboot. Reserve a fixed lease on the router for the terminal's MAC address, or switch the terminal to Static IP.